
Apple Contacts App
Learn some cool features of the MacOS Contact App.
If you have an iPhone, chances are you have used the Contact iOS app. Apple makes it easy to add and edit contact information on your phone. Did you know that there is a Contact MacOS App? There are some unique feature in the Desktop version that makes it worth using.
Six Features Unique to the MacOS Contact App
You can create smart groups, which makes it easy to send emails to teams. Simply add a common "hashtag" in the notes field and the user will be added or removed from a certain smart group.
Removed Duplicate entries - Clean up your address book by removing all those duplicate entries.
Create vCards - Useful to share contact information via email, airdrop, Slack and more.
Manage your personal distribution list - Do your contacts have multiple emails? In Contact, you can designate which email to use. So, for example, you can have a Distribution Group for Work and another Distribution for personal emails to the same group of people. (This feature is located via Edit > Edit Distribution List)
You can print mailing labels, envelopes or a contact sheet from the Contacts App. Great for a way to send out Christmas Cards or to keep a hard copy of your most important contacts. To use, simply select File-> Print and then select the style that you want to use. You can select the Avery Template format or use DYMO to print the labels.
Easily add a face to your Contact. Simple click Edit under the Contact, and then drag/drop an image to the circle next to their name. Why add a photo to a contact? When the person calls you you'll see that picture instead of their name.
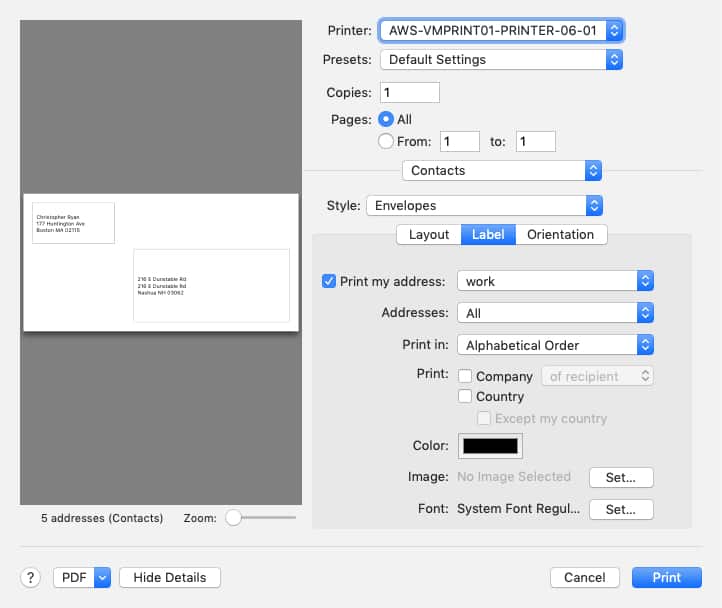
Print Dialog allows you to print your contacts address on envelopes or labels.
Manage Your Contacts Frequently
It's a good idea to manage your iOS Contacts frequently. Having a well-organized contact database will help to find contacts.
If you're looking for a practical task to do while waiting in line, manage your contact on the phone. If you have some downtime
PermalinkUse PhotoScape to Fix GoPro Images
Use PhotoScape to fix the Fisheye effect in GoPro photos
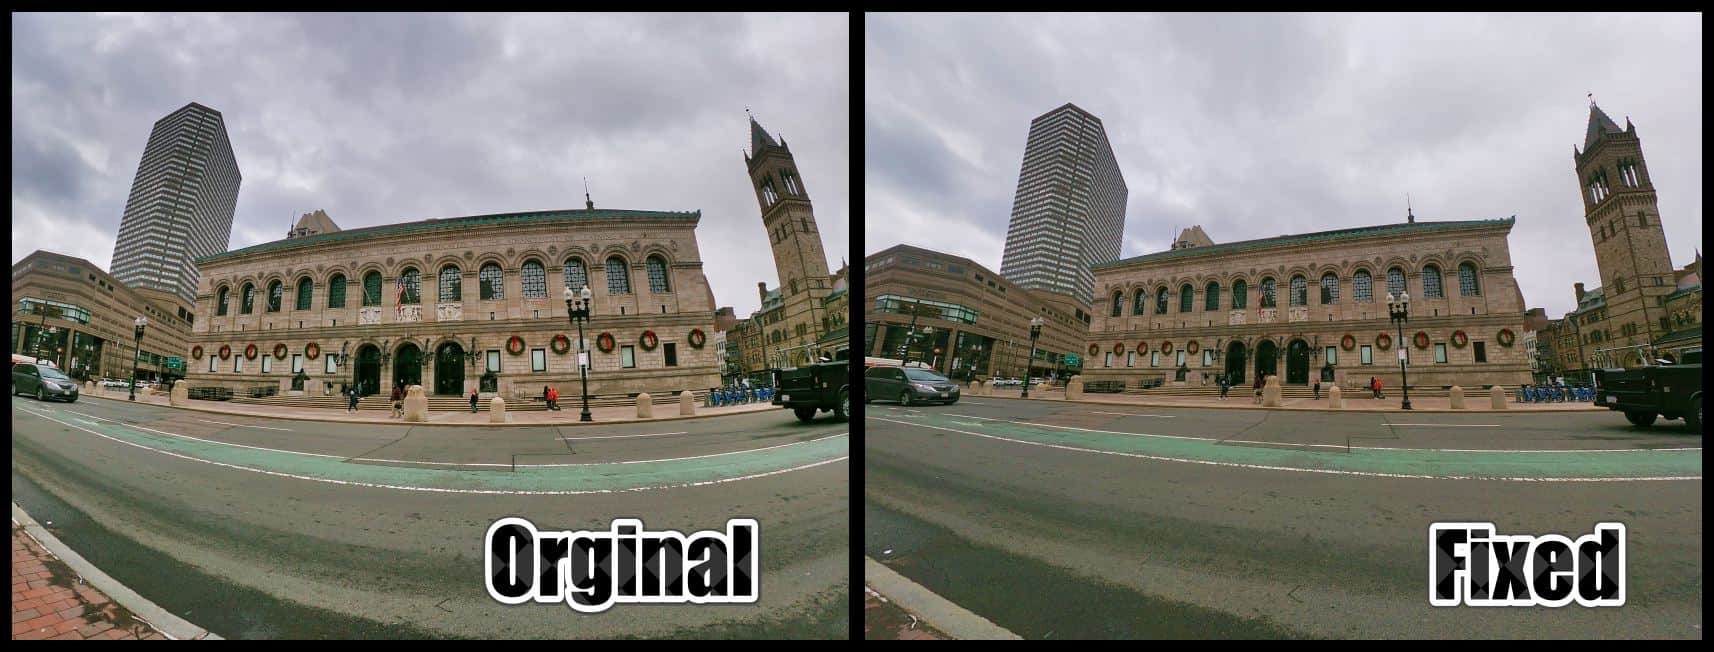
You can take fairly basic photos using GoPro Hero 7. The only problem with the photos is the FishEye effect. The photos should get touched up so it looks great.
One of the easiest ways to clean up the photos is to use PhotoScape X. There's a couple of tools that will help touch up the image.
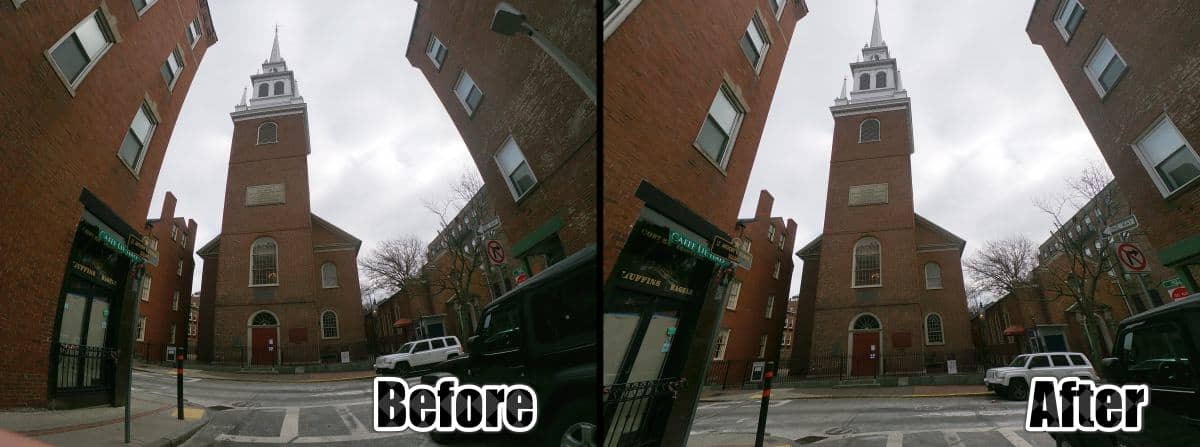
Here's an example of before/after of the Boston Public Library from Copley Square:
FishEye Tool
Under the Transformation category is the Fisheye effect tool. While most people think that it's used to add Fisheye, it's also used to remove fisheye, simply by adding a negative amount:
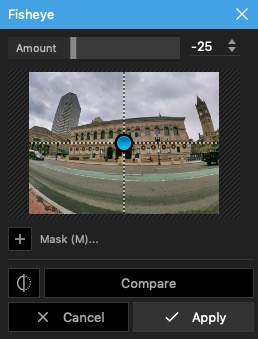
In my testing '-25' seems to be the perfect amount to remove the fisheye effect, just make sure that the focus of the Fisheye is in the center.
Lens Correction
Also located in the Transformation category is the Lens Correction Tool. This is where you have a lot more power in fixing the fisheye effect. The only downside is that there's a lot of different possible changes that can be made.
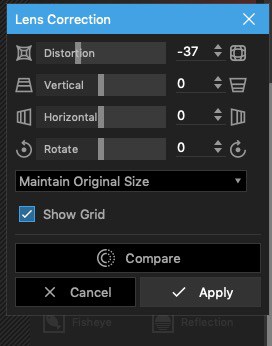
The best settings is using -35 for the Distortion Correction.
GoPro Photos
GoPro Photos capability isn't a replacement for iPhone XS Max. You may get some good wide-area photos, but the iPhone XS Max handle low light and colors much better.
GoPro Photos is good for landscape shots or when you want a cover photo for a YouTube video.
PermalinkAmadine
BeLight Software ships Amadine, their first Vector base application
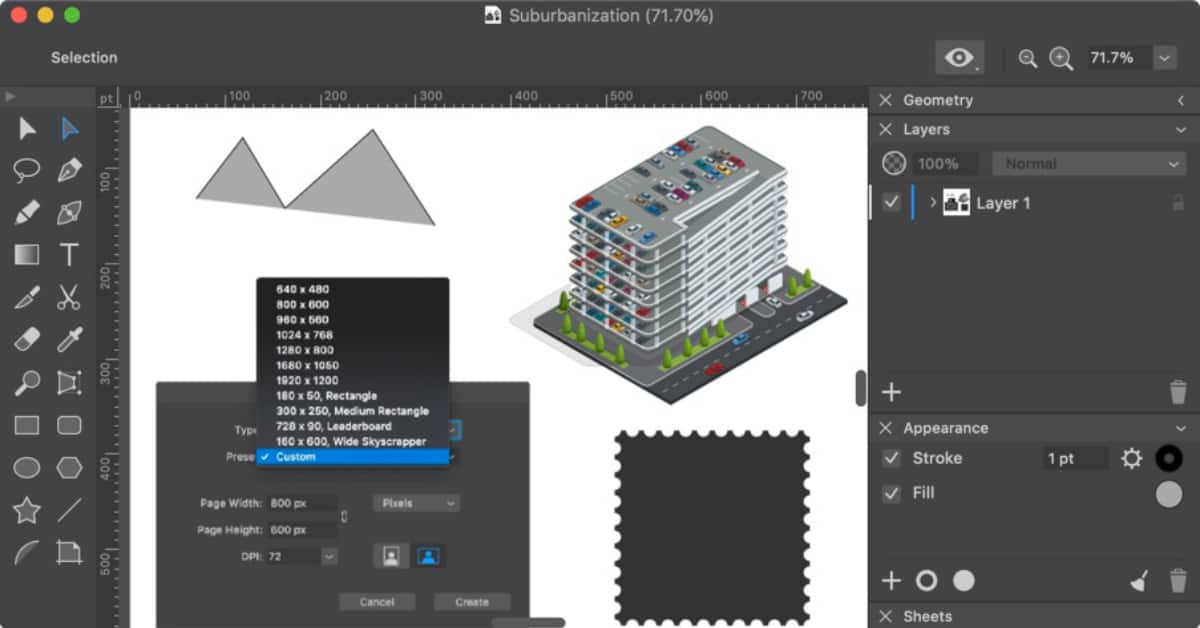
Amadine is a new graphical application by BeLight Software - the same company that creates Art Text Tool and Swift Publisher. It's their first vector design application.
Overall the application works pretty well. I did run into an issue with one of my EPS files where it didn't render very well.
Seven Things I Learned While Beta Testing Amadine
- Amadine is very basic vector application - there's isn't any special pen or vector tool that are not available in other vector applications.
- I was successfully able to drag and drop EPS and SVG documents and they opened correctly in Amadine. Each file that I dragged and drop had its own group layer.
- You can have multiple sheets or ArtBoards. Which allows you to have a single app to handle all different formats for images - for example, different icons designs for iOS and MacOS. Web Developers can have different sheets for different website layouts. You can create Sheet via the Sheet Window or the Sheets tool.
- Files can be exported to SVG, EPS, PDF, TIFF, PNG and JPG formats.
- You have the option to import PDF and EPS files as static images via the Import dialog and Drag and Drop.
- The Path Width tool is pretty neat, it gives you the ability to stretch out any vector pen line.
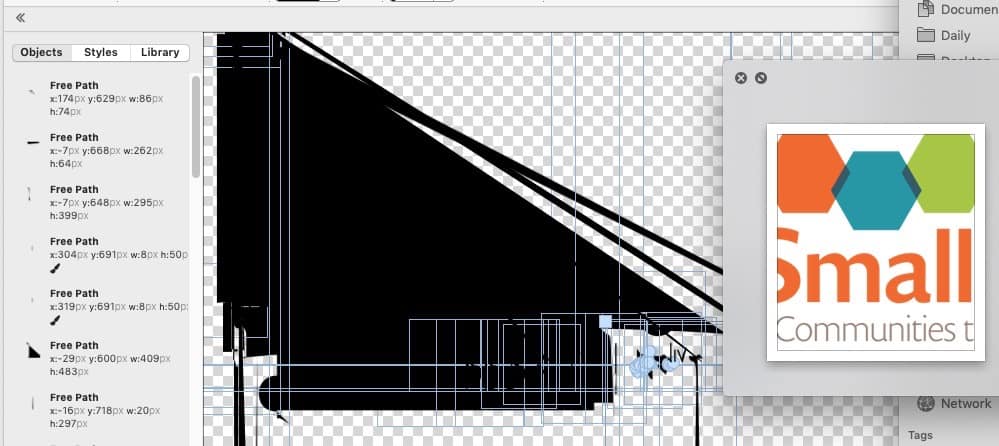
- It took a long time to import a 14.6 MB EPS file that I downloaded from DepositPhoto. It didn't really render correctly.
Amadine didn't render this EPS file correctly. The screenshot on the left is the Preview application.
Overall Thoughts
Amadine looks promising. I don't think I would buy it since I have Affinity Designer and ArtBoard. One of the cool features of ArtBoard is several instructional sheets to teach you how to use the pen tool. I think that really helps me grasp the whole pen tool concept.
I think Amadine is worth looking at if you're new to vector applications. It's certainly worth downloading and trying it out to see what you think. While Amadine is still in Beta, download the application and try it out.
I would be interested to see how BeLight Software integrates this into Swift Publisher. It would certainly make it Swift Publisher a powerful desktop publisher applications.
PermalinkBiff 2.0
Exciting features in Biff. Still falls short of worth buying
Back in November, the Escapers announced a new updated to their graphic application called Biff. Since I reviewed version one of Biff in March of 2017, I thought it would be good to check out the changes
New Features
Three big changes in Biff: Scenes, SVG Import and Code Generation. This is text from an email that announced the new features
Scenes allow you to add perspective to your work, ideal for publicity shots. SVG import allows Biff to take advantage of great resources like The Noun Project, quite simply, you can now use thousands of free SVG resources in Biff. Finally, we've got code generation for both Mac and iOS. This means you can draw out anything you like in Biff, then export the Swift code to draw the elements in your Mac or iPhone app.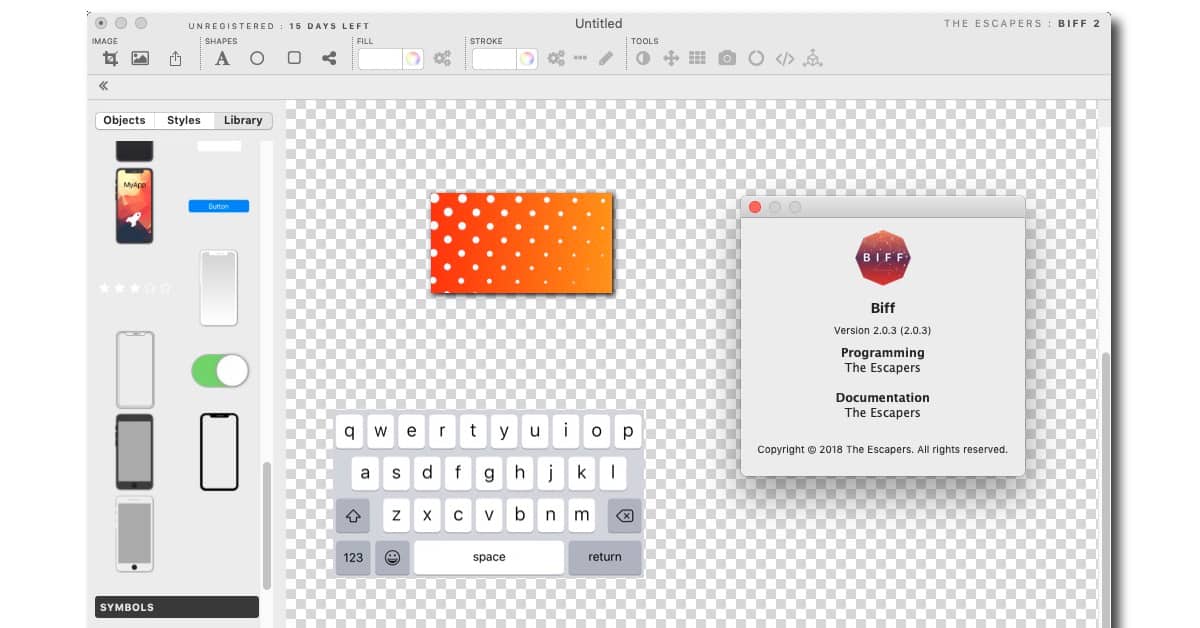
Scenes
This is a pretty cool feature. One of the neat things is the ability to easily create isometric images. Simply create a design, a couple of clicks later you can have an isometric layout.
There are six different perspectives: Reset, Left Tilt, Right Tilt, Left Angled, Flying and lie Flat.
Anything can be made a Scenes, including text. (Think logo design?)
SVG Import
This didn't work at all. Epic failure is one way to describe it.
I dragged and drop several SVG files and they didn't render correctly. One file, a "happy face," rendered upside down and other SVG files didn't render correctly at all.
Looks like there's some work needed with the import. (In fairness, they do say that Biff doesn't rasterize SVGs, it imports and converts them into regular Biff shapes.)
Files I tested were downloaded from the internet, no special compression or features.
Not sure what happened to the image when I dragged/dropped into the workspace.
Code Generation
This is pretty cool, there's support for UIKit and Cocoa. I don't do any coding that requires this functionality but it's neat to see an application that has this feature.
Worth the Upgrade?
Biff 2 cost $24.99 and I still don't think it's worth getting - especially since SVG Import didn't work for me. Many of the features can be found in other products, such as Affinity Designer, for a bit more money but they do offer additional functionality.
Having said that, the repeater/tile functionality is pretty cool. It's really easy to use and I have seen it available any place else.
Getting Biff 2
Try Biff 2 and see if it meets your needs. You can download a 30-day trial from The Escaper's Website.
PermalinkLiquivid Photo Fisheye Removal App
Easy way to fix the FishEye effect in photos done with the GoPro 7
If you take pictures with the GoPro camera you'll notice that the pictures may look distorted because of the fisheye effect. The photo can easily be fixed so they look good - a process that some people call defishing.
Affinity Photo and PhotoScape
Affinity Photo, PhotoScape, and Photoshop Elements have various tools to fix the images. Here's are some quick tips on ways to fix the fisheye effect in these applications.
- In Affinity Photo, you would use the Len Distortion Live Filter Layer tool. Simply select the Distortion amount that works best for you image.
- In PhotoScape X, the Lens Profile Correction tool does the work. It's located in the Transformation section. The GoPro x2192 Hero5 Black is the one that worked for me.
- In Photoshop Elements, the Correct Camera Distortion is the tool to fix FishEye. Simply use the
But the fastest and easiest way I found is to use an App that is specifically designed for that task. Save time from looking for different filters in various applications, and use a dedicated resource to make things easier.
Liquivid Photo Fisheye Removal
Liquivid Photo Fisheye Removal by Razvan Chisu is a quick and easy way to fix the photos. Simply drag and drop the photo to the app and presto it's fixed.
The application checks the photo meta-data for the camera type and automatically applied the best fix for the camera type. Yes, there is an option for GoPro 7.
Seven Things I learned about Liquivid Photo Fisheye Removal
I have been playing around with the application for a few days, and here are some of the things that I have learned.
- Liquivid Photo Fisheye Removal is free - you can download it from the app store. There is a similar tool for video, but that cost $7. Full details of all their apps are available on their website. (Check out the liquivid Video to HTML5 LITE app)
- There isn't any configuration needed, there is a settings option but it just opens to an empty dialog box.
- You have the ability to change the distortion strength. You get a live preview of the image as you adjust the slider.
- There is an "eye" icon underneath the picture, that's where you can see the before version of the image.
- There are 68 Distortion Camera settings - including Other/Unknown camera.
- There's a slider to adjust the JPG quality but you don't get a live preview of how reducing the quality impacts the image.
- The is no "batch mode" simple drag and drop one image at a time onto the window.
Example Photo Transformation
I would recommend trying out Liquivid Photo Fisheye Removal if you have any photos taken with the GoPro. Its simple design makes it easy to use.
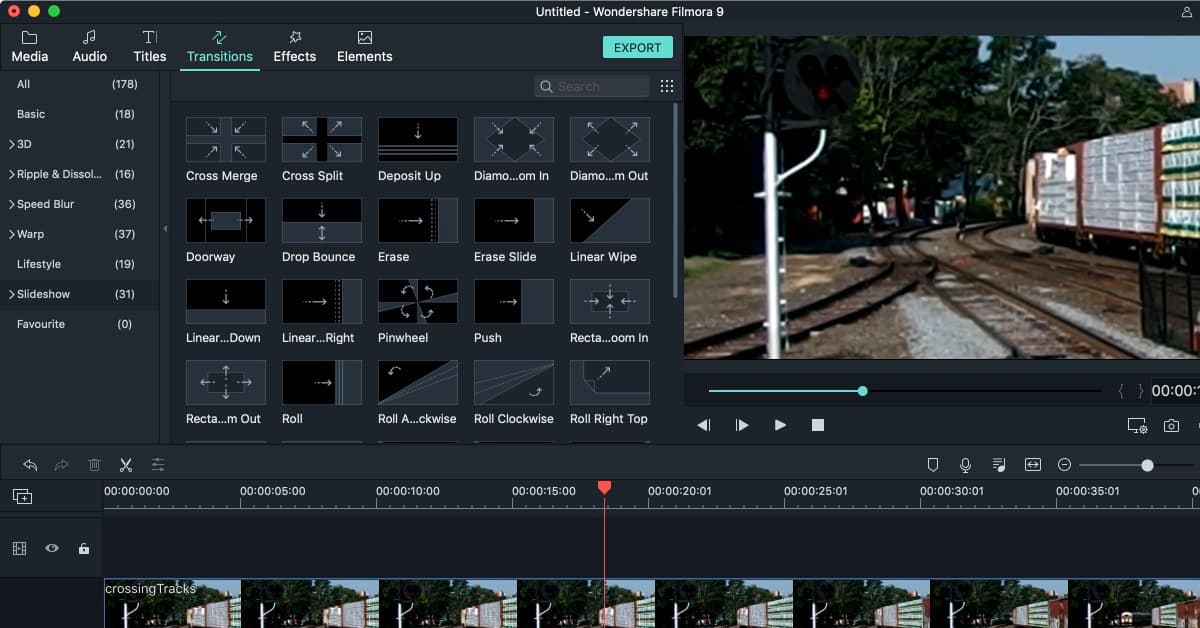
PermalinkFix GoPro FishEye in Filmora
Easy way to fix the FishEye effect of GoPro 7
GoPro is a really cool camera. It's great because you can set it up and record videos over a long period - such as time-lapse or recording going down the slopes.
The camera lens on the GoPro is a “Fish Eye†type of lens that can make some shots look a bit weird. This can easily be fixed in post-production without impacting the overall shot.
Unfortunately it is not possible to fix in iMovie. You'll need to use a different Movie Editor or use something like liquivid Video Fisheye Removal ($7.99) to fix the clip.
I recommend getting Wondershare's Filmora since it offers a lot of very cool functionality.
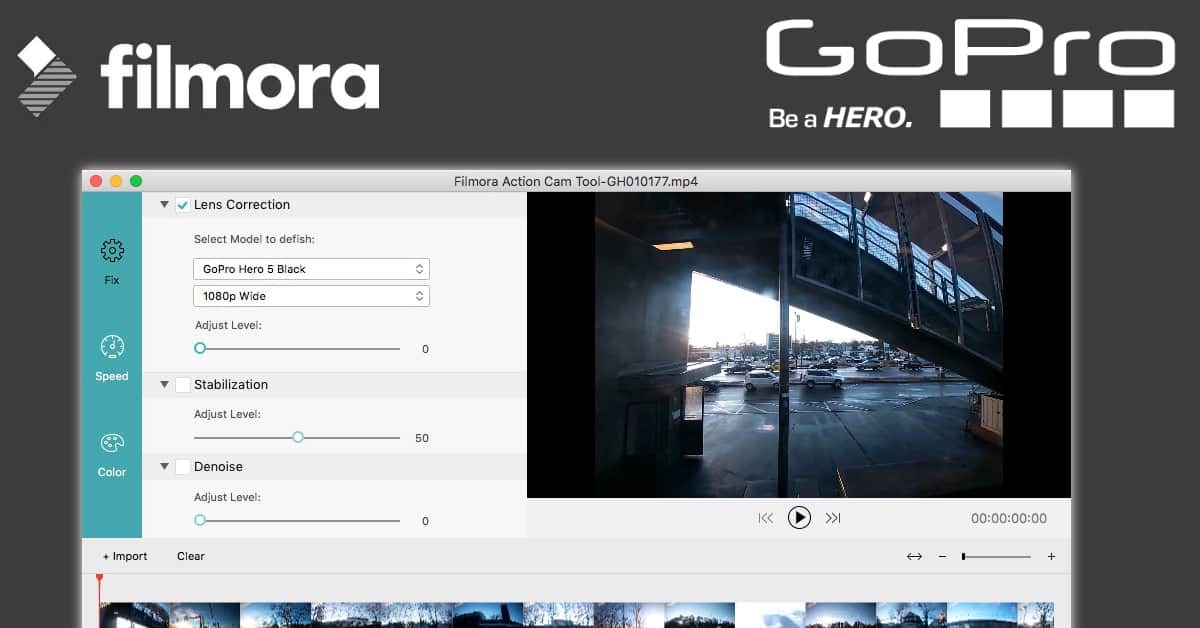
Fixing FishEye Effect in WonderShare Filmora 9
It's really easy to fix GoPro Video clips in Filmora. First, Upload your video to your computer, the easy way is to connect the GoPro cable to the computer and open up Photos. Then drag/drop the clips to the dashboard.
- Open up Filmora 9 and create a new Project
- Drag/Drop the video clip to the timeline.
- Double click on the video, and you should see the top left has change to some new editing options.
- Scroll down the video section until you see Lens correction.
- Select the checkbox to the left of Lens Correction
- For the GoPro 7 Silver, I found that selecting GoPro Hero 5 Black with 1080p Wide was the best selection to “defish.â€
The good thing about this is that you get a “live feed†of the changes, so you can see what works best for your particular shot.
Example Fix
This is a Timelapse video clip using the GoPro 7 Silver on the Framingham/Worcester MBTA Commuter Rail.
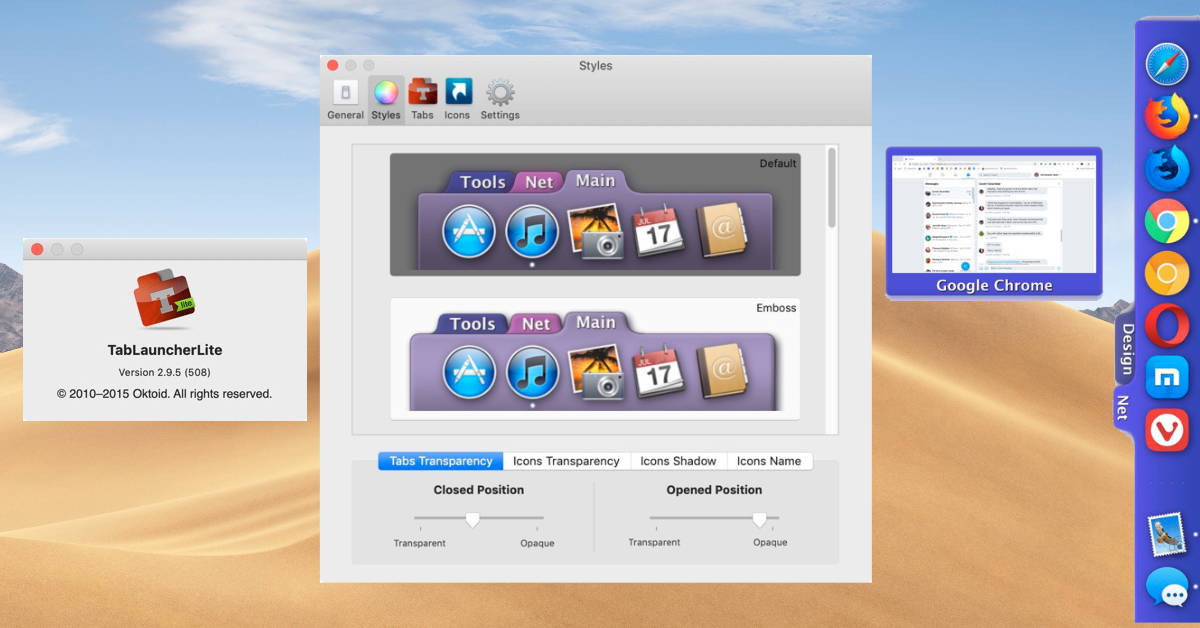
PermalinkTabLauncher Lite
Great way to organize applications for easy access
Apple's Dock is a great way to quickly launch all your everyday applications. Simply click on the icon.
But what if you want to access other applications? Usually, it involves Spotlight or opening up the Application folder.
TabLauncher lite is a better way to launch applications that are used often. With TabLauncher there are category tabs on the side of the screen where you can access applications quickly and easily. Now you can combine work-related apps, or graphics apps into simple categories that's easy to find and launch.
Website Description
TabLauncher will help you find and launch your favorite programs, web pages, folders, or any type
of files in a fast and easy way.
Taking up fewer resources as possible, and allowing you to personalize the appearance in many
ways, by changing colors, images, transparency, animations, and many other options to make it
blend in with your desktop.
Six Things I learned about TabLauncher
- The free version has a limit of three tabs, the paid version has unlimited tabs and is only $3.99
- You can have the tabs on any edge of the screen - the paid version allows you to have tabs on either side of the screen at the same time.
- You can put any application in the Tabs, in addition you can add scripts to perform any type of function.
- You can hide TabLaunch that way it's out of the way until you need it.
- There is no share functionality- so you can't share tab settings/configurations between computers.
- There are special tabs with built in functionality - such as Running Applications, Music
Memory Usage
TabLauncher Lite uses a lot less memory than LaunchBar. This might be a good solution for computers that don't have a lot of memory.
LaunchBar: 584.4 MB
Tab Launcher Lite: 85.1 MB
LaunchBar does offer a lot more features than launching applications, but if that's all you need to do then TabLauncher might be a good solution.
Getting TabLauncher Lite
You can download TabLauncher lite from the Apple Store. The full version is $3.99. You can learn more about the application on their website.
PermalinkTop 8 Macintosh Post of 2018
Quick look at the most popular posts of 2018
This year I tested and reviewed a lot of great Macintosh Applications.
This year I posted a lot of great tips and tricks on many applications that I use all the time, such as Pages, Affinity Photo, Photoshop Elements and Macintosh Tools.
Here are the top 8 Macintosh Post of 2018:
- Magnet for MacOS - Great tool to help properly align application windows on the screen.
- File Juicer - Great application to extract files from PDF documents or IOS Messenger.
- Wondershare Filmora - Looking for the next step up to iMovie? Checkout out Filmora, there’s lots of great transitions. The Text capabilities are very cool.
- Smart Converter Pro - I use this to batch convert lots of old media files to my iPhone XS Max.
- Apple System Services - Do you know about all the neat tools that are available in the Services menu?
- LaunchBar Actions - Learn some quick ways to perform simple actions using LaunchBar.
- Quadro Sync - Cool tool, but the company recently announced that they are discontinuing the application. Check out my review from January.
- Gif Brewery - If you want to convert any video to a GIF format, this is the software that makes it easy.
What's Planned for 2019?
I'll continue looking at new applications and giving my thoughts on them. Media seems to be the big thing that I might focus on, as well as storage solutions.
If you have any ideas, let me know!
PermalinkNumbers - Year on a Page
Easy way to create a reference calendar page
Did you know that you can create a Year-on-a-Page calendar in Apple Numbers? Creating a custom calendar will be more productive to hang up near your desk work or on the back of a kitchen cabinet.
You can put all the important dates and customize the month's colors to your liking. This template gives you more flexibility than some websites. (I wasn't able to find similar functionality in Excel or Word.)
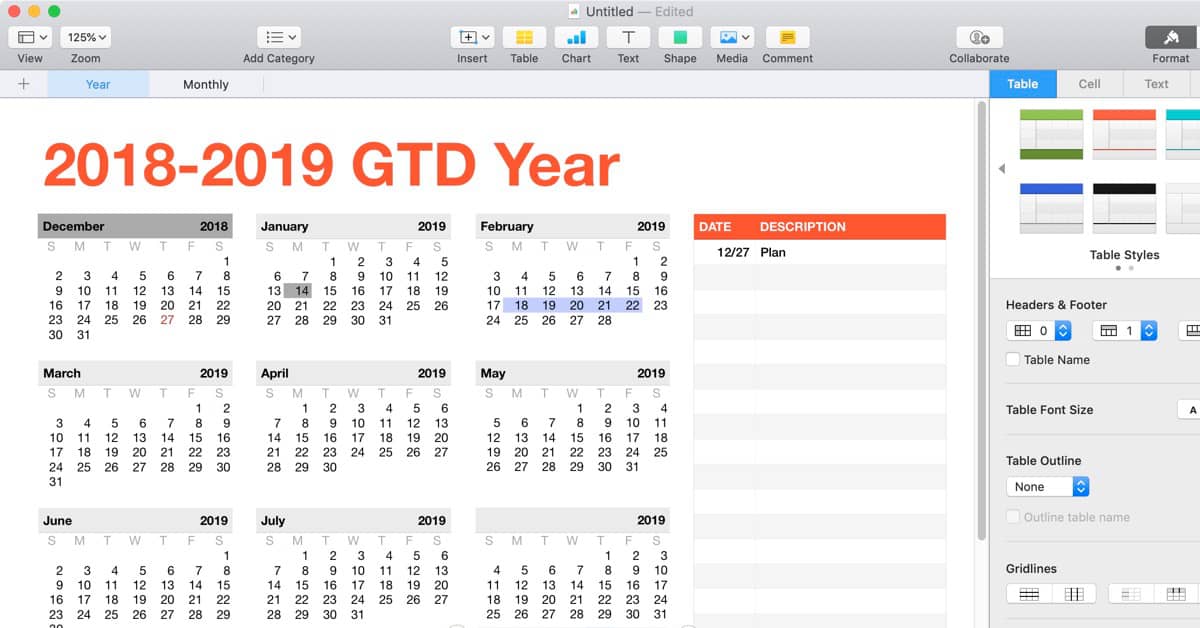
Five Things I Learned about the Calendar Template in Numbers
To get the Year-On-A-Page, simply open up Apple Numbers, select new, go to the Education category and select Academic Calendar.
To change the start date, simply, click on the month (September - by default) and then select the month. You can change the year by selecting the year and then up/down arrow the year.
There is a Month tab that allows you to fill in specific details for each month. Data entered here doesn't get carried over to the Description area on the Year-On-A-Page view. (That would be very nice)
You can highlight the background of days but you can't change the text, for example, add an Emoji on your birthday.
The Header text has no effect on the Calendar, so you can enter whatever you want.
PermalinkFilmora 9
Wondershare makes it easy to create awesome videos.
On December 12th, Wondershare officially released the latest version of their video editor - Filmora 9. This update allows users to have up to 100 video tracks, audio keyframing, and more tools that people are looking. They are able to do this while keeping the interface as simple as possible.
Filmora 9 makes it super easy to create quality videos.
What's New in 9
The first thing Mac users will notice is the application window is now using dark mode.
The split screen functionality has been removed from the toolbar.
By default the title inspector no longer opens up a separate window, the area above the timeline becomes the title inspector. If you want the previous functionality click on the advance button to see the Title Inspector window.
Music category has been renamed Audio
You can now better sort the various assets under each category. Before you could only sort by large thumbnail or small thumbnail. Now you can do a list view, and group by category.
To get to the Instant Cutter Tool, right click on a video in the Project library and select 'Instant Cutter Tool'
When Exporting to YouTube, there are more options when identifying the Quality. Users can now separately change the video and audio tracks quality.
Getting the Update
Anyone that purchased the previous update and selected the Lifetime option of previous versions of Filmora. This is definitely a better option since Wondershare is actively working on making Filmora better and better. The current lifetime price is a one-time fee of $59.99.
You can download a trial of Filmora 9 from their website.
PermalinkAbout
A Mac veteran since 1989, I'm here to share my experience with tips and tricks every Friday. Witnessing the evolution of Mac software and hardware firsthand, I've gained a deep understanding of how these machines work and can help you troubleshoot any issues that may come up.
Check out all the blog posts.
Blog Schedule
| Thursday | Business |
| Friday | Macintosh |
| Saturday | Internet Tools |
| Sunday | Open Topic |
| Monday | Media Monday |
| Tuesday | QA |
| Wednesday | Veed |