
Expanding Polygons Beyond the Default in Keynote
Unlocking More Sides
Hello, Mac enthusiasts! This week, we're diving into a neat trick within MacOS that many users overlook. By default, when you draw a polygon in most MacOS applications, it comes with five sides. However, did you know you can easily expand this number to create more complex shapes? Let's explore how to expand a polygon to have up to 11 sides by simply using a green dot.

- Starting with the Basics:
- First, open the application where you want to draw your polygon (such as Pages, or Keynote).
- Select the shape tool and choose the polygon shape.
- Understanding the Default Setting:
- By default, the polygon appears with five sides.
- Notice the green dot on one of the vertices of the polygon – this is your key to customization.
- Expanding the Polygon:
- Click and hold the green dot. As you start dragging it, you'll see the number of sides increase.
- Slowly drag the dot around the center of the polygon, and watch as the sides increase up to 11.
- Customization Tips:
- Remember that as you add more sides, the shape gradually becomes more circular.
- Experiment with different numbers of sides for various projects – whether it's for graphic design, presentations, or just for fun.
- Applications and Creativity:
- This feature is particularly useful in design projects where you need polygons that are not commonly available.
- Combine it with other tools like color fill, border adjustments, and rotation to create unique graphics.

Conclusion
Expanding the sides of a polygon from the default five to up to eleven opens up a new world of design possibilities on your Mac. It's a simple yet powerful way to add flair to your documents and presentations. As always, the key is to experiment and find what works best for your creative needs. Stay tuned for more tips and tricks next week!
PermalinkFCPeffects Black Friday Mega Bundle
Back again in 2024!
As a seasoned user of the FCPeffects Black Friday Mega Bundle, I'm excited to share my experience with this incredible collection of tools for Final Cut Pro. Last year's purchase has been a game-changer in my video editing projects, offering not just versatility but also remarkable value.

What's in the Bundle?
The Mega Bundle is a treasure trove for video editors, featuring over 1900 FCP effects, transitions, and titles. This comprehensive package, typically valued at over $1600, is available for just $59, making it an unmissable deal for both amateur and professional editors.
Key Highlights of the Mega Bundle
- Ease of Use: The bundle offers drag-and-drop presets with intuitive, customizable settings, suitable for beginners and pros alike.
- Speed and Efficiency: Designed to streamline the editing workflow, these plugins help save time on repetitive tasks, enhancing productivity.
- Instant Access: Post-purchase, the bundle is immediately available for download, ensuring you can start using the tools without delay.
- Wide Compatibility: Fully optimized for Apple's M1, M2, and M3 Silicon chips, the plugins work seamlessly with the latest versions of Final Cut Pro.
- Customization: The industry-leading customizability of these plugins allows for easy tweaking and adjustments to suit your project's needs.
My Personal Experience
Using the Mega Bundle has significantly improved my editing workflow. The 'Skin Smoother 2' and 'Quick & Easy Ken Burns' effects, in particular, have been instrumental in enhancing the quality of my projects, providing professional-grade results with minimal effort.
Why It's a Must-Have
- Cost-Effective: The bundle's massive discount offers incredible value, especially considering the individual cost of these plugins.
- Lifetime Access: It's a one-time purchase that grants you lifetime access to all the plugins, making it a long-term investment in your editing toolkit.
Conclusion
For anyone looking to elevate their video editing game, the FCPeffects Black Friday Mega Bundle is a golden opportunity. It's not just a collection of tools; it's an investment in your creativity and efficiency. As someone who has benefitted immensely from this bundle, I highly recommend it to both aspiring and seasoned video editors.
PermalinkHow to Print Odd/Even Pages in macOS Sonoma
A Step-by-Step Guide
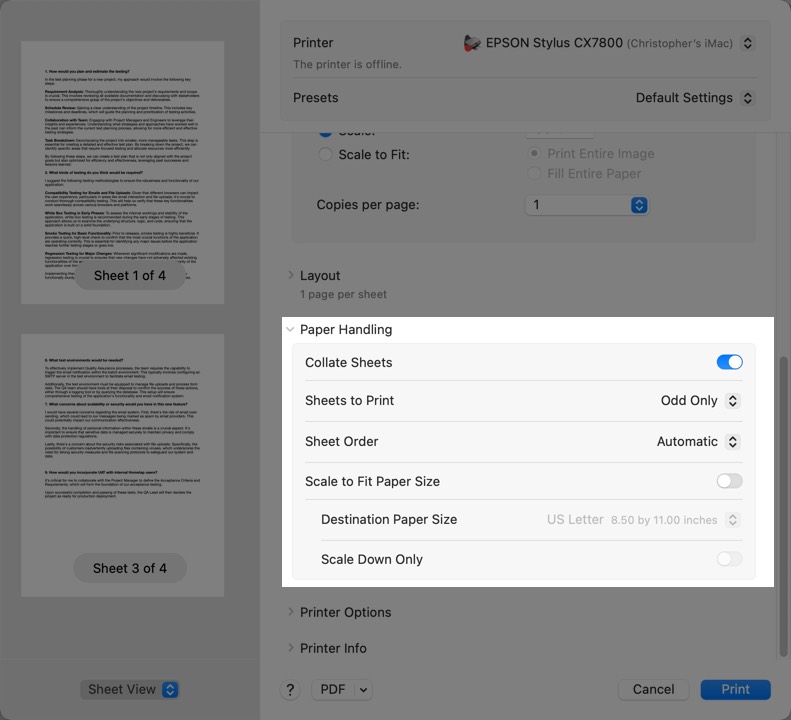
Welcome back to our weekly series where we delve into tips and tricks for macOS users! This week, we're exploring a handy feature in macOS Sonoma - printing odd or even pages. This can be particularly useful when you want to print on both sides of the paper manually or if you're only interested in specific pages of a document. Let's dive into how you can use the "Sheets to Print" option in the Paper Handling section of the updated print dialog box.
Step 1: Open Your Document
First things first, open the document you want to print. This could be a PDF, a Word document, or any other printable file.
Step 2: Accessing the Print Dialog
With your document open, go to File > Print, or simply use the shortcut Command + P. This will open the print dialog box.
Step 3: Navigating to Paper Handling
In the print dialog, you might see a simplified version initially. Look for a drop-down menu that usually shows the name of the application you're using (like Preview, Word, etc.). Click on it and select Paper Handling from the list of options. This is where the magic happens!
Step 4: Selecting Sheets to Print
Once in the Paper Handling section, look for the "Sheets to Print" option. You'll typically find two choices here: Odd Only and Even Only.
- Choose
Odd Onlyif you want to print pages 1, 3, 5, and so on. - Select
Even Onlyfor pages 2, 4, 6, and so forth.
Step 5: Adjust Other Settings (Optional)
While you're here, you can also adjust other settings like the page order. For instance, if you're planning to manually print on both sides, you might want to print the even pages in reverse order for easier handling.
Step 6: Print and Repeat if Necessary
After selecting your preferred option, click Print. If you're doing a manual duplex (double-sided) print job, remember to re-feed the printed pages into your printer and repeat the process for the other set of pages (odd or even, whichever you didn't print the first time).
Conclusion
Printing odd or even pages in macOS Sonoma is a breeze once you know where to look. This feature is especially useful for those looking to save paper or manually handle duplex printing. As always, macOS is designed to make your workflow more efficient, and this small but mighty feature is a testament to that.
Stay tuned for more macOS tips and tricks next week! Happy printing!
PermalinkTextEdit for Clipboard Content
The tool to handle complex RTF
I have been copying various text information online into Apple Pages. I have become frustrated with the formatting in Pages and spend a lot of time fixing bullet points and header text.
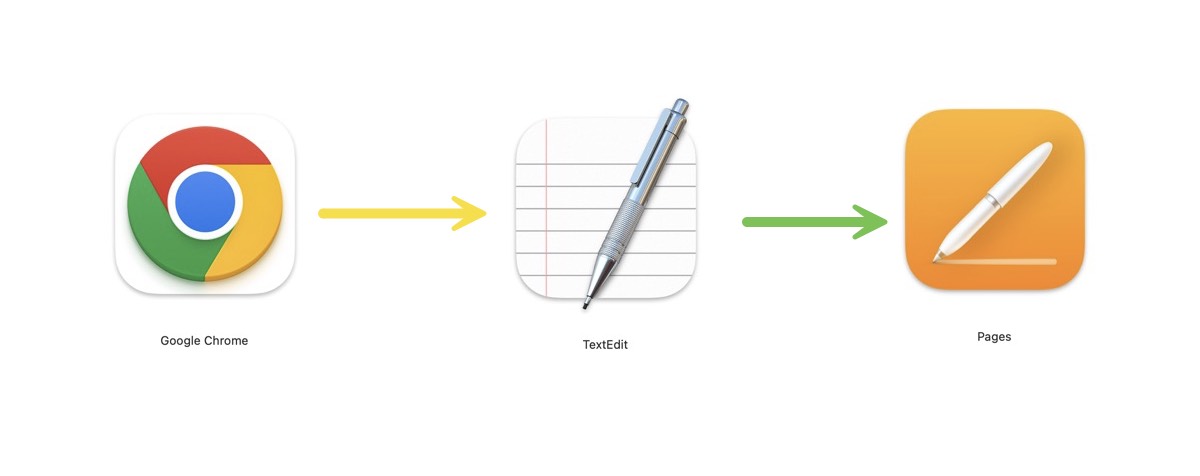
I recently found that if I use TextEdit the formatted text content from Google Chrome matches what I see in the browser. This is especially true for complex list types.
Note: This also happens with Apple Safari.
So if you're running into difficulty with Pages not handling Clipboard formatting, try using TextEdit.
Here's why this method is effective:
- Different Formatting Standards: Google Chrome and Apple Pages might interpret and handle text formatting differently due to their distinct underlying technologies. This can lead to inconsistencies when you copy-paste directly from Chrome to Pages.
- Neutral Ground with TextEdit: TextEdit, a simple and versatile text editor for macOS, acts as a neutral ground. It supports a wide range of text formats and provides a more consistent interpretation of the formatting. When you first paste into TextEdit, it adapts the formatting from Chrome in a way that's more compatible with Pages.
- Maintaining Formatting: By copying from TextEdit to Pages, the likelihood of retaining the original formatting from Chrome increases. TextEdit essentially "translates" the formatting into a form that Pages can better understand and reproduce.
- Simplicity and Accessibility: TextEdit is a basic tool that comes pre-installed on all Macs, making it an easily accessible solution for this kind of formatting issue.
To use this method, simply copy your formatted text from Google Chrome, paste it into TextEdit, and then copy from TextEdit and paste into Apple Pages. This should maintain most, if not all, of the original formatting.
Remember, though, that very complex formatting or certain specific elements might still not transfer perfectly due to inherent differences in how Chrome and Pages handle them.
PermalinkiMac FaceTime Camera Quality
Use an old iPhone for better videos
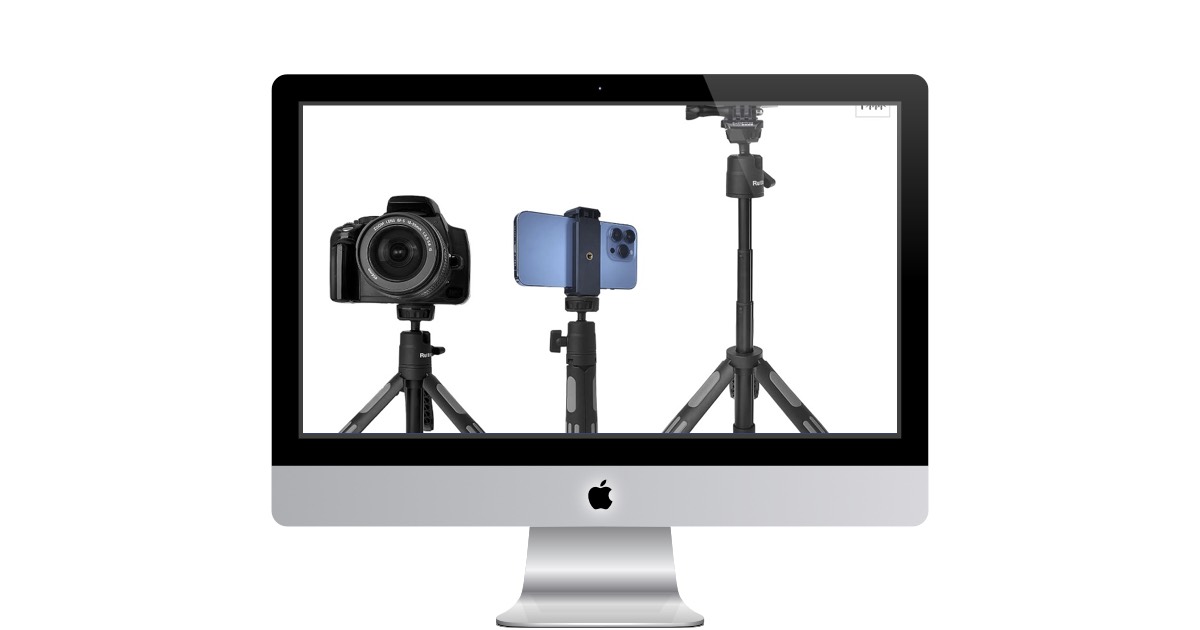
My iMac, which is a Retina 5K, 27-inch, 2019 has a built in camera. The built in camera is an HD camera. My Apple Thunderbolt Display also has a built it camera, and it's also a HD camera.
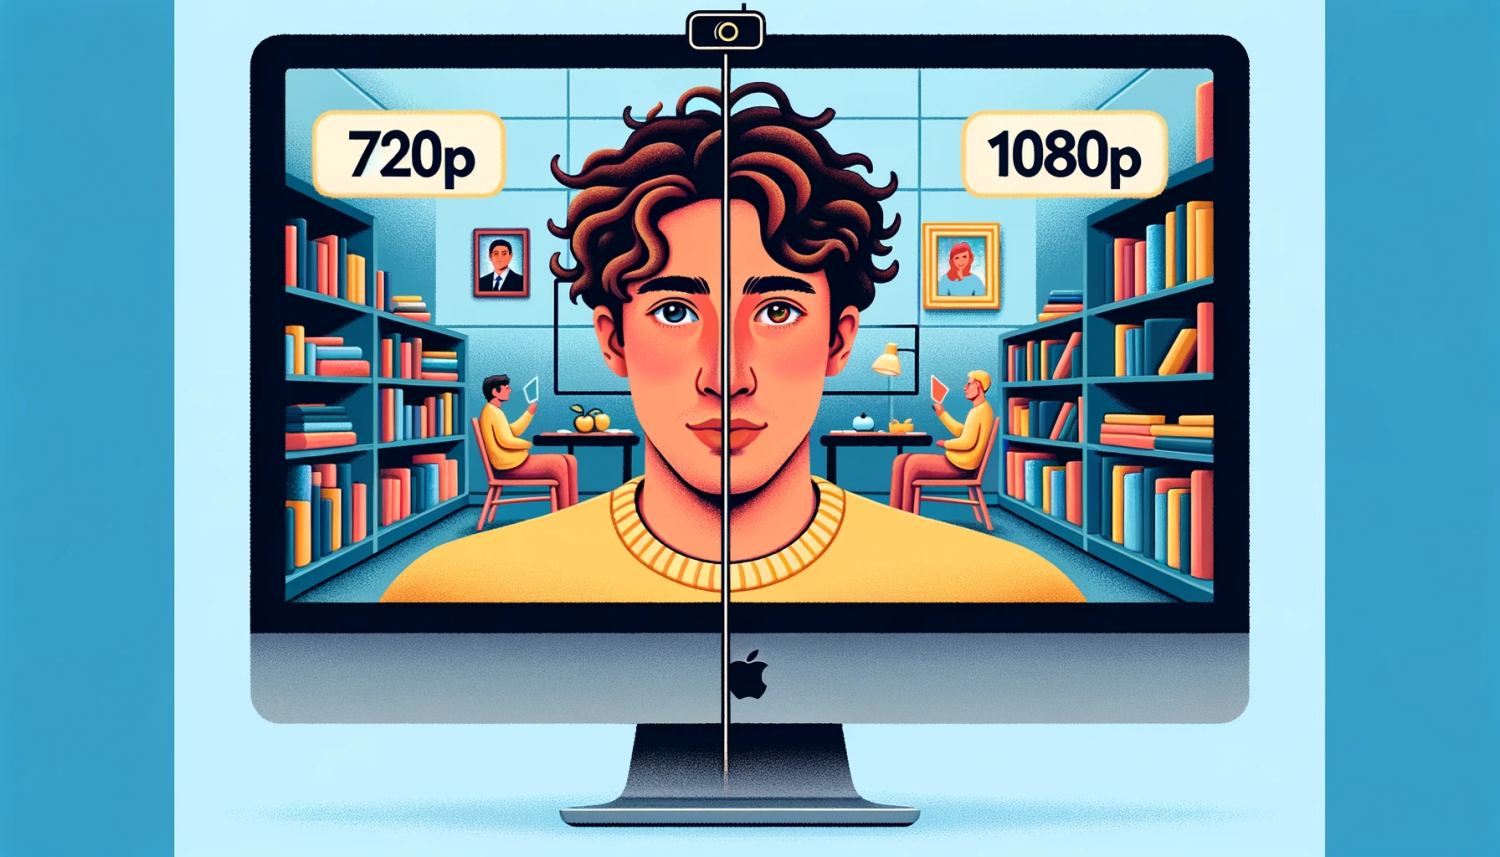
Today, the terminology "HD" doen't really mean High Definition as HD means 720p. Most smartphones front screens are now using 1080p image resolutions.
Video Resolution Fun Facts
| HD | 720p image resolution (1,280 x 720 pixels – approximately 1 million total pixels) |
| Full HD | 1080p image resolution (1,920 x 1,080 pixels – approximately 2 million total pixels) |
| Ultra HD | 4K image resolution (3,840 x 2,160 pixels – approximately 8 million total pixels) |
720p vs 1080p
Do you really need a 1080p video resolution for Zoom or Microsoft Teams calls? Probably not. However it would help with low lighting and clarity. This would be good for job interviews or important job meetings.
Got an Old iPhone?
The camera on your iPhone is designed to capture high-resolution photos and videos. When used as a webcam, it can significantly outperform many standard computer webcams. The iPhone's sensor and lens are engineered to produce sharp, high-definition images, ensuring that you come across clearly and professionally. Furthermore, the iPhone's camera excels in a variety of lighting situations, adjusting to give you the best possible image.
Setting Up Your iPhone as Your iMac's Camera
Transforming your iPhone into a FaceTime camera for your iMac is relatively straightforward. You'll need a few things to get started:
- Your old iPhone (preferably one with a 1080p camera, such as the iPhone 6 or later).
- A stable stand or tripod to position your iPhone.
- A lightning cable to connect your iPhone to your iMac.
- Software to bridge the connection between your iPhone and iMac (apps like EpocCam or Camo).
Once you have everything you need, follow these steps:
- Install the Webcam App: Download and install your chosen webcam app on both your iPhone and iMac. These apps will enable you to use your iPhone as a webcam via a USB or Wi-Fi connection.
- Connect Your iPhone: Mount your iPhone on the stand or tripod and position it where you would normally have a webcam. Connect your iPhone to your iMac using the lightning cable.
- Configure the Webcam App: Launch the app on your iMac and follow the instructions to connect it to your iPhone. You might need to allow some permissions on both devices.
- Select the iPhone as Your Camera Source: In your video conferencing app's settings (like Zoom, Skype, or Microsoft Teams), select the webcam app you've installed as the camera source.
- Adjust the Settings: Fine-tune the camera settings to your liking. You can adjust the resolution, zoom, and even add filters if your webcam app supports these features.
The Benefits of 1080p Resolution
With your iPhone now set as your FaceTime camera, you'll notice a considerable improvement in video quality. The 1080p resolution of your iPhone's camera provides a high-definition video feed, making your image on calls much sharper than the standard 720p webcam of older iMacs. You'll appear clearer, with more accurate colors and better detail. This can be particularly beneficial for professional calls where making a good impression is paramount.
Looking Your Best on Conference Calls
The higher resolution combined with your iPhone's superior sensor will mean that your video has less noise and better performance in low light conditions. You can say goodbye to pixelated video and embrace a more polished and flattering image. Remember, good lighting is key to professional video calls, so make sure you're well-lit from the front. Your iPhone will take care of the rest, ensuring that you look your best.
Closing Thoughts
Using your old iPhone as a FaceTime camera is not just a creative hack but a smart way to leverage technology you already own. It's a win-win situation that contributes to a more sustainable lifestyle while improving your professional presence online. So, dust off that old iPhone, set it up as your new iMac webcam, and get ready to show up on your next video call with clarity and confidence.
PermalinkTesting Headset Microphones Volumes
Tips on improving your Microphone.

In the quest for impeccable audio quality during our virtual interactions, the microphone plays a starring role. This week, we delve into the realms of testing and enhancing your headset microphone's input on your Mac, ensuring your voice resonates clearly and accurately across digital corridors. Let’s explore some tools and techniques to boost up that input signal to achieve audio nirvana.
Understanding Your Microphone Settings
Before diving into external tools, familiarize yourself with the Sound settings on your Mac. Navigate to Apple Menu > System Preferences > Sound > Input. Here you can select your headset microphone and adjust the input volume.
Testing Your Microphone:
QuickTime Player: A simple yet effective way to test your microphone is by using the QuickTime Player on your Mac. Go to File > New Audio Recording, select your headset microphone, and hit the record button.
Online Tools: Websites like OnlineMicTest.com provide a platform to check your microphone's functionality and audio quality.
Boosting Your Input Signal:
Boom 3D: This software is a gem for enhancing audio quality. It provides a range of features including a volume booster, equalizer, and presets to refine your microphone input.
Audio Hijack: With Audio Hijack, you can boost the input levels and apply effects to improve clarity and eliminate background noise.
Noise Reduction:
Krisp: A stellar app that works magic in real-time to remove background noise. It also provides a gain control feature to boost your microphone input.
Auphonic: A web-based tool that offers noise and hum reduction, along with leveling and loudness processing to optimize your audio.
Advanced Calibration with Audio Interfaces
Consider investing in an audio interface like Focusrite Scarlett which provides robust preamps to boost your microphone's signal.
Regular Maintenance
Don’t forget the basics. Regularly clean your headset microphone and ensure it’s free from dust and debris, which can significantly impact sound quality.
Conclusion
Incorporating these tools and practices in your routine will significantly uplift your audio game on Mac. Whether you are in a professional meeting or a casual virtual hangout, ensuring your voice is heard loud and clear is quintessential. So, go ahead and explore these tools to find what resonates with your audio preferences, and keep the digital dialogues flowing smoothly.
PermalinkRound Corner Images in Affinity Designer
Quick and Easy
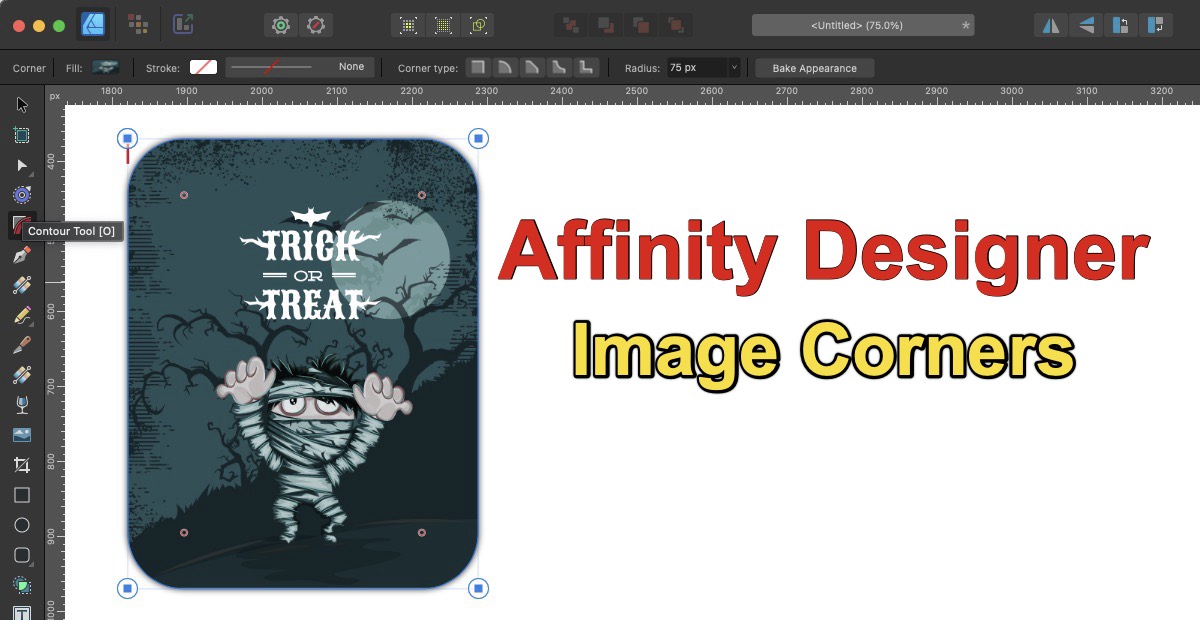
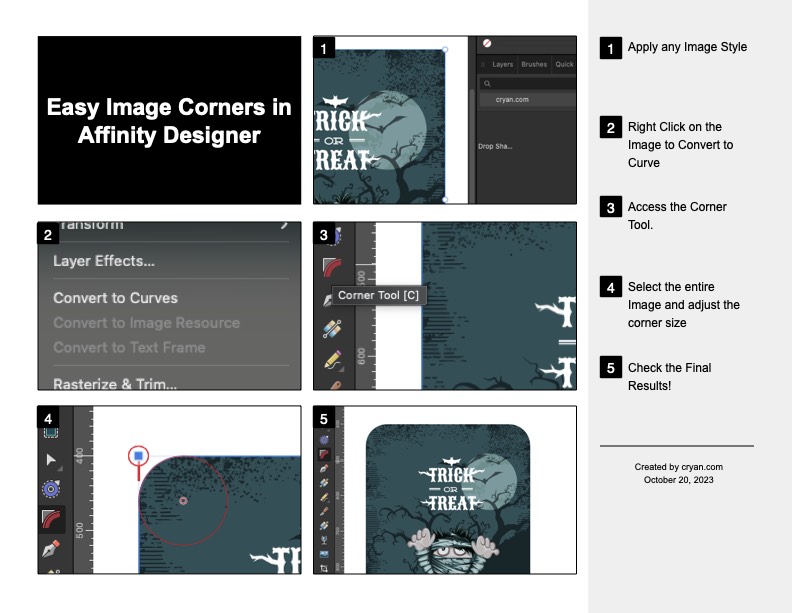
Greetings Macintosh enthusiasts! This week, let's dive into a nifty trick using Affinity Designer, a powerful tool for graphic designers. Have you ever wondered how to add those smooth, round corners to your images, giving them a polished and professional look? Look no further! In just five simple steps, you can achieve this effect effortlessly. Here's how:
Step 1: Apply Your Desired Style
Start by applying your preferred style or effect to the image you want to edit. This could be anything from a filter to a color adjustment - it's up to you! Experiment with different styles until you find the one that suits your vision.
Step 2: Convert the Image to Curves
Once you've applied the desired style, it's time to convert your image to curves. To do this, select your styled image, navigate to the 'Layer' menu, and then click on 'Convert to Curves.' This step essentially changes your image into an editable vector graphic.
Step 3: Access the Corner Tool
With your image now in curve form, it's time to bring on the round corners! Locate the 'Corner Tool' in the toolbar. It usually looks like a square with a radius arc in one corner. Click on it to activate the tool.
Step 4: Adjust the Corner Radius
Now comes the fun part - adjusting the corner radius. Click and drag any of the corner nodes of your image to round the corners to your desired level. Affinity Designer allows for precise control, so you can make subtle adjustments or go for bold, rounded corners - the choice is yours!
Step 5: Apply and Save
Once you're satisfied with the rounded corners, it's time to apply the changes. Simply click outside the image or press Enter, and voilà! Your image now boasts those sleek, rounded corners you've been aiming for. Don't forget to save your work to preserve your edits.
And there you have it - in just five steps, you've transformed a regular image into one with rounded corners, adding a touch of sophistication to your design. Feel free to experiment with different styles, corner radii, and image types to unleash your creativity!
Helpful Guide
Stay tuned for more exciting Macintosh tips and tricks next week. Happy designing!
PermalinkRicoh Theta Z1
Download Media from Ricoh Theta Z1
In this week's blog, I'm diving into the world of 360-degree photography with the Ricoh Theta Z1. Capturing stunning images and videos is one thing, but seamlessly transferring them to your Mac is a game-changer. Here's a step-by-step guide on how to do it right.
Choose the Right Cable
First things first, ensure you have the correct data transfer cable. The right cable (usually USB-micro to USB-A) will establish a stable connection between your Ricoh Theta Z1 and your Mac.
You'll need a USB-Micro data cable. One was supplied with the Ricoh Theta Z1.
Utilize Image Capture App
When it comes to downloading files from your Ricoh Theta Z1, the Image Capture app is your best friend. It's pre-installed on your Mac and offers a straightforward interface. Connect your Ricoh Theta Z1 to your Mac using the cable and open Image Capture. Your device should appear on the left sidebar. Select it, choose where you want to save your files and click 'Import All' for a quick transfer. You can also selectively import specific photos and videos.
If you don't see the Ricoh Theta Z1, you are likely not using a data USB-micro cable
Stitch Spherical Images with RICOH THETA
Once your media files are safely on your Mac, enhance your creative process by stitching your spherical images together. RICOH THETA provides intuitive software that seamlessly blends your 360-degree images, giving them a professional touch.
And there you have it! With the right cable, Image Capture app, and RICOH THETA software, you can effortlessly transfer and enhance your Ricoh Theta Z1 media on your Mac. Stay tuned for more Mac tips and tricks next week!
PermalinkFilling Forms using Apple Preview
Don't Print Documents to Fill Them
Forms are an integral part of our digital lives, whether it's filling out a job application, completing a survey, or submitting essential documents. Thankfully, with Apple's Preview application, the process of filling out forms on your Macintosh computer becomes seamless and hassle-free. In this guide, we'll walk you through the steps of filling forms using Apple Preview, making your paperwork woes a thing of the past.
Prerequisites
Before we begin, ensure you have the latest version of macOS installed on your Macintosh computer. Preview is a pre-installed application, so there's no need to download or install anything separately.
Step 1: Open Your Form
- Locate the form you need to fill out on your Macintosh computer.
- Double-click the form file to open it in the Preview application.
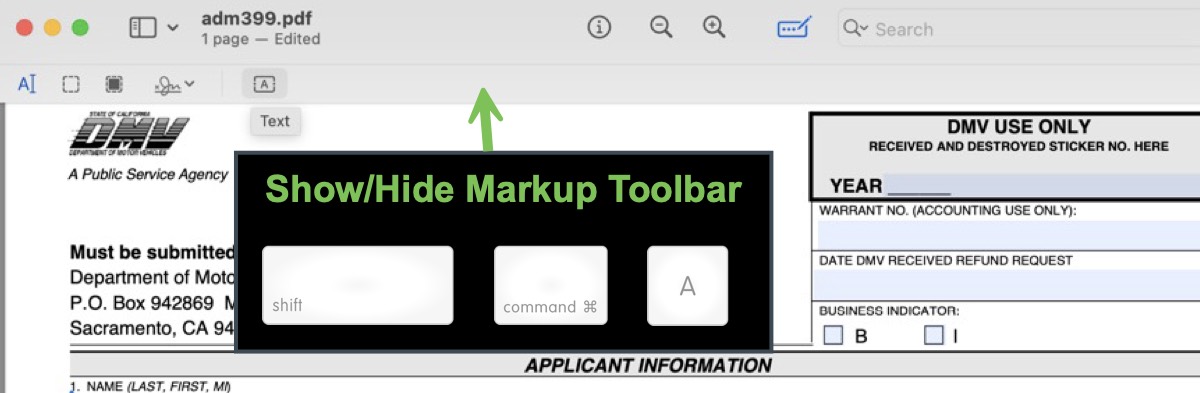
Step 2: Click on the Text Tool
- In Preview, click on the toolbox icon in the toolbar, or press Shift + Command + A to activate the Markup Toolbar.
- Select the Text tool from the Markup Toolbar. It looks like a small 'T'.
Step 3: Place Text Boxes
- Hover your mouse over the area of the form where you want to enter text.
- Click to place a text box. Resize and reposition it as needed to fit the form fields perfectly.
Step 4: Enter Your Information
- Double-click inside the text box you just created.
- Enter your information. You can adjust the font style, size, and color using the formatting options in the Markup Toolbar.
Step 5: Checkboxes and Radio Buttons
- For checkboxes and radio buttons, use the Shapes tool in the Markup Toolbar.
- Click on the Shapes icon, select the appropriate shape, and place it over the checkbox or radio button. You can adjust the size to match the form's design.
Step 6: Save Your Form
- Once you've filled out the form, click File > Save to save your changes. Your form is now ready to be shared or printed.
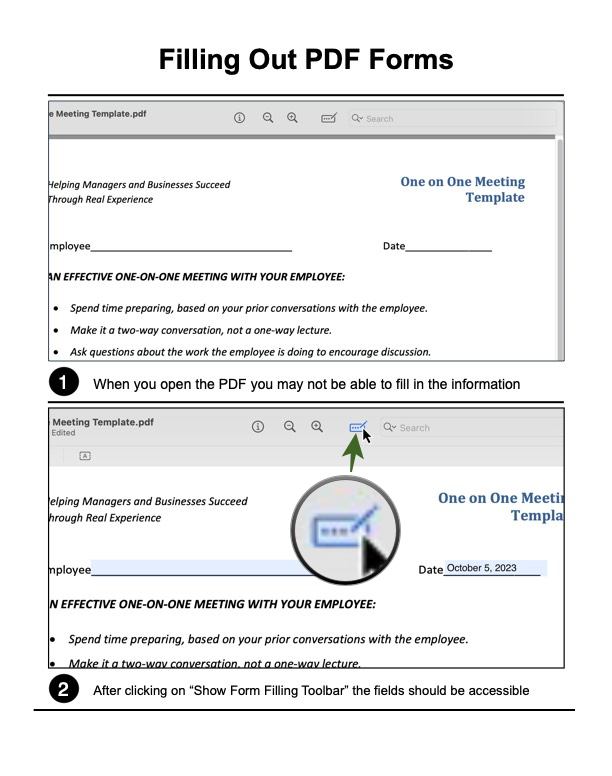
Form Filling Toolbar
For most forms, simply clicking on the Form Filling Toolbar icon will enable the form to be editable.
Stage Manager and Desktop
Fix the Disappearing Apps
Earlier this week I installed macOS 14 (Sonoma). One of the first things I noticed was that every time I clicked the Desktop, all my open windows would move away. I didn't like this behavior. Turns out this is a default feature of Sonoma.
Easy Fix
Apparently Apple wants people to use Stage Manager to manage their desktop. Stage Manager came out in last year's release.
While this might be "cool" I don't like it, and I wanted to revert to the "old way."
To disable the feature:
- Click on the Apple Menu and select "System Settings..."
- Select "Desktop & Dock" on the left menu.
- Then in the "Desktop & Stage Manager" section, make sure the "Check wallpaper to reveal desktop" is set to "Only in Stage Manager"
See the image:

Review of macOS 14 (Soon!)
I am still playing around with macOS 14 (Sonoma) and I'll blog about it next week. I did let other people know that this isn't really a much-have update.
PermalinkAbout
A Mac veteran since 1989, I'm here to share my experience with tips and tricks every Friday. Witnessing the evolution of Mac software and hardware firsthand, I've gained a deep understanding of how these machines work and can help you troubleshoot any issues that may come up.
Check out all the blog posts.
Blog Schedule
| Thursday | Business |
| Friday | Macintosh |
| Saturday | Internet Tools |
| Sunday | Open Topic |
| Monday | Media Monday |
| Tuesday | QA |
| Wednesday | Veed |
Other Posts
- Creating a Shortcut to Open a Specific Pages Template
- Quick Camera
- Blackmagic RAW Speed Test
- Backup Voice Memos
- EDUCORP Catalog
- USB Drives Lifespan
- TextEdit for Clipboard Content
- How to Extract Audio from Video on Mac Instantly Using Automator
- Using Automatic File Splitting in OBS
- Thunderbolt Display Cable
- Panic Nova
- External Monitor for iMac
- Emmet in BBEdit
- TextSoap
- Organizing Your Mac's Launchpad