
Growl
Is Growl still a valid application?
Growl is a notification system for Mac that allow users to customize how to handle notifications.
The application was created in 2004 as a utility to be the central command to handle all system notifications. It allowed application developers to just send notifications and not have to worry about how to display the information to the user. For users, the notification could be delivered via speech, email, or ignored.
Users have the ability to have all sorts of styles to show the notifications.
Over the years it gained a lot of acceptance and a very impressive list of supported applications.
In November 2011, Growl became a paid application to help support the full-time developers.
Apple Changed the Game
When Apple released OS X Mountain Lion (10.8) in 2012 it included a new Notification Center which allowed users to configure how to handle notifications. Essentially doing most of the functionality being done with Growl.
So is Growl still a valid application?
Is Growl a Dead Application?
You can still buy Grown on the Apple Store for $3.99. In fact it's rated #199 in the Productivity sales - second to last "Clear - Tasks, Reminders & To-Do Lists" is the last application.
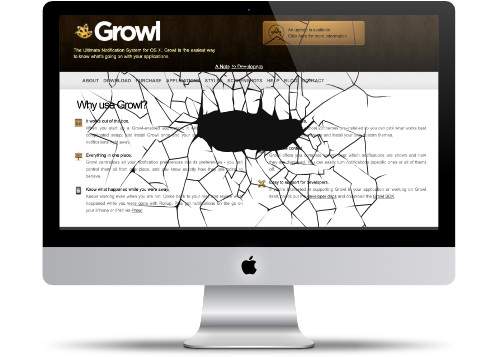
However, there are plenty of signs that Growl is a dead application:
The last update in the Apple Store (2.1.3) was on October 29, 2013 - 6 years ago. This was to fix issues with Growl support with OS X Mavericks.
In the App Store, there are a lot of negative review about Growl - it currently has 2.6 Rating (Out of 5).
All support is being handled in the Google Discussion List. Most of the comments are about installing issues and how to uninstall.
No major browser supports Growl. In September 2012, someone put in a request to remove Growl from Firefox. It was removed shortly after. Opera removed support for Growl in version 17 on October 10, 2013. FireFox and Opera are still listed as supported applications on the Growl site.
There many "old" applications listed in the supported apps section. It is actually a nice list of old apps.
The open source code repository on Google Code hasn't recieved any new commits since October 12, 2013.
The last Blog post on growl.info was on December 13, 2013.
The last Twitter Post from @GrowlMac was on May 1, 2015.
Now What
I think Apple should check out the Growl Application to see if it works in macOS Catalina. I don't want to waste $3.99 just to find out.
If Growl is still an active application, they should at least have more activity on their website. Let people know what's going on.
PermalinkLiveQuartz Photo Edit
Simple photo editing tool with a lot of filters to play around with
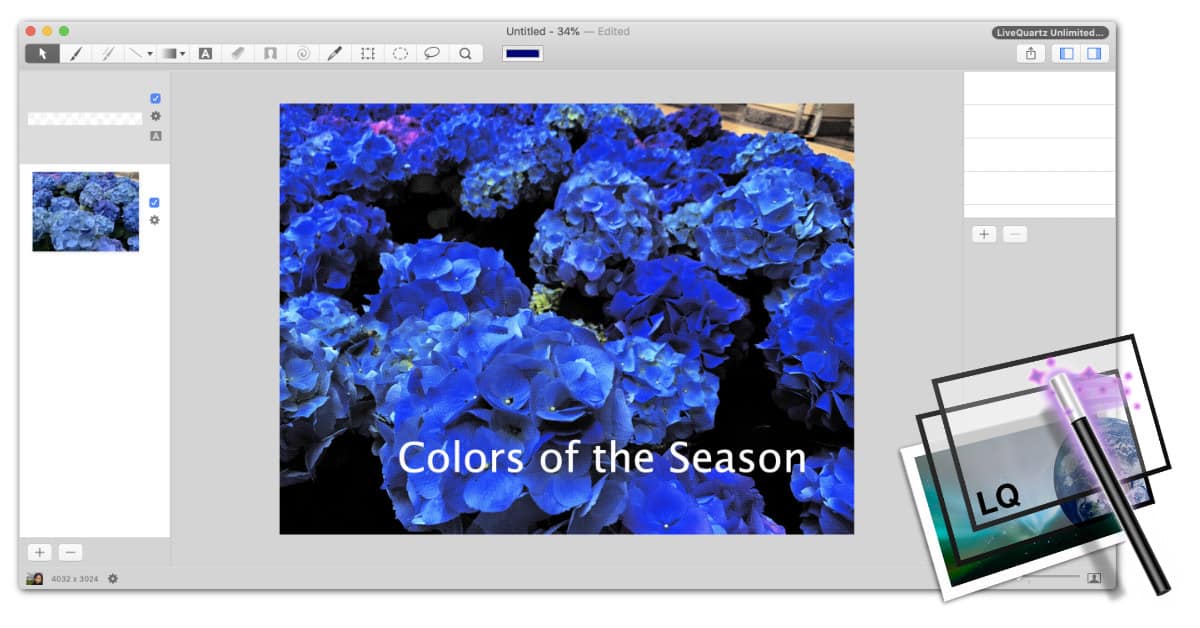
The application LiveQuartx Photo Edit ($7.99) is a "simple and powerful editor for the Mac." It is designed for people that need a simple image application that don't want to learn how to use a graphic application.
Features of LiveQuartz Lite
Some of the tools that are available in LiveQuartz
- Layer Moving Tool - Move objects around.
- Brush - Paint/Color tool
- Duplication Tool - Like a stamp tool in Photoshop. Select a reference point, then click where you want to duplicate it.
- Drawing Tools - Draw line, stroke rectangle, fill rectangle, stroke oval and a fill oval.
- Gradient Tools - linear and radial gradient
- Rich Text Tool - Add text to an image
- Eraser Tool - Erases part of the image using the brush size.
- Background Eraser - Removes the background color of an image.
LiveQuartz has a lot of very cool filters, you could spend hours playing around with all the different ways to alter an image. This list is a small set of the 124 filters that are available
Some Filters that are available in LiveQuartz:
- Geometry Adjustment - Flip Horizontally, Vertically, Perpective Correction
- Distortion Effect - Bump, Hole, Glass Pinch, Twirl, Vortex Distortions
- Blur - Bokeh, Box, Median, Motion Morphology, Disc Blur
- Sharpen - Sharpen and Unsharpen
- Color Adjustment - Color Controls, Hue Adjust, Vibrance, White Point Adjust
- Color Effect - Color Curves, Color Map, Thermal, X-Ray, Photo Effect Fade
- Stylize - Edges, Gloom, Mix, Shadow, Crystallize, Bloom
- Halftone Effect - Circular Screen, CMYK Halftone, Line Screen
- Title Effect - Affine Title, Op Title, Triangle Title, Kaleidoscope, Paralletogram Title
Background Eraser
The Background eraser is pretty neat. Simply select the tool, then click on what you want to be removed, you can "drag" the mouse to increase the number of colors that get removed.
It's a quick way to remove the background of an image - such as a sky or solid color backgrounds.
Limitation of LiveQuartz Lite
The lite version of LiveQuartz allows you to export one image per day (export, share, cut, copy, drag and drop, print) If you love the application and plan to use it frequently, you should consider purchasing an Unlimited license for $7.99.
If you think you'll just use the application for a week, you can subscribe just for 7-days for $.99
Personal Recomendation
LiveQuartz is pretty cool tool, but I think using PhotoScape X is better application. It cost more - $39.99 for the pro version - but you have more capabilities such as applying filters in batch mode, creating collages, stickers, frames, light effect and so much more.
PhotoScape X does have a bit of a learning curve. I think it worth spending a few hours to learn how to use the application to get more out of a graphics program.
If you're just going to do some basic photo editing every once in a while, then LiveQuartz is a good tool to have.
PermalinkMicroWave Express vs Fission
Should you use MicroWave instead of Fission?
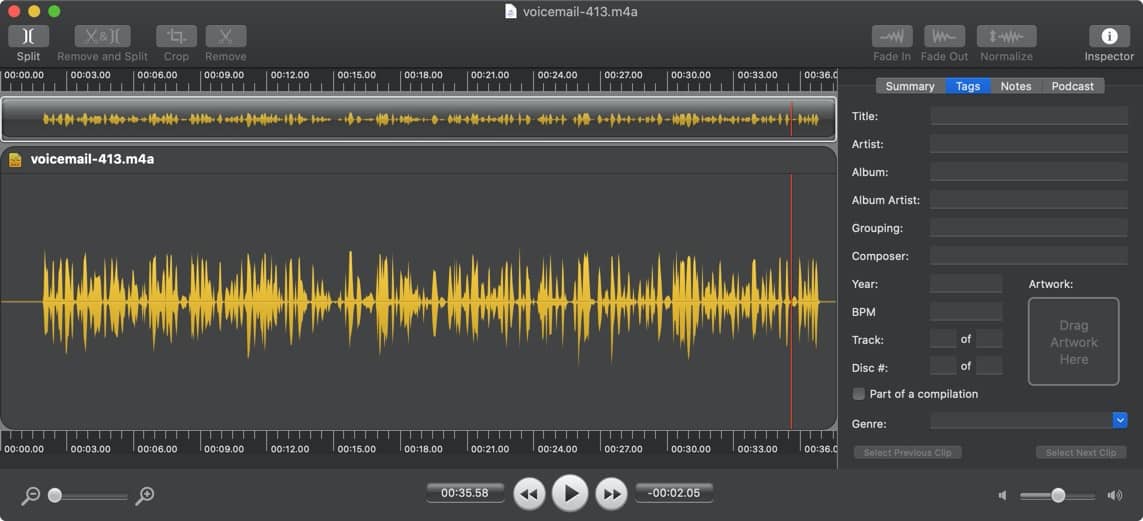
I decided to take the MicroWave Express version for a spin. I decided to try the freeware version which has some limitations - exporting is limited to 10 seconds. Otherwise, the features are the same as the paid version.
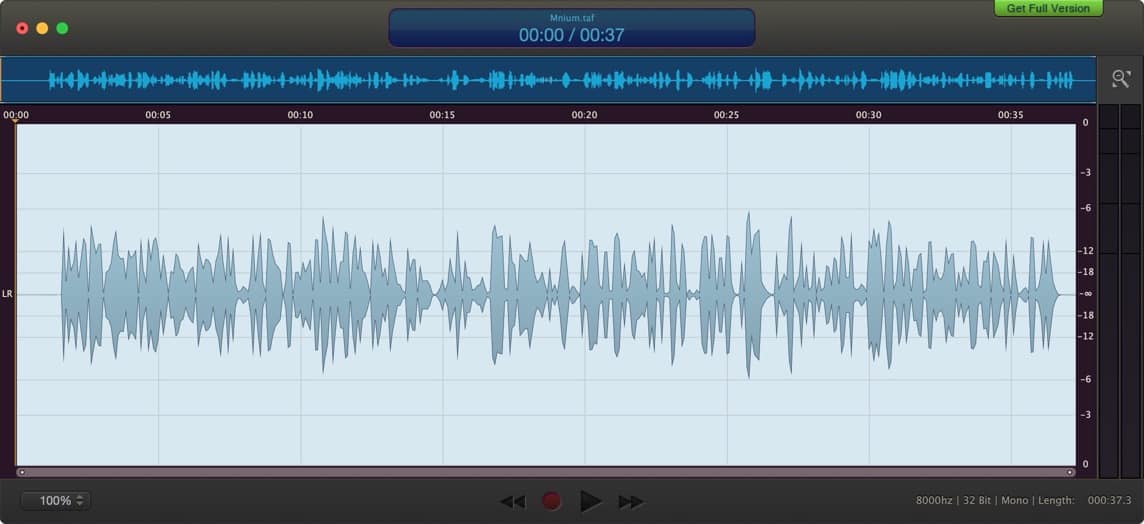
Screenshot of the MicroWave Express
The paid version of MicroWave cost $19.99 and is available on the Apple Store.
Screenshot of Fission version 2.5.0.
Rogue Amoeba Fission cost $29 from the Rogue Amoeba store. You can download a test version of Fission from Rogue Amoeba site.
Some Observations
Here are my notes on playing around with the application for a few hours:
One cool feature that you can create new audio files in MicroWave. You can't create content using Fission, you have to use Audio Hijack to import sound. While it's bad that you have to use another app, it does give you a lot more flexibility on digitalizing the audio file.
You can't just add another track, like you can with Garageband and Audacity. The only want I could get an additional track is to export the mono file as a stereo to add the second track. Note: Fission only displays a single waveform while editing, but it does edit stereo files as stereo.
You can select different Wavelength colors. This is a neat way to customize the look and feel to something that you may be familiar with. You can select from Classic, Midnight, Graphite, Fruity, Building Bricks and Orcish Green. I personally liked the wave colors in Midnight and Orcish Green.
MacroWave allows you to edit the Metadata when saving the document. It's a good way to remind you to add it before saving. You can add it anytime using the "Edit Metadata" option. The only value that you can't add/change is the Artwork. In Fission, you can add additional notes, lyrics and Podcast URL information.
MicoWave supports Flac Lossless (.flac), Apple Lossless (.m4a), PCM Wave (.wav), AIFF (.aiff), Core Audio Format (.caf). Fission supports all those with the addition of MP3. Both applications have the ability to select the audio quality (Maximum Bit Rate, Channels, Sample Rate)
I found it easier to split the audio in Fission than in MicroWave. Fission allows you to easily split the audio clip into multiple files - including the ability to "Smart Split" which splits the audio based on silence. MicroWave does offer a silent detector that allows you to drop a marker. Fission seems to work better in my testing.
MicroWave Express has a lot of cool sound effects, such as Delay, Distortion, Graphical Equalizer, High Shelf Filter, Matrix Reverb, Pitch and many more. Fission doesn't offer any effects.
Final Thoughts
MicroWave is a pretty cool application, but I don't think it replaces Fission and Audio Hijack. I couldn't see the value of buying another sound application that does a lot of the same things.
PermalinkSetting up a Better Display on your Retina Computer
Getting the most out of your Retina Display iMac/MacBook
One of the things that I noticed on my new iMac (Retina 5k, 27-inch, 2019) is that my screen resolution seems to be the same as my old Mac. I have a bigger monitor, but I am not seeing the difference in actual space.
Turns out that the issue is with the Display Resolution. I was using the "Default for display" which makes the display appear the same as before. I didn't know there's another option that can be set.
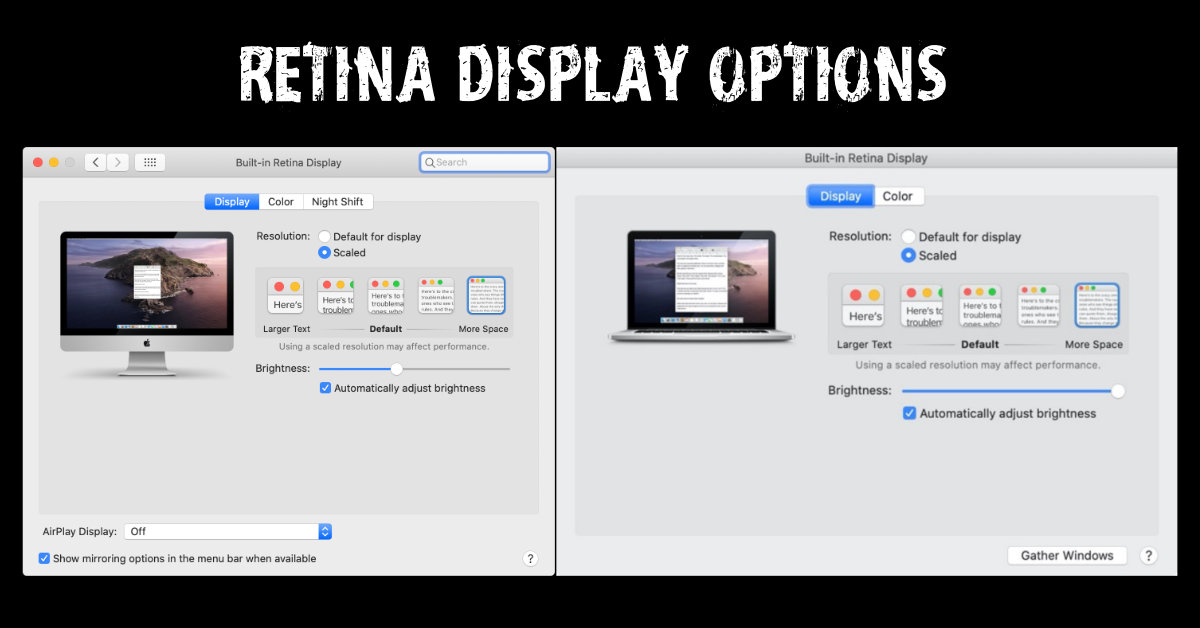
I saw a YouTube video which suggested to change the Resolution to Scaled and then select the "More Space" option. This set the contents of the display to be smaller - basically getting more use of the 5k Graphics card.
There is a disclaimer at the bottom of the Scaled section which says, "Using a scaled resolution may affect performance." I was wondering what type of performance degradation I would see.
In some instances you may see a slight delay after typing something before an action appears on the screen. This is a very small amount, we're talking milliseconds - but slightly noticeable.
It's good to know that changing the screen resolution doesn't impact the overall performance of the computer. So making the resolution change would be good to set up if your doing Movie or Sound Editing. Probably not good if you spend time writing a novel or email.
Works for Me
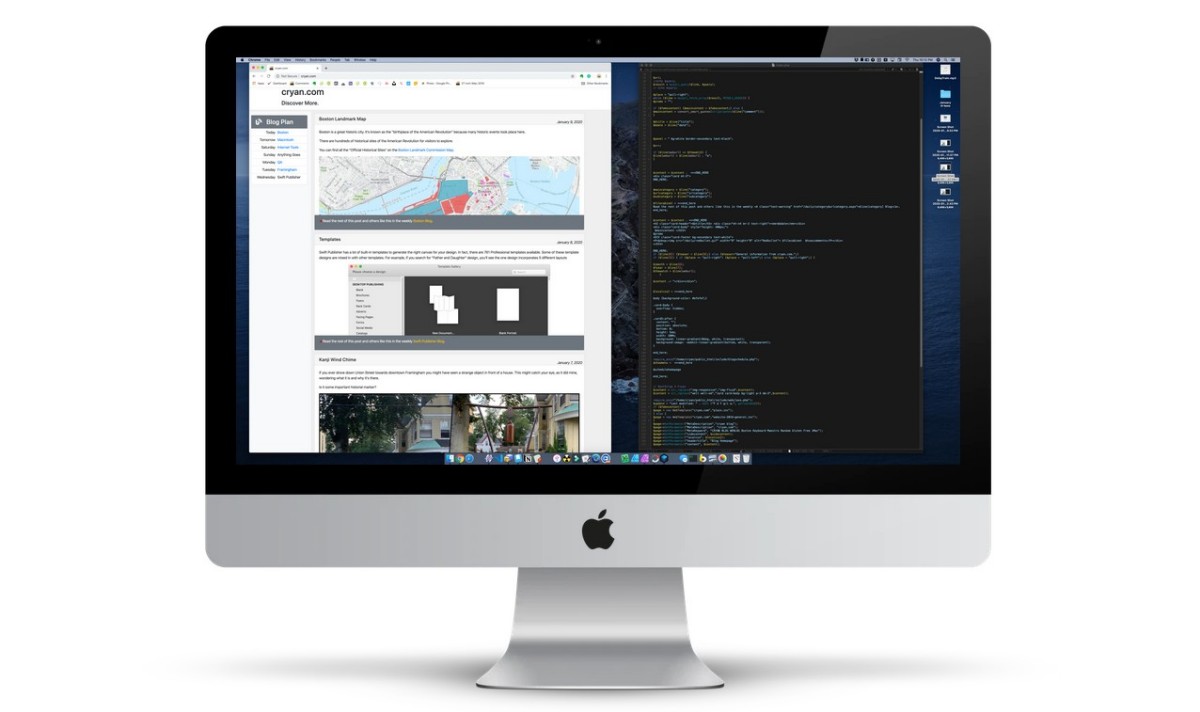
I like it because I can now edit personal websites and see them on the screen side-by-side.
TextSoap Editor
TextSoap vs BBEdit
Last Fall, I purchased TextSoap 8.5 because it was on sale for a great price on BundleHunt - $5. It regularly sells for $44.99 - I thought it was too good of a deal to pass up!
This is an application that I have briefly looked at in the past but never convinced that it would be something that I would use on a regular base.
Product Description
TextSoap is a text processing tool that automates the tediousness of removing extraneous characters, wrapping broken paragraphs, fixing quotation marks, finding and replacing common text, and so forth. It comes with more than 100 built-in “cleaners†and also lets you create your own custom solutions.
What about BBEdit Text Factory?
Some of the features and functionality can be duplicated using BBEdit Text Factory. BBEdit Text factory capability is a bit superior because you can run Unix commands as part of the action. This allows you to integrate powerful UNIX tools to your text.
BBEdit Text Factory Screenshot
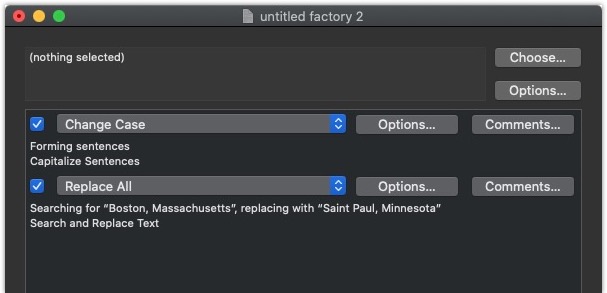
TextSoap's Custom Cleaner Screenshot
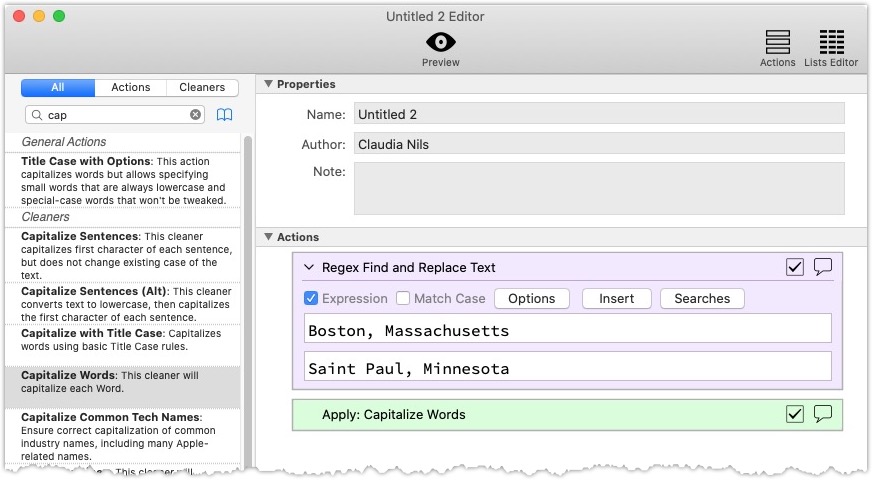
Key advantages of TextSoap
After Playing around with TextSoap for a while, I came up with several key features:
- TextSoap "Scrub" Cleaner does a great job of cleaning up the text. It's the one-stop tool to get the text looking in decent looking condition.
- The TextSoap menu option allows you to access TextSoap tools any time you have text selected - in any application, even Chrome text fields. Making it easy to fix up text where ever you are. Simply select the text, select the menu item, and the text gets replaced with the cleaned-up version. You can't do that using BBEdit!
- TextSoap Editor makes it easy to find the tools you need. The search capability gives you instant access to many valuable built-in tools.
Macintosh Year in Review
The Best Macintosh Blog post of 2019
This year there were a lot of great Macintosh Posts, I had a lot of fun learning new Macintosh applications.
Only a few posts I feel that stood out from the 52 posts made this year.

Nine Blog Post that are worth reading again
BBEdit Shortcuts - Some of my popular BBEdit Shortcuts
- iterm2 Status Bar - The iterm2 Status Bar can give you a good snapshot about your environment.
- LaunchBar Instant Send - Learn how to get more out of LaunchBar Instant Send.
- Managing the Mac Dock - Get more out of your System Dock
- New 27-inch iMac - I got a new iMac this year. Read up on what I learned from the buying process.
- Archey - Spice up your terminal login with this cool terminal tool!
- Triggers with Hot Corners - A cool trick with Screen Corners
- Dynamic Desktops - Create Desktop background images that changes all day long.
- Mosaic - Learn how to better organize your Application windows
2020 Goals
I plan on doing smaller simple posts, and not try to "cram" a software review in a single post. After reviewing a lot of posts, I feel that smaller post would have more value.
Expect to see more posts around media and tools for the 27-inch iMac with Retina 5K display.
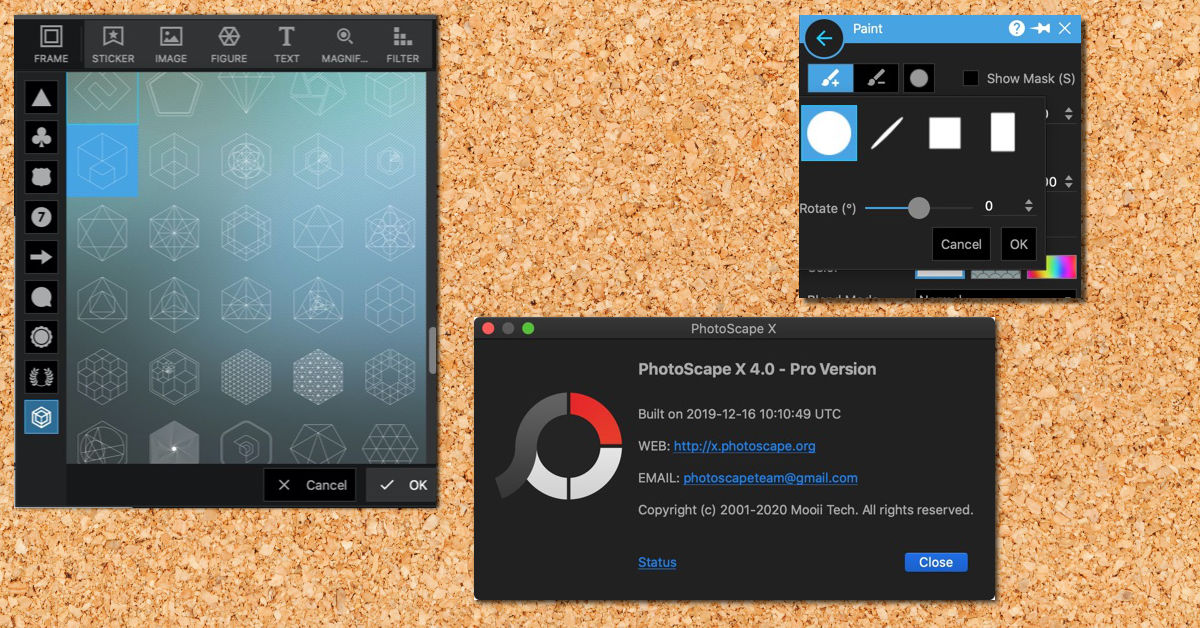
PermalinkPhotoScapeX 4.0
Great Update with lots of new features.
Every year PhotoScape X does a big update at the end of December. The 2019 update occurred on the 16th.
The nice thing about this update is that it's free! PhotosScape X is a great "must-have tool" for anyone on a Macintosh.
New Features
There are a lot of neat features in this release, here's are my favorite items:
- Users can now record actions, which makes it easy to apply duplicate actions on similar photos.
- You can now add your filters as Favorites, which makes it easy to reach common filters
- There's a new "Replace Image" filter in the Transformation section. Looks like all it does is replace the currently selected image. I am not sure the value this has.
- Lots of great Stickers - Faces, Flags and Floral. These come in handy every once in a while.
- 233 Geometric Figures which can add a unique touch to any design - These are in the last items in the figure menu. Try applying Drop Shadow and Outline for more of an effect.
- There are three new brush shapes, these are located in the Tools -> Paint. There's a new Shape option next to the Subtract brush. You can use an angle brush, square brush and a rectangle brush.
Check out the release note for all the changes in the big 4.0 update.
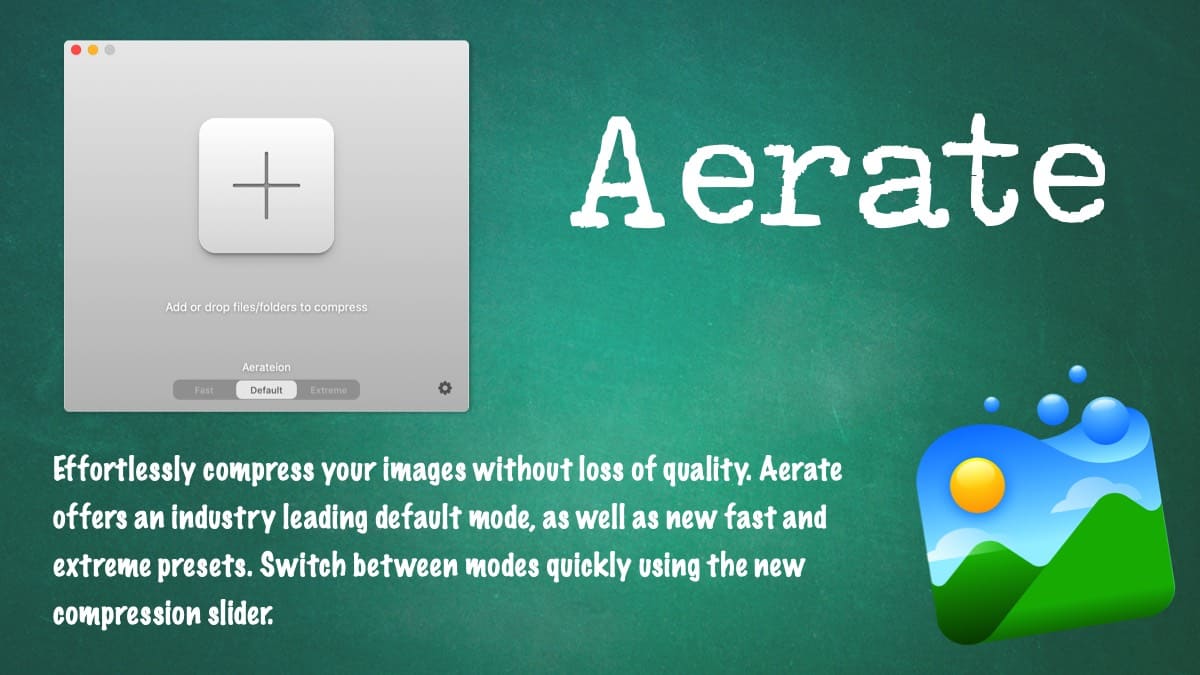
PermalinkAerate
Aerate isn't as great of an App as it could be.
Aerate is a Macintosh image compression program. It's design so that you simply drag and drop an image and instantly you get a quailty image.
Aertate is made by BZG, who makes some pretty cool applications, such as Unite and Coherence Pro.
Preferences Settings
There are 2 compression engines:
Opti - Faster Compression. (Not a whole lot of information on this.)
Zopfli - Higher compression into gzip and zlib formats but takes a bit longer than Opti. You get better results, but it will take more time to get there.
You can convert PNGs into JPGs, which can come in handy when wanting to convert a bunch of PNG and JPG images.
ShortPixel is Better
I tested Aerate against some other image compression programs and here are my notes:
Aerate wasn't able to compress all my images. Some of the images actually went up in size, but Aerate let me know that "no space saved this time." However, using the exact same image on ShortPixel, I was able to save 57%.
![]()
Screenshot to show ShortPixel was able to compress a particular image where Aerate said that it couldn't.
Good App?
Aerate is free, the Pro version cost $14.99. Aerate Pro gives you access to "Fast" and "Extreme" compression modes. In addition, you get to use the Multi-core CPU to compress a lot of images. In addition, you can Bulk-compress multiple images.
I got Aerate as part of a BundleHunt promotion. I paid about $5 for the Pro application.
Honestly, I don't think it's worth the cost. ShortPixel worked so much better, I would recommend using their image compression.
PermalinkKeyboard Maestro with Slack
Use Keyboard Maestro to overcome a Slack feature
Recently the Engineering team at Slack made changes to when Markdown actions get applied.
However, when users paste in content they have to type in Shift Command F for the markdown text to be applied.
This is inconvenient to remember to type the command every time I paste in text. Especially a lot of the content that I put in Slack is from Keyboard Maestro.
People all over Twitter were complaining about the changes.
Keyboard Maestro to the Rescue!
Then I thought, this is a perfect use of Keyboard Maestro. All I had to do was add a new action to any existing Macro, and
Here's an example of Macro with the new Keyboard Action:
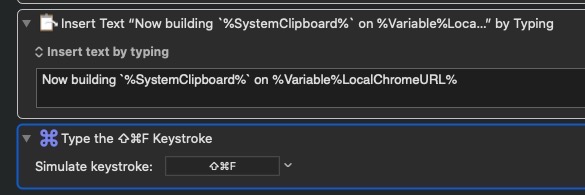
One More Thing
One thing that I can do, is create a new Macro that would always apply the Shift Command F whenever I paste in clipboard content.
This way I won't ever have to remember to type in the command.
I haven't done this - yet. I don't feel that I need to do it every time. Who knows, maybe in the future - it's nice to have that option.
PermalinkBlack Friday Watch
This is my annual Black Friday watch posting. Every year I post on things that I am looking for on Black Friday. In addition, I let you know what resources I am using to find the best deals.
Here’s the deals that I’ll be looking for on Black Friday and Cyber Monday.
Top Five Items
- USB Storage - I need something to help store files. I am trying to keep my main computer free of storage files.
- HDMI color cables - My TV HDMI cables are a mess. It would make life easier to have different color HDMI cables.
- Udemy Classes - Looking for Python and Swift classes. Right now pretty much every class is discounted to $9.99
- Cloud Storage - Maybe DropBox or Google will have some special deals.
- Desk organizers - something to help get my home office desk into a productive state.
I don’t need any software this year. However, I’ll be checking the Apple iOS Store for some good deals.
PermalinkAbout
A Mac veteran since 1989, I'm here to share my experience with tips and tricks every Friday. Witnessing the evolution of Mac software and hardware firsthand, I've gained a deep understanding of how these machines work and can help you troubleshoot any issues that may come up.
Check out all the blog posts.
Blog Schedule
| Thursday | Business |
| Friday | Macintosh |
| Saturday | Internet Tools |
| Sunday | Open Topic |
| Monday | Media Monday |
| Tuesday | QA |
| Wednesday | Veed |
Other Posts
- Apple Photos and Pro Raw
- Place Tool in Affinity Designer for Rich Text Formatted Files
- iResize
- PhotoScape X December Update
- Screen Capture with Retina Display
- Open Search via LaunchBar
- Background Removal via Finder
- How to Extract Audio from Video on Mac Instantly Using Automator
- FontDoc Copy/Paste
- Year On A Page
- LaunchBar Quick Search
- Using Instant Send with Day One
- New iPhone 14 Max
- Mosaic
- Mastering Final Cut Pro Audio: A Comprehensive Guide to 49 Logic Effects