
Irish Icons from Xicons.com
A few years ago, the folks at Xicons.com created some really cool icons. They ran frequent contests for people to submit their icons and people would vote for their favorite.
The site isn't the same anymore, it's now part of InterfaceLift and it appears that the main focus of their business is with Desktop Wallpapers. They still have an active icon area, but it doesn't seem to be as vibrant as it once was.
Back in 2002/2003, I grab a bunch of their icons. Seems appropriate to share some of the Irish theme ones.
Click on image to download the IrishIcons zip file.
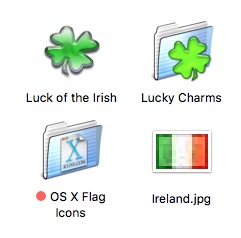
Irish Icons
In this collection by Dustin J. Craig contain these icons inspired by Lucky Charms:
Clovers, Diamonds, Hearts, Horse Shoes, Lucky Charms, Lucky You., Moons, Neon Clover, Pot of Gold, Rainbows, Red Balloons, Stars
Lucky Charms
These icons by ceruleanjen contain all the marshmallow shapes in the Lucky Charms cereal:
Clover, Heart, Moon, Shamrock, Spade, Star
As noted in the Read Me file: A few icons to celebrate St. Patrick's Day and make your Mac feel a bit Irish.
OS X Flag Icons
This icon collection contains 194 national flags and 7 Organizations, including Ireland.
AFRICAN NATIONS:
Algeria, Angola, Benin, Botswana, Burkina Faso, Burundi, Cameroon, Cape Verde, Central African Republic, Chad, Comoros, Congo, Congo (Zaire), Djibouti, Egypt, Equatorial Guinea, Eritrea, Ethipoia, Gabon, Gambia, Ghana, Guinea, Guinea-Bissau, Ivory Coast, Kenya, Lesotho, Liberia, Libya, Madagascar, Malawi, Mali, Mauritania, Mauritius, Morocco, Mozambique, Namibia, Niger, Nigeria, Rwanda, Sao Tome & Principe, Senegal, Seychelles, Sierra Leone, Somalia, South Africa, Sudan, Swaziland, Tanzania, Togo, Tunisia, Uganda, Zambia, Zimbabwe
AMERICAN NATIONS:
Antigua & Barbuda, Argentina, Bahamas, Barbados, Belize, Bolivia, Brazil, Canada, Chile, Colombia, Costa Rica, Cuba, Dominica, Dominican Republic, Ecuador, El Salvador, Grenada, Guatemala, Guyana, Haiti, Honduras, Jamaica, Mexico, Nicaragua, Panama, Paraguay, Peru, Saint Kitts & Nevis, Saint Lucia, Saint Vincent & The Grenadines, Surinam, Trinidad & Tobago, Uruguay, USA, Venezuela
ASIAN NATIONS:
Afghanistan, Armenia, Azerbaijan, Bahrain, Bangladesh, Bhutan, Brunei, Burma, Cambodia, China, East Timor, Georgia, India, Indonesia, Iran, Iraq, Israel, Japan, Jordan, Kazakhstan, Kuwait, Kyrgyzstan, Laos, Lebanon, Malaysia, Maldives, Mongolia, Nepal, North Korea, Oman, Pakistan, Palestine, Philippines, Qatar, Saudi Arabia, Singapore, South Korea, Sri Lanka, Syria, Taiwan, Tajikistan, Thailand, Turkmenistan, United Arab Emirates, Uzbekistan, Vietnam, Yemen
EUROPEAN NATIONS:
Albania, Andorra, Austria, Belgium, Belorussia, Bosnia & Herzegovina, Bulgaria, Croatia, Cyprus, Czech Republic, Denmark, Estonia, Finland, France, Germany, Greece, Hungary, Iceland, Ireland, Italy, Latvia, Liechtenstein, Lithuania, Luxembourg, Macedonia, Malta, Moldova, Monaco, Netherlands, Norway, Poland, Portugal, Romania, Russia, San Marino, Serbia & Montenegro, Slovakia, Slovenia, Spain, Sweden, Switzerland, Turkey, Ukraine, United Kingdom, Vatican City
OCEANIAN NATIONS:
Australia, Fiji, Kiribati, Marshall Islands, Micronesia, Nauru, New Zealand, Palau, Papua New Guinea, Samoa, Solomon Islands, Tonga, Tuvalu, Vanuatu
ORGANISATIONS:
European Union, IOC, NATO, Red Crescent, Red Crescent & Red Cross, Red Cross, United Nations
TurboCollage 6
Every day I send out a collage of photos to family and friends featuring my daughter. I have been doing this for six years now. When I put together the collage, it needs to be quick and simple.
What is TurboCollage
TurboCollage makes photo collages, mosaics, photo piles, grids, greeting cards, mood boards, polaroid collages, contact sheets, and more! Their website says that they have more than 55,000 active customers.
TurboCollage doesn't have any photo touch-up capabilities. You will need to touch up photos before using TurboCollage. This is fine for me because I have several applications that do an excellent job with fixing up photos.
Collage Style
There are seven built in Collage styles:
- Regular Pile - Pictures on top of pictures
- Advanced Pile - Pictures can be set to custom shapes (Hearts, Circle, Triangle etc…)
- Picture Grid - Grid of pictures (Like the Brady Bunch Intro)
- Mosaic - pictures are arranged in grid by different sizes
- Center Frame - Mosaic layout with a large center picture
- Zig Mosaic - Non-rectangular Mosaic layout
- Photohive - photos arranged in beehive pattern.
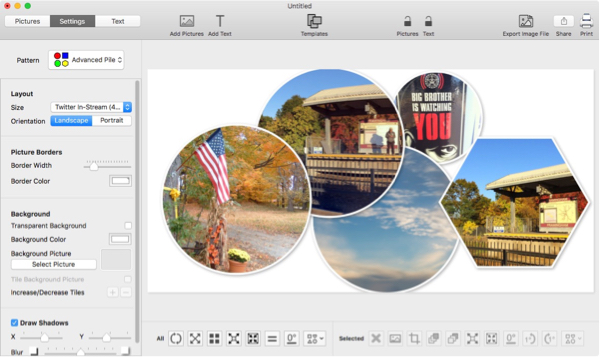
Templates
TurboCollage comes with templates broken into eight different categories. The templates are just a simple starting point to learn the capabilities of TurboCollage.
Basic Patterns, Picture Piles, Picture Grids, Mosaics, Center Picture, Zig Mosaics, Photohives, Instagram, Facebook Cover, Twitter Header Photo, Greeting Cards, Postcard.
What makes Turbo Collage Different
- Very easy to create a collage with a custom layout size
- The Picture border style adds a nice effect to final design
- Easy to adjust the layout of the images.
- You can create any layout size you need for print or web
TurboCollage vs Posterino
Both Applications do a great job making collages. I feel that for smaller collage, TurboCollage is the way to go. It’s very easy to put together a collage when you have only a few pictures to deal with.
Posterino is a great solution when you have a large set of images and want more control. You can read my review on Posterino from August last year.
TurboCollage vs PictMonkey
For years PictMonkey was my go to application for creating collages. Recently I encountered issues with my collage looking slightly out of focus. My workaround was decent but it was time to look at other solutions.
I really like how I could auto adjust pictures in PictMonkey, simplify right click and boom I can edit the picture and see the final results in the collage.
What I like about TurboCollage
I like how quickly I can generate a really good looking collage. I don't have to mess around with different settings or styles. I just add my photos, set the layout, make some visual adjustments and then export the image. It's fast, easy and I get a really nice clean picture.
TurboCollage 6 was last updated on September 28, 2015. It's available in the Apple App store or on their website.
PermalinkEUASOO Mouse Mice Z-7900 on MacOS
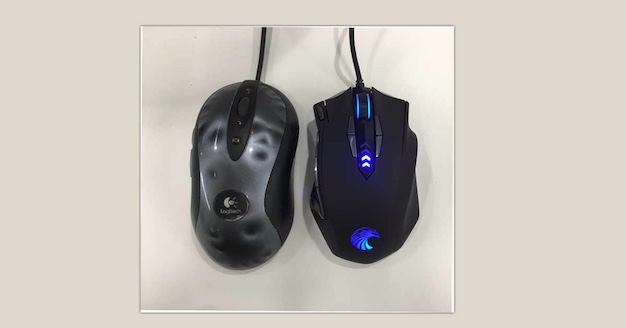
Last week I purchased a new gaming mouse EUASOO Mouse Mice Z-7900 4000 DPI Metal Base MMO/FPS High Precision Optical Gaming Mouse from Amazon. I have been looking for some replacement for my Logitech Mx 518 mouse. The mouse is several years old and I wanted to see if there was another mouse that might be more comfortable to use.
There's two reasons's why I wanted to investigate a new mouse:
- Logitech Mx 518 is old, it first shipped on August 2, 2005.
- The Logitech Gaming Software is very limited and doesn't have the ability to assign commands to the keys.
Why Use a Gaming Mouse on Daily bases?
A gaming mouse has a couple of advantages over the standard "Magic Mouse" that ships with every Apple product:
- Game Mouse are better Ergonomically fit - If your doing a lot of work on the computer, you want something that feels comfortable to hold all day.
- Extra Buttons and functionality - Gaming Mouse have extra buttons to do more work. In the 1990's having a two button mouse was good. Developers today have a need to simplify their workflow and a two button mouse just doesn't cut it. Yes, the "Magic Mouse" has various swipe settings, but who wants to remember if it the functionality is 3 swipes or 4?
Initial Impression
The mouse does have a nice soft feel whereas the Logitech MX 514 mouse doesn't have a soft top.
The light on the top of the mouse is pretty cool.
There are no drivers or MacOS software that comes with Z-7900. The standard mouse functions will work out of the box, but you'll need to purchase a third party driver to use the extra mouse functions, speed and acceleration.
The mouse is seen as a "USB Gaming Mouse," Vendor ID: 0x04d9 (Holtek Semiconductor, Inc.)
Here are some options and my experiences with getting the extra buttons to work on the Mac out of the box:
USB Overdrive
- Only Supports the extra Button 4 and Button 5 (Buttons in front of the thumb and behind the thumb)
- Ability to assign AppleScript to key clicks. (Which meets my needs)
Keyboard Maestro
- Only Supports the extra Button 4 and Button 5
- Awesome ability to assign functions to the extra buttons.
Better Touch Tool
- No control over the extra buttons.
- Can only control the main click and double click.
SteerMouse
- Can control 4,5,6,7 Buttons. (Those are the buttons around where the thumb is.)
- Doesn't have access to the buttons at the top of the mouse.
- No support for assigning command keys
ControllerMate
- Can control 4,5 Buttons.
- Very complicated to use and learn, it may have more power than Keyboard Maestro. I may re-visit in the future.
Driver Hack
I have read that there is a way to hack the driver to get all the buttons to work. This will involve me reinstalling Parallels to get it working. I haven't installed the application since my computer crashed last month.
I'll be sure to post my experience soon.
PermalinkPrivate File
In 1996, Aladdin Systems came out with a cool piece of security software called "Private File." This software allowed users to encrypt any file and send it securely.
From their documentation:
Why is the product called Private File?
That's just our way of letting you know that when you make your files private (by way of a simple drag and drop action), they will be protected with strong encryption as well as bring compressed -- using the award-winning Stuffit compression technology. The private files you create can be sent anywhere in the world, thanks to our cross-platform versions for Mac and Windows and because we also have a legally exportable (outside the US) version!
Private File used industry standard algorithm called MD5. The International version would use 40-bit encryption while the domestic version used 128-bit encryption.
Private File was available for Macintosh System 7.0.1 and Windows 95 and NT 4.0.
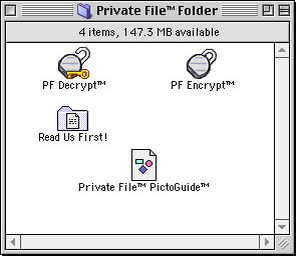
Easy to Encrypt and Decrypt
Private File works by Drag-Drop. You take any file or folder, drop it on the "PF Encrypt" icon, type in a secure password, and it will compress and encrypt very quickly.
Encrypted StuffIt archives created with the Private File utility will have .pf extensions.
To Decrypt, simply drag the file with the .pf extension to the "PF Decrypt" application, enter the password and it will decrypt the file.
Private File was discontinued sometime in 1999. Smith Micro Software acquired Aladdin Systems in 2005. (Note Aladdin Systems had to change the company name in 2004 as part of a trademark settlement from Aladdin Knowledge Systems.)
Today's Solution
If you're looking for the same functionality in Macintosh OS X world, Stuffit 16 is a good solution. You have the same drag-drop flexibility as Private File with today's compression technology. Stuffit 16 offers 512-bit encryption.
We come a long way in software. When Private File came out it cost $49.95. Today a digital copy of Stuffit 16 only cost $9.99
PermalinkArt Director's Toolkit
The Art Director's Toolkit 4 came bundled with my Powerbook G4 computer. The application is a toolbox of useful mini-apps for graphic designers.
The current product description:
Art Directors Toolkit (ADT) is the "Designer's On-screen Toolset" for Artists and Designers working with digital media. Always a one-click-away companion dedicated to speeding up the design process, ADT works almost by stealth whether using Illustrator, Photoshop, InDesign, QuarkXpress, Dreamweaver or any tool to create digital media and websites. No more cluttering your desk or desktop with stickies, swatch books, calculators and google searches. ADT provides all of the obscure calculations and information designers need on a daily basis.
I haven't used the application that much when I got my Powerbook. I thought it was worth looking into and seeing if there were many changes in version 5.5.
The only change that I can see between the two versions is that version 5 included a new Launcher. The Launcher allows you to store your commonly used applications, folders, and files. It's a useful tool to organize and open documents.
Useful Art Director's Toolkit Functionality
There are a couple of useful things that I found in Art Director, after no opening the application for a couple of years. My Powerbook G4 is not collecting dust in the basement, it's on my home desk. I just don't open every single application on my computer.
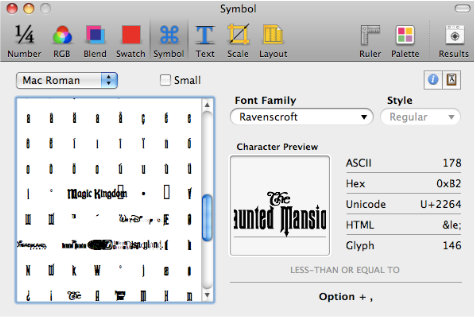
Symbol Tool
The Symbol Tool allows you to see every single character of a selected font. This is useful when you have special fonts that have some extras. For example, the Ravenscroft Font includes some Disney Logos.
Using Art Director's Toolkit, I can see that if I type Option and, I can get the Haunted Mansion logo.
Blend Tool
The Blend Tool gives you the ability to mix different colors to see what the results would look like. It's a neat way to play around with colors and to see how they interact with each other.

Other tools in the toolkit include, Ruler, Number, RGB, Swatch, Symbol, Text, Scale, Layout, Palette and Launcher.
Getting Art Director's Toolkit
You can download Art Director's Toolkit from code-line.com website. There is a 15-day trial, after that it cost $24.95.
If you're a graphic designer and like to play around with colors and sizes, I would suggest checking out the software. At least download the trial and see if the tools can make your life easier.
PermalinkFontDoc
Its good to have a lot of fonts available in your Font Catalog. However, it can be tricky to decide on the perfect font for a headline or graphic.
Having a single page reference can be useful to figure a practical font that expresses your message the best.
Font Book
Apple Font Book allows you install fonts and to view Font designs. You can't see different typefaces side-by-side to see which one looks best for the design.
The Font Book does include a print functionality. Basically, you select the fonts, then select Print and you can see they various typefaces. You can print to PDF to use this later.

It's nice but there's not much configurations.
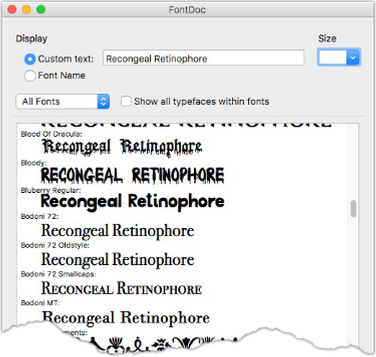
FontDoc to the Rescue
With FontDoc, you can apply a customize text and determine the preview font size. This makes it really easy to pinpoint the best font to use.
Checkout this preview for "Recongeal Retinophore":
The neat thing is that I can create an RTF document that I can reference at a later date.
FontDoc is free. I find it to be a useful Utility application to have. You can download FontDoc from Allen Smith website.
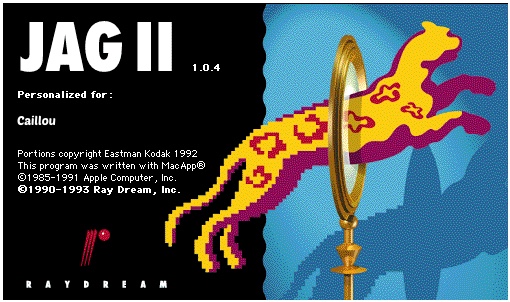
PermalinkJAG II
Back in the early 1990s Ray Dream created a cool image enhancement utility called Jag II. The program would help remove jagged edges from images.
This is from their press release from April 13, 1993:
JAG II features a completely revised edge detection algorithm which finds the jagged edges in an image -- whether the image is black and white, eight-, 16-, 24- or 32-bit color -- and compares them to the background. JAG II determines whether to use the original technique of adding intermediate colors to blend the edges or to take advantage of the new resolution-boosting algorithm to maintain the document's color palette and smooth the jagged edges through increased resolution. This ability to maintain the color palette is a vital tool when working with monochrome images on laser printers which don't support the use of the intermediate color (gray), or when a restricted color palette is in use. The added resolution allows a crisp, clear image at any size.
One of the things that I liked about was the design of cool splash screen.
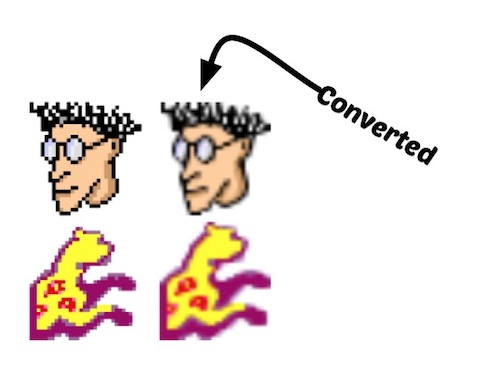
A problem with JAG II is that it doesn't have any support for JPEG images. It supported opening PICT, Tiff, Photoshop 2.0, MacPaint, Quicktime Movie, AVI, Autodesk Animator, DV, Animated GIF, SMIL, Movie, Pictures, PICS and Graphic Files.
If you have a lot of images, you could use the Batch Processing. However, the application doesn't always do a great job. Check out the rendering of this graphic file from 1.0.4
Ray Dream was purchased by Fractal Design in 1997.
PermalinkKant Generator Pro
Kant Generator Pro is a text application written by Mark Pilgrim for the 68k Macintosh. The application had the ability to create some very creative random text using various modules.
The application hasn't been updated to work on Mac OS X environment. There was some development work done about 10 years ago to port this over to Carbon code, but the developer ran into all sorts of difficulties and gave up on the project.
What is Kant Generator Pro?
The best way to understand the application is from the author. This is the description of Kant Generator Pro from the "About Menu" in the application:
Kant Generator Pro was originally designed to generate text that vaguely resembles Immanuel Kant's Critique of Pure Reason, a brilliant and revolutionary piece of philosophical writing which, for some time now, has been serving as the fourth leg of my wobbly refrigerator. It has since been expanded to allow you to generate anything you like. Several modules are included with this program which can create anything from thank you notes to excuses for being late to work. You can also design your own modules with the full-featured module editor.
As Kant Generator Pro once said (and may say again some day): "Philosophy teaches us nothing whatsoever about philosophy." Words to live by.
I found Kant to be an amusing application. It's fun to see what creative sentences that would be generated. The text content would be good when you need a placeholder text and don't like using Lorem Ipsum text.Examples of The Excuse Module
Three example runs of the Excuse Module:
I stupidly plunged a leather punch through my son's leg, and when I was waiting for the repairman to get to my house there was this unspeakable fire, and then while I was scraping the strewn debris from my teeth, there was this explosion. Then I suffered a bout of severe paranoia, then there was this terrible hail storm, and then while I was scraping the bone chips from the floor, I suffered a petite mal seizure
Skip, this is Craig Michaels. It's sometime around 2:45 in the morning and I'll be a little late today. There was this fire, and when I was waiting for the insurance adjustor to arrive our dog contracted AIDS, and then while I was picking the broken glass out of my mouth, there was this cyclone, then there was this traffic jam, and when I was waiting for the towing company to show up our dog caught pneumonia...
"Excuses, Excuses" is based on the remarkable reasons a former coworker of mine would come up with for why he couldn't come in to work. The names have been changed to protect the guilty, but some of the instantiations are pretty darn close to reality. - Mike W. Miller
Super Vectorizer 2
Super Vectorizer is a professional vector-tracing app that automatically converts bitmap image like JPEG, GIF, and PNG to clean, scalable vector graphics such as AI, SVG, DXF, and PDF. It supports tracing of color and grayscale, black-and-white, skeletonization, and line, as well. Super Vectorizer uses a totally new image-quantization algorithm that produces more natural color after vectorization. (Whew! That's a long complex description.)
Basically Super Vectorizer will take an image and convert it to be a scalable graphic file. This is useful if you want to make a low-quality image to display awesome in a high-resolution environment.
This is a very useful application where you want to convert a trace that you made with a pen/pencil into a vector object so that you can scale it to fit in any environment. If you don't convert it, when you take a scan file to a higher resolution image, the image may have jagged edges.
Converting a file to a vector format, helps make your graphic file look good in any situation.
Exports to four different format type:
- SVG - Scalable Vector Graphics is an XML-based vector image format for two-dimensional graphics with support for interactivity and animation.
- PDF - Portable Document Format
- AI - Adobe Illustrator Format
- dxf - AutoCAD format
Tip: Affinity Designer users should save files in the AI format.
I found the application to be somewhat useful to convert graphic files into vector objects. The more colors an object has the more blurry the final results may look. It takes a while to figure out all the different adjustment that makes your final image look good. The preview helps you figure out which combo works best for your particular image needs.
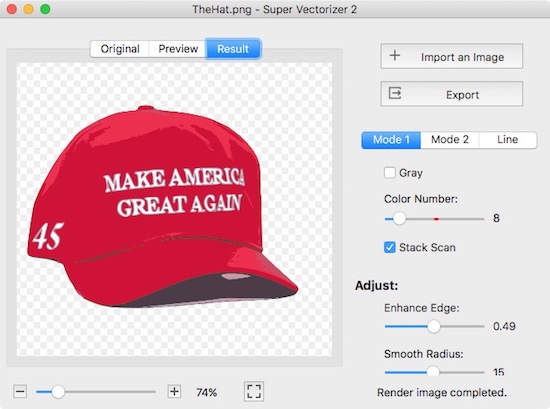
Converting Donald's Trump hat to a vector format.
Check out the "Make America Great Again" vectorized hat that was done using Super Vectorizer 2
Purchase Super Vectorizer 2
You can buy Super Vectorizer on the App Store. It's currently on sale for $9.99 (Regularly $29.99). It's a good deal for anyone that likes to convert images into vector format for some are work.
PermalinkimageSnap
ImageSnap is a Public Domain command-line tool that lets you capture still images from an iSight or other video source. You can use scripting tools to automate when to take pictures.
Someone wrote a BASH scripts to take a picture of someone that has stolen their laptop computer. Pretty cool way to use the tool.
Example Script
This is an example BASH script I wrote to send a picture of me when I log into the computer every morning:
imagesnap -q -w 2 ~/Desktop/$(date +%y%m%d%H%M%S).png
<?php
$files=shell_exec("imagesnap -q -w 2 ~/Desktop/$(date +%y%m%d%H%M%S).png");
?>
By default the picture will use the laptop camera, so if I hook up an external display with a camera it won't use that. I added the 2 seconds warm up because without the warm up the picture appears to be dark.
I have an action in Keyboard Maestro to enable the script to run within a minute after I log into the computer.
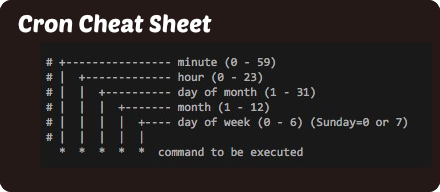
Cron Job
You can easily set up a file, using either of the above examples and run a cron job:
31 17 * * * user /path/to/file.sh
I can see if I am in the same mood in the morning as in the evening.
Here's a quick guide to what each item on cron line means:
About
A Mac veteran since 1989, I'm here to share my experience with tips and tricks every Friday. Witnessing the evolution of Mac software and hardware firsthand, I've gained a deep understanding of how these machines work and can help you troubleshoot any issues that may come up.
Check out all the blog posts.
Blog Schedule
| Thursday | Business |
| Friday | Macintosh |
| Saturday | Internet Tools |
| Sunday | Open Topic |
| Monday | Media Monday |
| Tuesday | QA |
| Wednesday | Veed |
Other Posts
- OcenAudio Vs Fission
- Mosaic
- OBS Studio
- How to Save and Add Your Own Preset Templates in Pixelmator Pro
- Page Curl in Graphic Converter
- Blackmagic RAW Speed Test
- Explore GarageBand's Vocal Effects: 25 Unique Voice Options for Creative Audio Production
- OmniGraffle 2020 Calendar
- Managing the Mac Dock
- Kant Generator Pro
- Mission Control Tips and Tricks
- Fix GoPro FishEye on a Mac
- OmniGraffle
- Happy Birthday Macintosh
- Triggers with Hot Corners