
Apple Photos and Pro Raw
RAW Photo editing made easy
You might be surprised to know that the Apple Photos app allows you to edit PRO RAW photos. No need to buy an expensive app in order to edit your PRO RAW photos. (This is useful if you just got the new iPhone 14 Pro.)
There are a lot of steps involved in editing a photo but Apple makes it so easy that you don't have to take a course to learn how to do it, while still making it look amazing.
A RAW image can be adjusted in Apple Photos in thirteen different ways.

Light
In order to control the overall light in the picture, you can use the slider to adjust it as you would the sunlight.
Color
Use this option when you want to make all the colors brighter or make the photo black and white.
Black & White
When you want to transform an image into black and white, select this option. When you want your image to look better without color, this is a unique effect.
Retouch
Using this tool, you can fix up some spots on your photo such as sun glare or dust. I recommend doing this after you've adjusted your colors.
Red-Eye
Red-eye issues can easily be fixed with this quick retouch tool. Simply select the right size brush and indicate where the red-eye is located on the image.
White Balance
You can easily fix a bad color by pointing out where the white pixels need to be in the image. That is what the White Balance tool does. You simply point the picker to where the white pixels need to be in the image and it is instantly corrected.
Curves
The Curves adjustment allows you to adjust the brightness, contrast, and the look of specific colors (red, green, blue), as well as adjust settings for the black point, mid-tones, and white point.
Levels
You can adjust the levels in a photo to lighten or darken areas and adjust the contrast in the photo. You can adjust settings for the black point, shadows, mid-tones, highlights, and white point. You can also change the look of specific colors (red, green, and blue).
Definition
It is possible to adjust the definition settings of a photo to add contours, shapes, local contrast, and definition of mid-tones. I have found this has the greatest impact on the sky colors.
Selective Color
Use the color picker to select a color in the image, once selected use the Hue, Saturation, Luminance, and Range to make that color pop out.
Noise Reduction
Use noise reduction to neutralize noise if your image was taken in low light. Sometimes this works, and sometimes other settings deal with noise reduction better.
Sharpen
Using the Sharpen tool on a photo, you can make edges crisper and more defined. This helps some areas to stand out more in a photo.
Vignette
Vignettes can darken the edges of a photo and emphasize the center of the image. You can adjust the size and darkness of vignettes to create the look you want.
PermalinkPhotoStyler
Abandoned Photo Design App
Earlier this week, I was trying to remember an application I saw that lets you import any image and instantly see previews of different designs and styles.
The reason I was thinking of this app is that I was trying to figure out a way to display a bunch of images in a unique way - instead of using some basic collage. On my own, I didn't remember the name of the app.
After many searches, I found the software: PhotoStyler by Neatberry. I never bought this application, but I had it on my watch list in 2017/2018. At the time, I thought it was a bit expensive at $29.99. My goal was to find out if it was included in various bundles and black friday deals at a lower price. That never happened, and I moved on to other apps.
Welcome to PhotoStyler window appears whenever you open the App.
Abandonware?
There has been no update on the app PhotoStyler for a long time, and the app appears to be abandoned. It is not available on the App Store since it was abandoned. The application Created/Modified date is September 24, 2015.
Fortunately, I managed to find a Disk Image of the application and managed to install it under macOS Monterey (Version 12.6) without any issues. After it was installed, I got a warning about it being from an unknown developer. This was to be expected.
I can only use the application in Demo mode as I don't have a license key.
Sample Screen Shots
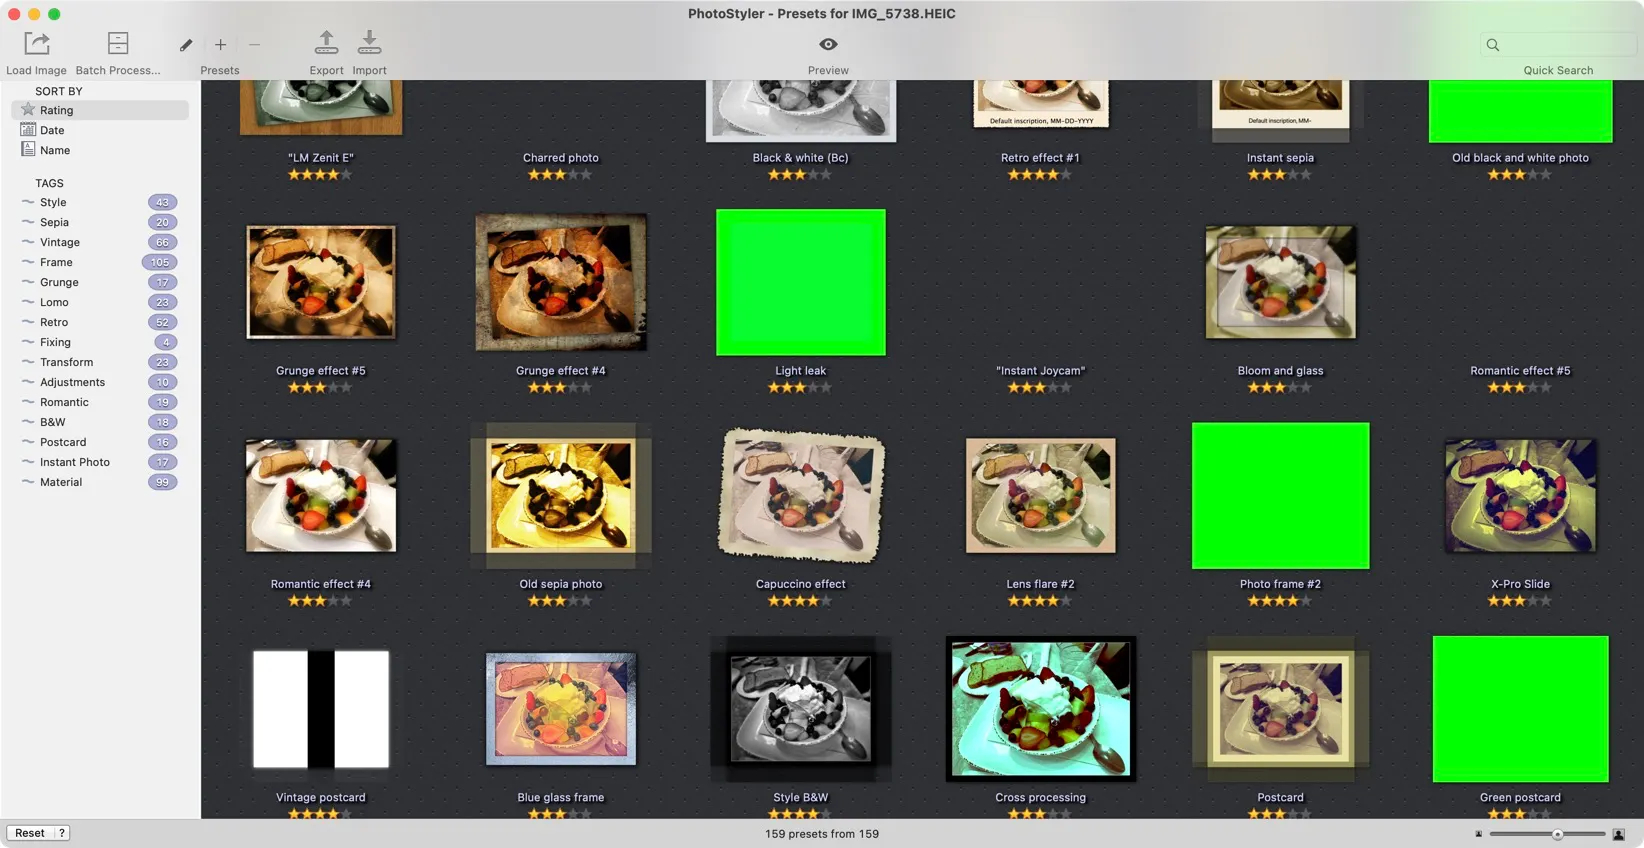
After you upload an image PhotoStyler works its magic and creates some designs for you. There are 189 possible presets. There are many that are not showing which I believe is related to the application not being updated in seven years.
Once you find the design you like. You simply double-click on the preview image to open up the editor.
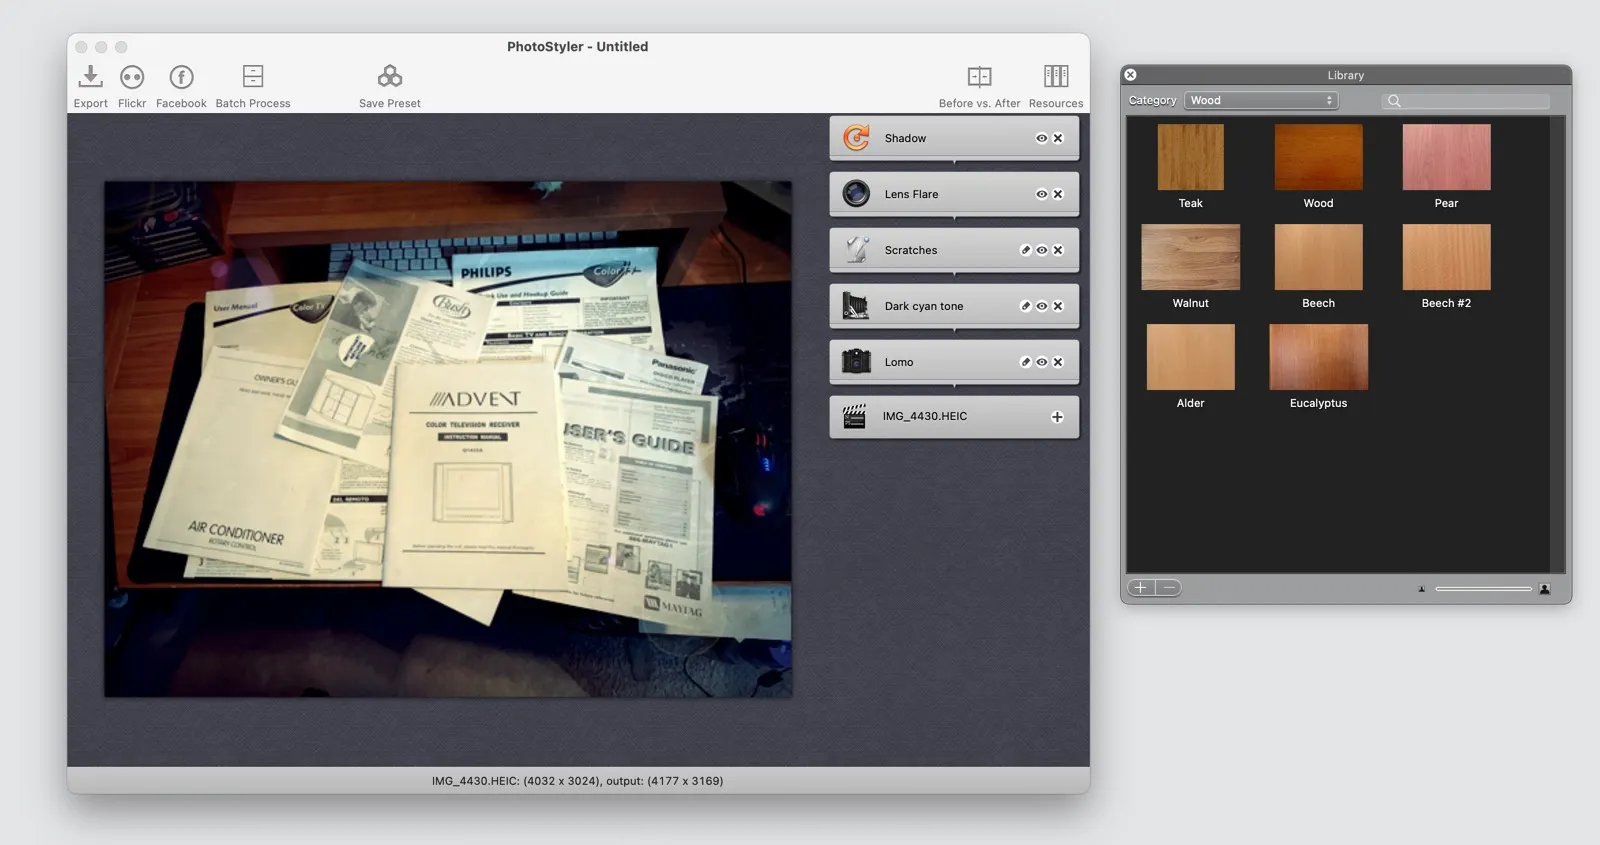
Once you have the rough preset selected, you can change all sorts of aspects. You can replace the background, change colors, add lens flare and so much more.
After your done with your design, you can add it as a preset so that you can use it in future designs from PhotoStyler.
PermalinkBest Macintosh Apps
Over the past 5 years, these are the best apps I've used
It's five years ago today that I purchased Keyboard Maestro. It's a great application that I use pretty much every single day.
I was reminded of other apps that I purchased years ago and still use regularly, so I created this list of the most useful apps that I purchased over 5 years ago.

BBEdit - (BBEdit 6 - September 6, 2000) - BBEdit is the only application that I have ever used since System 9. I have been using it almost continuously since 1997. It is a fantastic tool for dealing with text related issues on the Macintosh.
OmniGraffle - (OmniGraffle 4 - November 8, 2005) - It was with OmniGraffle version 4 that I started my journey with OmniGraffle and later upgraded to OmniGraffle Pro 7. This application is a great tool for creating organizational charts and laying out images.
Transmit - (Transmit 3 - September 27, 2006) - The Transmit application is my go-to application when it comes to transferring files. I use it for both work and personal files. It is easy to set up bookmarks so that I can quickly go to where I need to go for my files.
Fission - (Fission - March 22, 2008) - My favorite way to edit an audio clip is to drag and drop it on the Fission icon in the dock, which makes it easy for me to do simple modifications such as enhancing the sound and splitting an audio clip.
Affinity - Affinity Designer (October 18, 2016) and Affinity Photo ( December 11, 2016) - With the advent of the Affinity Photo and Affinity Designer, I am no longer reliant upon Adobe Software to edit my images and create my creations. These applications are simple to use and make it easy for me to create the results I wish to achieve.
LaunchBar - (November 25, 2016) - From opening applications, to simple calculations, to finding information quickly - LaunchBar is a great way to make using MacOS easier. It allows us to open applications, to perform simple calculations, to search the internet quickly.
Image2icon - (December 1, 2016) - It is very important to me to have colorful folders. That is why I use Image2icon to create folders with images and symbols. This makes it much easier for me to quickly find the folder I am looking for. I use Image2icon any time I need to clean up my computer.
PhotoScape - (September 11, 2017) - My favorite image tool is Photoscape X. I use it frequently to resize images, fix some minor problems and more. It is one of the easiest and most useful tools I use.
Keyboard Maestro - (September 23, 2017) - With Keyboard Maestro, my words are incredibly powerful. I can use macros to show the correct date format in the application I'm using, insert common feedback snippets, and get the latest weather information. The application is really powerful, and once you learn what it can do, you'll be eager to use it.
Permalink6 Tips That Will Help You Get The Most Out of Affinity Photo
Design Ideas to fix Designers Block
Creativity is a tricky beast to tame. But with the right tools, you can find inspiration in unexpected places. There are so many ways to get creative that you might struggle to keep track of them all. Affinity Photo is one of the most underrated photo editing tools on the market. Not only does it have some great new features for professional photographers and enthusiasts, but it also comes with a range of useful filters and options that can help you get more from your images. These tips will give you a brief overview of the best Affinity Photo features and how they can be used creatively in your work as a photographer or digital artist covering everything from angles to lighting effects, user-created filters, and more.
Basics: Get to Know the Tools You Have
The first step towards getting the most out of Affinity Photo is to get to know its basic tools. This is true for every program you use for photo editing, but it's especially important for Affinity Photo because of its wide range of features. Many of these aren't immediately obvious, but they can make a huge difference to how you approach your images. Here are some tips on the basic tools and features you should be aware of when getting started with Affinity Photo. - Selection tools: These are important for everything, but especially for retouching. You'll want to use the selection tools to find and remove anything you don't want in your image. - Transform tools: These let you move and manipulate parts of your image. You can use them to adjust the perspective, size, rotate, and flip the image. - Layer tools: Every image you create in Affinity Photo will be composed of layers. These are very important and let you do things like changing the position of the layers, adding filters, and stacking images together. - Histogram: This shows the brightness levels in your image. It's important for retouching and color correction.
Don't Be Afraid to Go Vertical
If you're a portrait photographer, you'll be familiar with being asked to take a shot in landscape format. In fact, you may have been asked this countless times, always with the promise of better photos. But is there any truth to this? The short answer is yes. The longer answer is that you should shoot portrait format if your subject is people or animals. This is because it makes them look more natural and less distorted. In landscape format, you tend to have a slimmer figure, which is okay for buildings and scenes, but not so great for people. You might also choose to shoot portrait format if you're trying to draw attention to specific areas of your image. For example, if you're taking pictures of fruit, you may want to shoot in landscape format. This way, the focus is on the shape of the fruit. If you want to draw attention to the fruit's color, however, you should shoot portrait format. This is because you're only focusing on the top and bottom of the fruit.
Change Your Point of View
A good tip for getting the most out of your images is to change your point of view. This simple shift can make a world of difference. You might be so focused on capturing the perfect shot that you forget to look around and experiment with different angles. This is great for your creativity. It can also be helpful in terms of making retouching easier. If you have a pesky object in the way of your shot, you can try shooting from a different angle so that it's out of the frame. Once you have the final image, you can always move the object back into place. This is especially helpful for things like power lines or other distracting elements. It can be much easier to remove them from your shot when you don't have to try to edit them out later.
Don't Be Afraid to Use Filters
There are many people who believe that photo filters are used only by novices and people who can't take good photos. This is not true at all. You can use filters to experiment with new effects and create artistic images. You can apply filters to your images when you want to try something new or are struggling with retouching. The filters in Affinity Photo aren't limited to the standard effects, either. You can use them to create a wide range of different styles. There are also unique tools and options that let you alter the intensity of the filters. You can create your own filters, as well. There are many different types of filters and effects you can use in Affinity Photo. One of the most popular is the Black and White filter. This can be used to create a classic and artistic look. Saturated filters can help you find bold and vibrant images. There are also many creative and artistic filters that you can use to add a touch of creativity to your photos.
Let There be Light
Light can make or break an image. It can either create a beautiful and engaging shot or a dull and unappealing image. You can use light creatively to make your images more interesting, though. If you throw shadows and create silhouettes, you can create dramatic and powerful images. Keep an eye on the light and experiment with different positions for your subject. If there's not enough light, you can use artificial lights to fill in the shadows and create a beautiful image. You can also try different color filters to change the mood of your images. Experiment with warm and cool tones to find the perfect color scheme for your photos. You can even try manipulating the light to create interesting effects. If you want to create a streak of light, you can use an object to reflect the light.
Take Advantage of Shapes and Patterns
If you're struggling to come up with new designs or are just looking for some creative inspiration, try using shapes and patterns in your photos. - Circles: These can be used to create striking and eye-catching images. When you use circular objects, you can create beautiful and artistic photos. You can use these in your shots and in retouching and create some interesting effects. - Squares: Squares are another shape that you can use to create stunning images. You can use these in your shots by framing your subject in a square. You can also use them to create interesting effects during retouching.
Wrapping Up
Affinity Photo is an incredibly powerful program for editing and designing images, but that doesn't mean you have to use all of its features. There are many things you can do to get the most out of Affinity Photo, from understanding its basic tools to experimenting with different angles and filters. With the right approach, you can use this program to create stunning images without any effort at all.
PermalinkNew iPhone 14 Max
PreOrdered the new phone
This morning I preordered an iPhone 14 Max. It’s been four years since I got a new iPhone. I am pretty excited about getting the latest iPhone.
I know there are some people that say that the iPhone 14 isn't that much different than the iPhone 13. It really doesn't matter to me what people say. Based on the specs of the iPhone 10 and the iPhone 14 - its really going to be an upgrade for me.
Things That I am Excited About
Always On Screen - I have my iPhone at my desk and it will be nice to use it as a clock and see other widgets at a glance.
48 Megapixels - I can't wait to see what 4x the resolution in ProRAW will do to some landscape photos - especially in the fall.
Telephoto - Taking telephoto pictures can change how I see everyday things. I can't tell you how many times I wanted to take a really good macro photo.
Depth Effect on Videos - This will be a cool effect to apply to videos taken after capture.
New Blog Posts!
Once I get the new phone, I'll blog about my experience with the new phone. The phone isn't expected to arrive until early October.
PermalinkJira Search using LaunchBar
Get to Your Ticket Quicker
If you're a fan of the popular macOS utility LaunchBar, you know that one of its best features is its ability to search for and launch just about anything on your Mac. But did you know that you can also create custom search templates in LaunchBar?
With a little bit of effort, you can create custom searches for just about anything, including websites, files on your computer, or even specific items within those files. In this blog post, we'll show you how to create a custom search template for LaunchBar.
In this example, we'll create a custom search for your company's Jira board. Simply paste in your ticket number and a new browser window will open to that Jira page.
How it Looks
How to Setup
First things first: open up LaunchBar's Index (you can do this by pressing Command-Space to bring up the bar, then type Option-Command-i).
Click on the "Custom Search Template". Then, click the "+" button at the bottom of the window. In the resulting dialog box, enter "Jira Board" as the action name and paste your board's URL into the "URL template" field. Finally, click "Save." Your new search action will now be available whenever you launch LaunchBar.
Note: The asterisk should be placed where you want the ticket to appear. Example: https://jira.company.com/browser/*
Completed
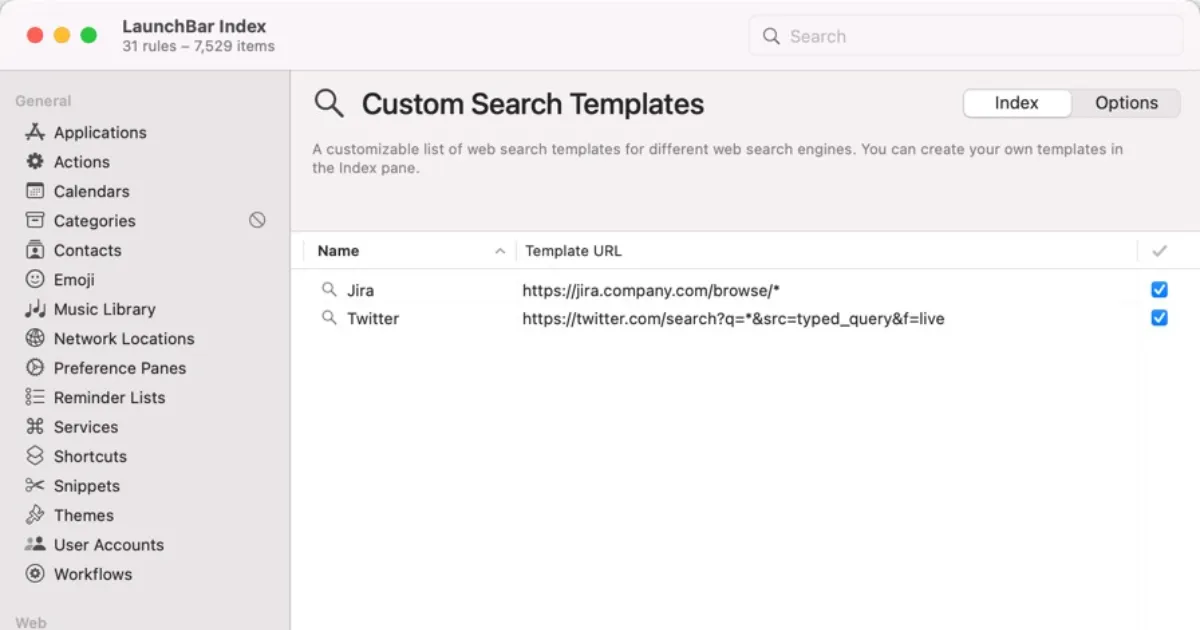
Completed Example
Mission Control
Focus on Your Apps
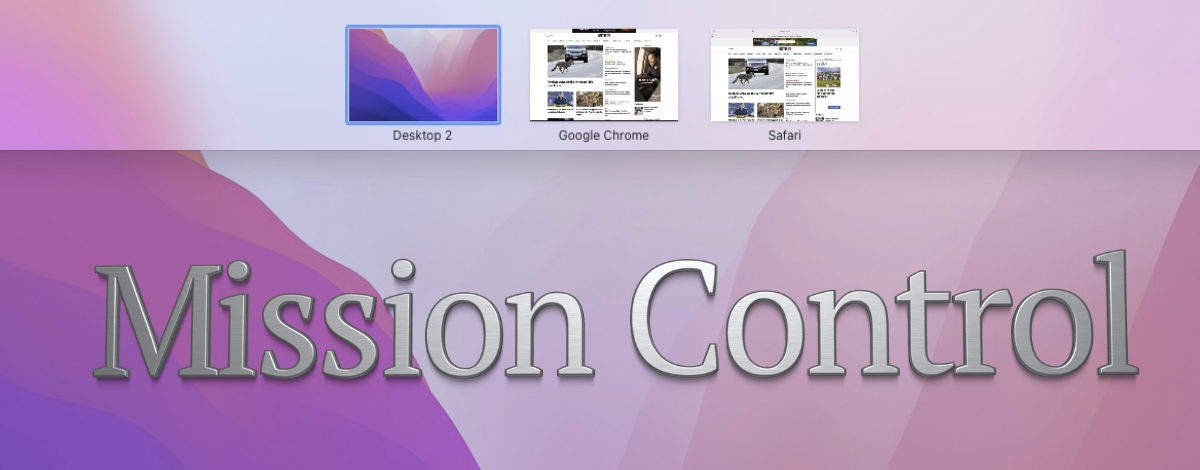
Mission Control is an essential application for anyone using an Apple computer. It provides a centralized location from which you can manage all of your open windows and applications.
To open Mission Control, press the F3 key on your keyboard, or click on the Mission Control icon in the Dock. From there, you can use the tabs at the top of the window to switch between running applications, windows within those applications, and spaces (multiple desktops). You can also use Mission Control to quickly move windows between spaces.
If you have multiple displays connected to your computer, each display will show up as its own space in Mission Control. This makes it easy to move windows back and forth between displays without having to drag them across your desktop.
Mission Control is a great tool for focusing on one task at a time. You can, for example, have separate work and home spaces. This way you can keep your work life and personal life separate. You can also use Mission Control to focus on specific tasks. For example, if you need to study for an upcoming test, you can create a space specifically for studying and then close all other applications except the ones that you need for studying.
PermalinkAirport Express Setup
It is not possible to set up Airport Express with the latest version of Mac OS
During my recent move, I discovered a few Airport Express stations that I forgot that I had. While setting up my home office, I thought it would be interesting to see if I could still use them to set up my Epson Stylus CX7800 printer.
My Printer
The Epson Stylus CX7800 printer is a scanner/printer that I got many years ago. It doesn't have any wireless capabilities that are pretty much standard in today's printers. The printer was released on July 27, 2005, and has not been officially discontinued by Epson.
The newer version of this printer is the Epson Stylus Photo RX595 All-in-One Printer. It still doesn't contain any built-in wireless functionality.
Setting up the Airport Express
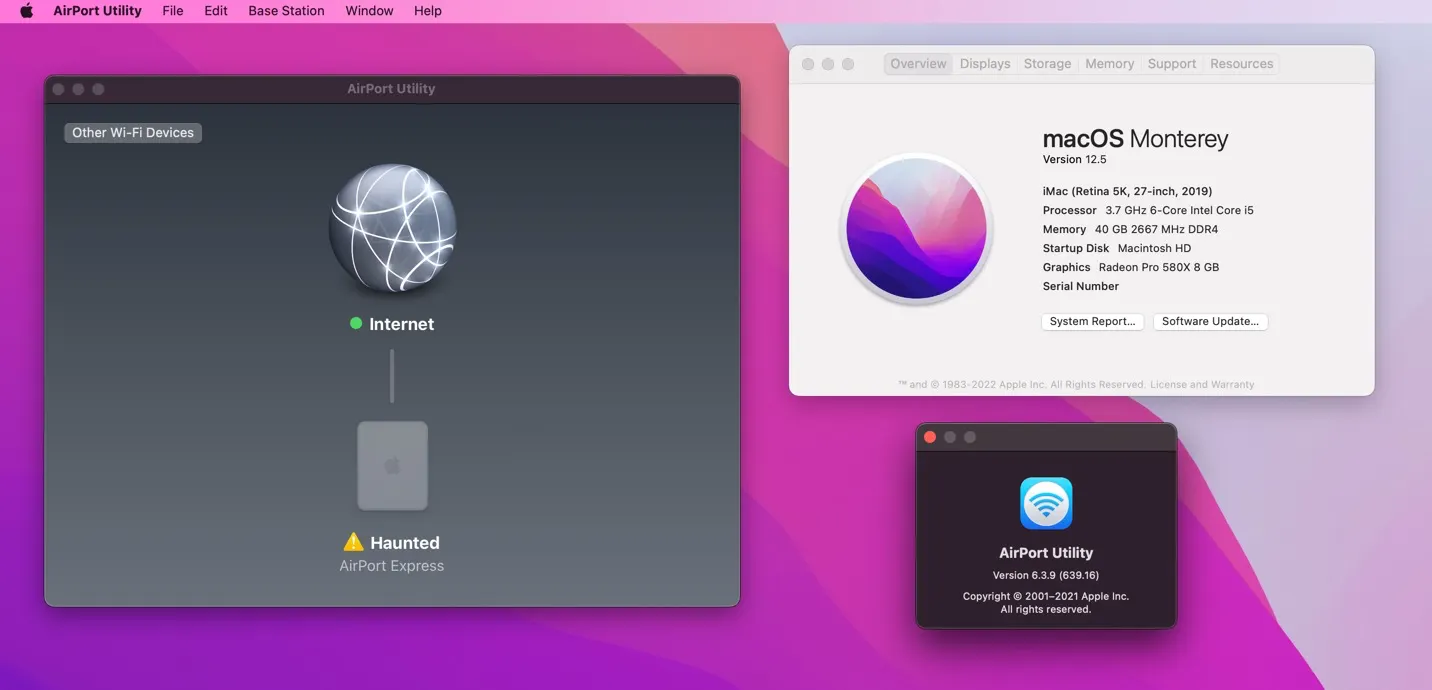
AirPort Express is not found!
I tried using the latest Airport Utility on my iMac running macOS 12.5 (Monterey). The computer was not able to detect the Airport Express. I tried connecting the ethernet cable from the Airport Express to the iMac and setting it up that way, but the AirPort Utility didn't recognize the device.
In the above screenshot, you can see that another AirPort Express device was found. This was set up using my Powerbook computer:

The only way that I was able to set up the Airport Express was to use my Powerbook G4. It's currently running Mac OS 10.5.8 (macOS Leopard). When I plugged the Airport Express in a nearby wall outlet - the AirPort Utility was able to detect it.
Note: The location of the Airport Express isn't an issue as the two computers are sitting next to each other.
I learned that the iMac/Monterey is no longer able to setup an AirPort Express device. However, when it is set up, I can connect to it to print or to send music.
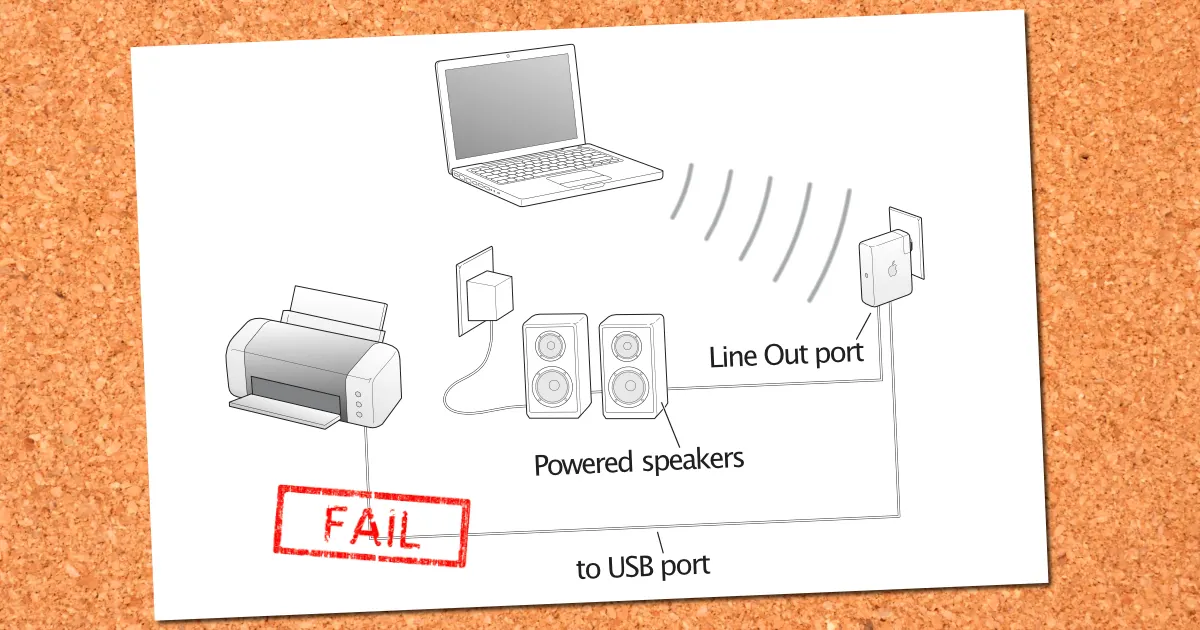
After playing around with all the various network settings, I wasn't able to get my Epson Stylus CX7800 printer to work with the Airport Express. It turns out that the AirPort Express won't work with the default Epson drivers. I would have to download alternative drivers and that's just to print. Who knows what quality and limitations I'll have. In addition, the scanning feature of the printer would not work using AirPort express.
iFelix.com has an Unofficial List of Compatible Printers that work with the AirPort Extreme and AirPort Express. My key take-way is that I can't use the scanner part of the printer - which kind of defeats having a printer/scanner.
Alternative Tool
There is a Launcher for Airport Utility for those that are running macOS 10.15 "Catalina." The utility allows you to run AirPort Utility v5.6.1.
This utility will not work if you are running macOS 12.5.
Basically if you have updated the macOS since COVID-19 you will not be able to use the Launcher for Airport Utility. You will need to use an older system to configure your AirPort Express.
My Recommendation
If you really want to get your AirPort Express working, take it to a friend's house that has an older Mac and manually set it up there.
Download the AirPort Express Setup Guide and follow the instructions on manually setting up your AirPort.
PermalinkCombine Similar Images
Easy Tool to generate a new combine image
There are times when I want to combine two similar screenshots. Usually, it's because I want to combine multiple popovers over text.
It happened this week. I had a screenshot of tooltips that had data and they didn't match up. I wanted to create a screenshot with the two pieces of data.
It's been a while since I did it, and I can't believe that I didn't blog about it in the past. So here's how I combined two images that had just a slight change.
Combine Image Difference
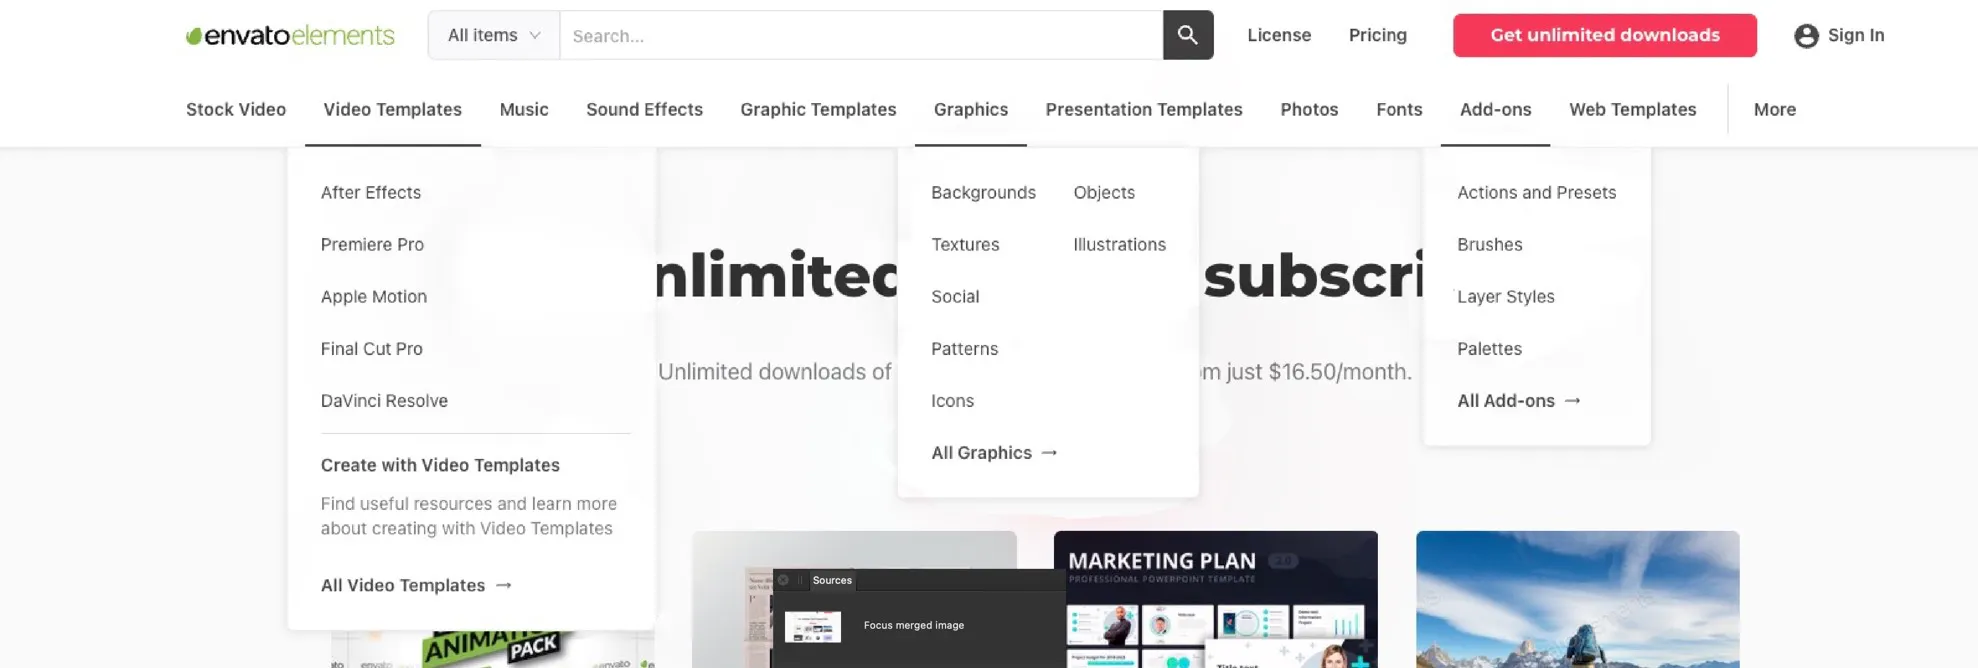
So the key to get this done is to use the Focus Merge in Affinity Photo
Affinity Photo's Focus Merge feature is a great way to combine similar images into one composite. This can be especially useful for landscapes or photos with a lot of detail. By selecting the images you want to merge and then using the Focus Merge tool, Affinity Photo will automatically align and blend the images together for you.
To create a new Focus Merge, go under the File menu and select "New Focus Merge."
Add a similar image that you want to merge together.
Then use the "New Focus Merge" tool to add and remove sections from each image. This takes some practice, basically, you select the layer and remove anything that you want.
It makes takes some time to understand this tool. It is the fastest way that I have found to combine similar images and touch them up.
The above image only took me 3-mins to clean up. It really is a useful tool for combining similar images.
PermalinkOBS Studio
Great Tool to Capture External Video
One of the limitations of Final Cut Pro is that you can’t capture Video/Audio from a USB source. So if your using an UDB capture card you can’t record it in Final Cut Pro.
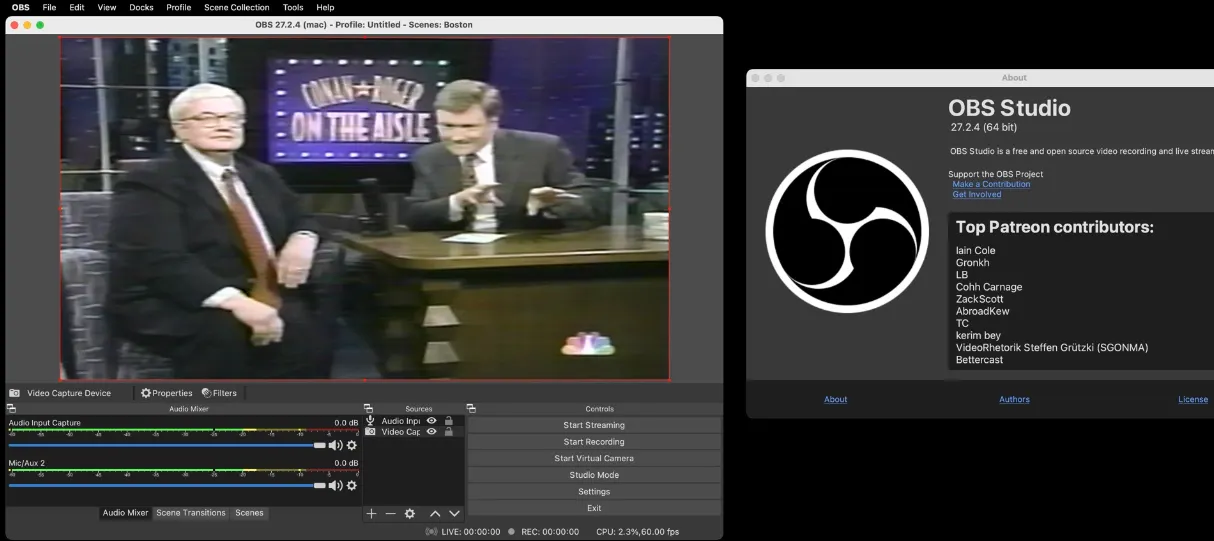
Quicktime is an alternative solution, but I have been thinking there has to be a better way. The OBS Project looks to be a good solution. I'll be using this tool to capture video from my VHS player to my iMac.
Five Things I Like About OBS Studio
Instant Audio - When I launch OBS I can hear the input audio right away. I don’t need to turn up the audio every time I launch the application. If you use Quicktime for video recording, you know what I mean.
Easily Record Segments of Video Feed - I can click Start Recording and Stop Recording when ever I want. In Quicktime, when you stop recording the “main feed†is gone and your “stuck†with the recording window waiting for me to save. The nice thing about this format is that I can save clips with relevant names. The bad thing is that it takes time away from doing the next clip. OBS Capture makes it easy to focus on the capture part.
Separate Scene Setting - I can setup different input configurations and easily switch between them using the Scene collection.
Quality Video - OBS Capture has Good Quality input. I am not loosing quality by using OBS Studio. I can capture raw video/audio and make final edits in Final Cut Pro.
Enhance with Filters - I can apply filters on Import. There are eleven filters available: Apply LUT, Chroma Key, Color Correction, Color Key, Crop/Pad, Image Mask/Blend, Luma Key, Render Delay, Scaling/Aspect Ratio, Scroll, Sharpen.
Still Lots of Learning
I am just getting started learning how to use OBS Capture. The application looks to be what I am looking for in a USB Video capture.
There are a couple of tricks I had to learn to get started:
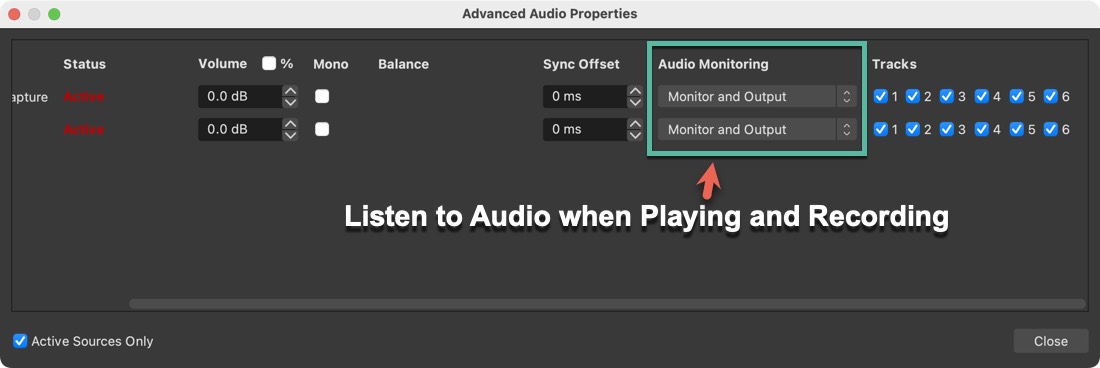
Getting Audio to Play While Recording
People use OBS Capture to stream games and things on your computer. The OBS Project team disabled playing audio on capture because of audio feed back. It’s easy to enable it once you have your Audio Input and Video capture sources enabled:
Select Edit Menu and then Advance Audio Properties Scroll to the right and under “Audio Monitoring†use the pull down option list and select “Monitor and Outputâ€
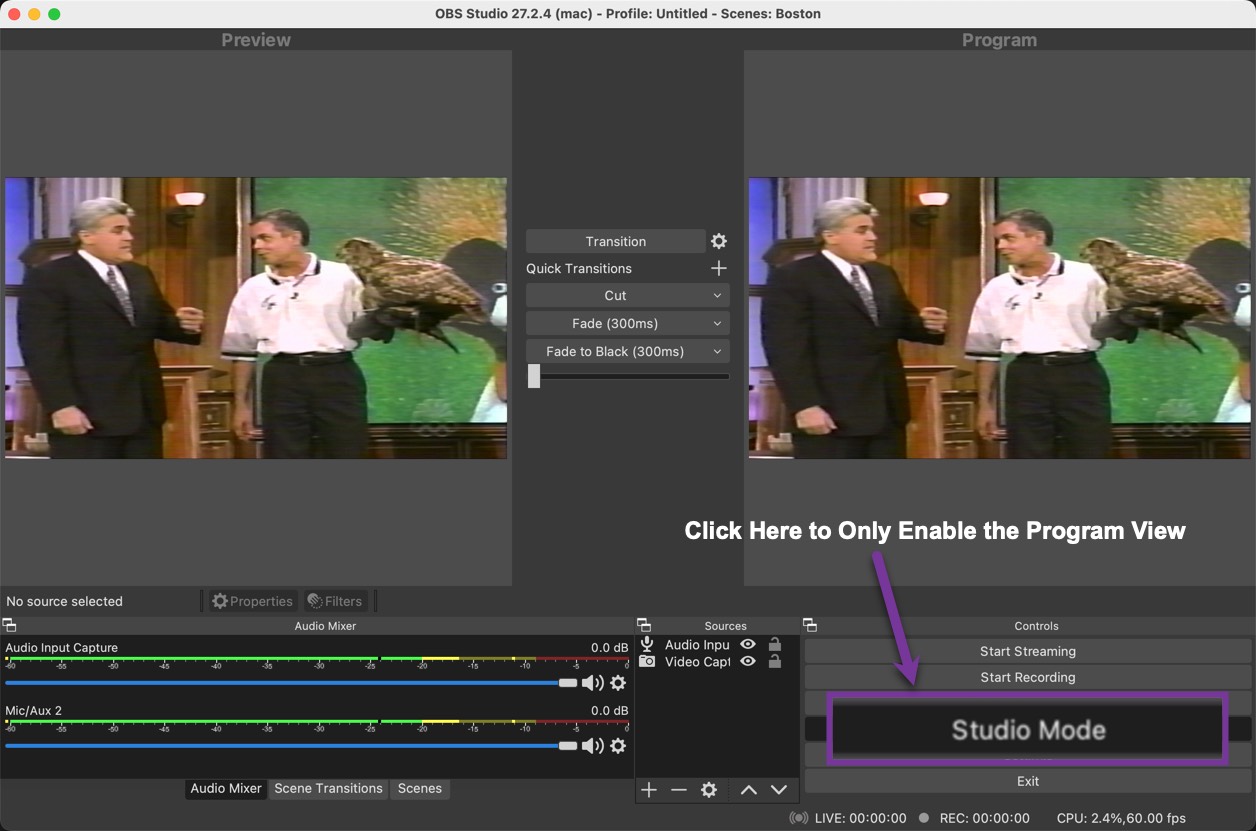
Showing Only the Live View
When you first launch OBS Capture, you see two video windows. You can simplify the view by only showing the one view. This is done by clicking on “Studio Mode†in the Controls section.
About
A Mac veteran since 1989, I'm here to share my experience with tips and tricks every Friday. Witnessing the evolution of Mac software and hardware firsthand, I've gained a deep understanding of how these machines work and can help you troubleshoot any issues that may come up.
Check out all the blog posts.
Blog Schedule
| Thursday | Business |
| Friday | Macintosh |
| Saturday | Internet Tools |
| Sunday | Open Topic |
| Monday | Media Monday |
| Tuesday | QA |
| Wednesday | Veed |
Other Posts
- Jira Search using LaunchBar
- Colorful Icons on my External Drive
- Master Ocenaudio Filters: Unlock the Power of Professional Audio Editing
- SentinelOne
- Hypercard
- XXD
- Quick Camera
- Peak 3 LE
- Acorn 6
- Backup Voice Memos
- Free Up 30GB in 30 Minutes
- Expanding Polygons Beyond the Default in Keynote
- Old Macintosh TCP Applications
- Final Cut Pro Audio Effect List
- BCS 13 Font Collection