
Macintosh Blog Posts
A Mac veteran since 1989, I'm here to share my experience with tips and tricks every Friday. Witnessing the evolution of Mac software and hardware firsthand, I've gained a deep understanding of how these machines work and can help you troubleshoot any issues that may come up.
Macintosh Blog Posts
A Mac veteran since 1989, I'm here to share my experience with tips and tricks every Friday. Witnessing the evolution of Mac software and hardware firsthand, I've gained a deep understanding of how these machines work and can help you troubleshoot any issues that may come up.
A list of all the Blog Posts in this category.
Macintosh Cyber Deals Watch
Last year I had my list of software that I was going to watch for, so I thought I repeat the "Watch List" for this busy shopping season.
My budget is pretty tight this year. Chances are that I won't be making any big purchases on "Black Friday" or on "Cyber Monday." Here are the software and services that I'll be checking out this year:
Software Watching
- Belight Software - Art Text and Swift Publisher are pretty cool. Currently Belight Software has 30-70% off sale in the Mac App Store. The sale doesn't cover Art Text or Swift Publisher. I have seen Art Text in some recently announced bundle packages, but they are more than what Art Board sells.
- PhotoStyler - Great for presenting photos online, Social Media and Blogs. (Single User license is $29.99)
- Art Board - Didn't upgrade to 2.0, wonder if they will have a special deals. (Single License is $39.99)
- Movavi - I think 2018 will be the year of multimedia. I am always looking for a different solution to compliment iMovie.
Services Watching
- Creative Market - Love all the package deals. Certainly expect to see a good teaser for this year.
- DropBox - Great service. Currently at 60% at 6.2 GB
- StoryBlocks - Usually have a $99 year membership sale, this time of year they discount to nearly $45.
- Font Awesome 5 - Wonder if they will have one last sale before they go live.
- UDemy - there are a few courses that I want to watch but they are outrageously expense. I'll be checking frequently to see if they are discounted. They currently have a 55,000+ online courses at $10 for a limited time!
- Go Daddy - perhaps they will have discount domain name or hosting plans.
Hardware
Not watching any hardware deals this year. At the moment, I have enough disk space and don't really need a new Flash storage devices or cables.
It will be interesting to see what Apple deals are announced. I suspect that they include iTunes gift card with some purchases of MacBooks and iPads.
Adding Drop Shadow to Images
The standard way to add images to your Mapdiva's Artboard project is to simply drag and drop images to the ArtBoard document window. I have recently learned that I am better off using shapes for more control - including adding drop shadows.
The first few times that I was using ArtBoard, I couldn't figure out how to do anything with images. Then I discovered the Image Adornment feature and shapes. It's a pretty powerful feature of Artboard and worth exploring.
Adding drop shadow is just one small functionality that users can do.
Simple steps to add Drop Shadows in ArtBoard
- Create a Shape (Rectangle, Round Rectangle, Circle)
- Drag the image that you want to use on that shape.
- Adjust the image/shape to how you want it.
- Add the Glow/Drop Shadow style to the stroke
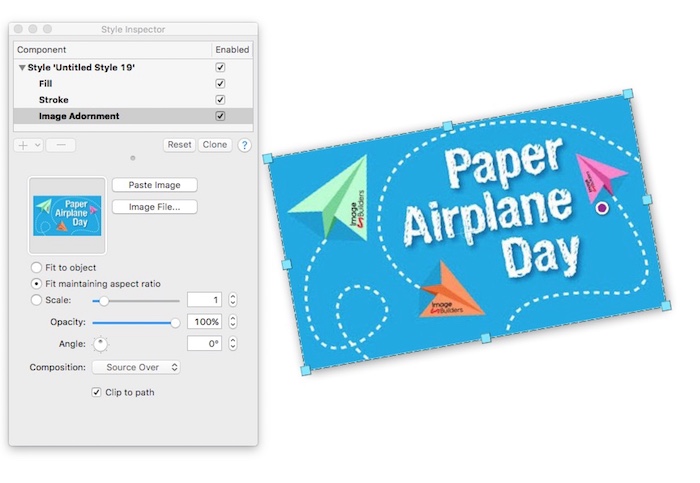
Once you drop the image to the shape you have three options on the shape/image adjustment:
- Fit to Object - will stretch the image so that it fills the shape.
- Fit Maintaining aspect ratio - Keeps the image aspect ratio within the shape.
- Scale - make the image bigger or small within the shape.
For a simple drop shadow/glow effect, I find that setting the option to "Fit Maintaining aspect ratio" is the best option, and then adjusting the object around the shape.
There are a few things to note when using images in ArtBoard:
There's no way to fit the shape to the image. That is, there's no way to adjust the shape to fit the exact image size. It takes a bit of skill to get it to be a perfect fit. (This is true with ArtBoard 2.0)
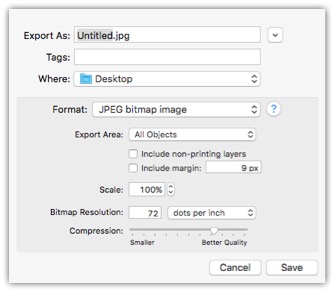
When you export the image, as selection only, the drop shadow also gets exported. The default color and position is perfect for most needs./
The good thing about using this method is that you can make sure that the image fits certain dimensions.
Custom Arrow Annotation Effects
One of the things that I like about ArtBoard is the ability to create cool looking arrows to point something out. In other annotation base applications, you don't have much control. You simply have a straight line with an arrow at the end.
Napkin ($39), a cool looking image annotation and markup application, and one of the most expensive annotation tools available, has very little control over the arrow tail. I have learned that learning a bit how ArtBoard works can produce some nice effects.
Here's an example of using ArtBoard (on the left) and the common annotation tools:
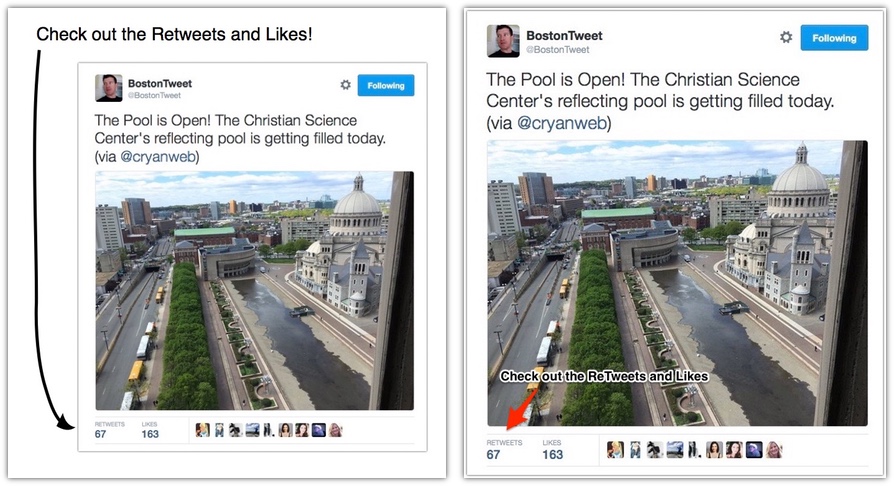
Click on image for a larger version.
Simple Reproduction Steps
- Using the Pen tool create the Arrow tail that you want.
- Using the "Styles and Clips Art" dialog and select the Artboard Collection, then Brush, Pens & Marker Strokes, and Arrows
- Drag the arrow that you want on the line you created.
- Make some minor tweaks to the line and the line width.
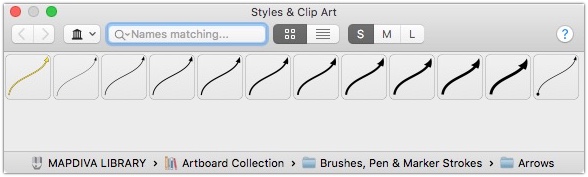
The ArtBoard default arrows collection has some good options. Check out the ArtBoard Style Components for other creative arrow stroke ideas.
It does take some practice getting a nice smooth line. The smooth line functionality does help a bit (Edit > Path > Smooth).
The net results is a much cooler image attachment to all those bug reports. This is something that I would use for every bug I found, but for the occasional hard-to-find bugs, it's a great way to have the bug report stand out.
ArtBoard Hand on Exercises
One of the features that I like about ArtBoard is the 'Hand on Exercises' where you can learn about Drawing Paths, Drawing Shapes, Combining Shapes and Bezier Paths.
These Hands-On Exercises are a great way for people that want to learn how to use the Pen tool to create shapes. After spending a few minutes with these simple exercises I learned a lot about the proper way to create shapes from paths.
"Before these exercises I could never figure out how to do anything with the pen tool. Now I understand how it works!"
The "Hands on" exercises are basically instructions on individual PDF documents. When a user selects the instructions from the 'Open' menu, ArtBoard opens the PDF on a non-editable layer in ArtBoard. All of the exercises are available in the trial mode of ArtBoard. There are no extra exercises once you purchase ArtBoard.
Here are some details of each of the exercises:
Bezier Paths Exercise
This exercise sheet give you a couple of Bezier paths to try out using the Bezier Path Tool [b]. Users start by learning how to make a simple 's' shape type of path, then you learn how to make a closed loop path by creating a fish using the Bezier Path tool.
Combining Shapes Exercise
This exercise sheet educates users all about ArtBoard Combining Shape functionality. Users learn all about creating different shapes when you interact different shapes.
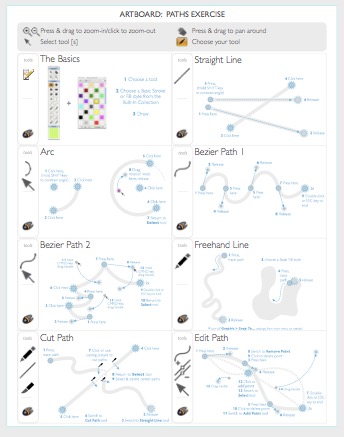
Drawing Paths Exercise
This exercise sheet lets you practice the fundamentals of paths. At the end of the seven-part exercise shows you learn how to create straight line, Arc, Bezier Path, Freehand Line, Cut Path and Edit Path.
This exercise is great to start for anyone interested in learning how to properly use the pen tool.
Drawing Shapes Exercise
This exercise sheet teaches you the fundamentals of using shapes in ArtBoard. You'll learn how to create rectangles, ovals, round rectangle, round-ended rectangle, irregular polygon, regular polygon, wedge & arc. At the end of the exercise, you'll get a better understanding on using shapes in future designs.
Training Exercises Summary
The good thing about the exercises is that they are always available. Anytime you need a refresher on how to use the pen tool, you can just open up the Paths Exercise and learn some of the fundamentals.
The exercises are very simple to learn. The fact that Mapdiva took the time and created theses tutorials tells me that they want you to get the most of ArtBoard.
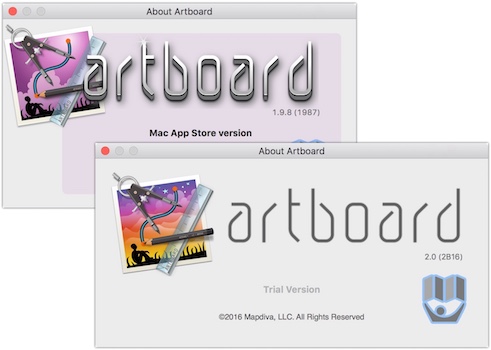
ArtBoard 2.0
This week The Mapdiva Team announced the release of ArtBoard 2.0:
Artboard 2 puts quality graphic design tools squarely within reach of new and experienced creatives.
- New tabbed interface provides 'at-your-fingertips' access to functions through the Styles Tab, Geometry Tab, Text Tab and Layers Tab.
- New object features, such as Divide objects and Skew objects, and more.
- Enhancements to Smart Shapes, such as individually squared corners on round-cornered rectangles, makes them even smarter.
- Export options now include exporting drawing, individual layers, Slices, and selected objects.
There appears to be no upgrade path for anyone that purchased the software recently. There is an introduction period discount. Users can now purchase ArtBoard 2.0 for $29.99.
I haven't decided if it's worth upgrading to 2.0, or going with another solution that has more EPS support.
EPS in ArtBoard
One of the downsides of using Mapdiva's ArtBoard is that it don't fully support vector EPS. Which means that when you include an EPS file in an ArtBoard document the image will be rasterized. You can't change the vectors in the EPS. This is an issue when you purchase an EPS file that contains multiple objects from CreativeMarkets and InkyDeals.
ArtBoard is currently working on a new version to be shipped sometime this year. They haven't announced if they will support vector EPS files. However, in the Mapdivia forums, various ArtBoard authors have indicated that EPS support isn't a primary use of the application.
As to whether this is important, the majority of our target customer base do not care about it - Artboard and Ortelius are not intended to compete with Illustrator for graphics professionals. ~ Graham "Keymaster" on April 1, 2012 at 1:53 am
ArtBoard does support SVG, and there are some graphic libraries available for that, such as openclipart.org. However, not all SVG files are the same. Some of the files were created as raster graphic files in SVG format.
There is no way to tell the difference between a rendered graphic SVG and a vector graphic file. If you're using openclipart.org, look for vector in the image description.
On Mapdiva Blog, they talk about two ways to properly open an SVG file. When dealing with an SVG file that has multiple objects, such as the linear.SVG, I find the best way is to drag the SVG file to the ArtBoard application. This opens the file allowing you to select the object that you want to use.
If you open the file via the Graphic tool, the SVG file will open as a rendered image. The reason why you don't want it rendered is because you can scale vector images better.
ArtBoard looks to be a cool application and I am looking forward to learning all about the capabilities. As I learn something new, I'll be sure to share it here every week.
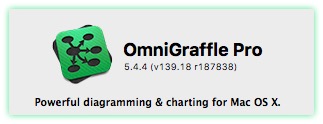
OmniGraffle
On October 16th, I blogged about how I setup a template in Pixelmator to use as a canvas. I have since discovered that OmniGraffle offers some cool touch up capabilities that I am looking for.
Don't get me wrong, I like the capabilities of Pixelmator, but OmniGraffle seems to have more powerful "basic" post production touch up functionality. Ya, that does sound a bit redundant. But here me out!
After I take a screen of action in a web browser, I usually need to touch up the image a bit. Something of the common tasks that I perform:
- trim the screenshot
- Combine images (a before and after screenshot)
- Add pointers to highlight something significant
- Add a caption to the image
In OmniGraffle this is very easy to do, you can drag and drop an image to a template, do some manipulation and export the image as an object. For example, I can resize the image, touch it up, add some arrows and drop shadow or glow.
What's really cool is that when I am done I can export the image and only the object gets exported. So I don't have to worry about cropping the canvas. I can have a nice large canvas open to do my work and then just export the final copy. Very cool and a very handy Macintosh tool.
This allows me to touch up images and size then correctly for emails or to attach to Jira issues. It so easy to combine pictures and highlight certain sections.
I am still using an old version of OmniGraffle Pro (5.4.4) and haven't decided if it's worth paying $49.99 to upgrade to OmniGraffle 6. I just found out that I registered for Omnigraffle Professional 5 on December 12, 2007. I have been using this version for 8 years. I guess I should see what's the Developers have been up to in the past 8 years.
I also have been looking at some other Graphic Design applications such as Autodesk Graphic and Artboard. They may offer more functions and make some screen shots look even better. The other advantage of the other apps is that they have the ability to open EPS files (vector graphics) and that's something I need for files I get from Creative Market.I know that what I am doing isn't the purpose of OmniGraffle, but for me it seems to be the perfect tool.