Retrospective School Play
Lesson Learned From a Successful Production
The following are my thoughts on filming a local drama group this past weekend. I recorded the playback in April and was invited back in November. I was better prepared for this filming after recording the first session. Â
What worked Well
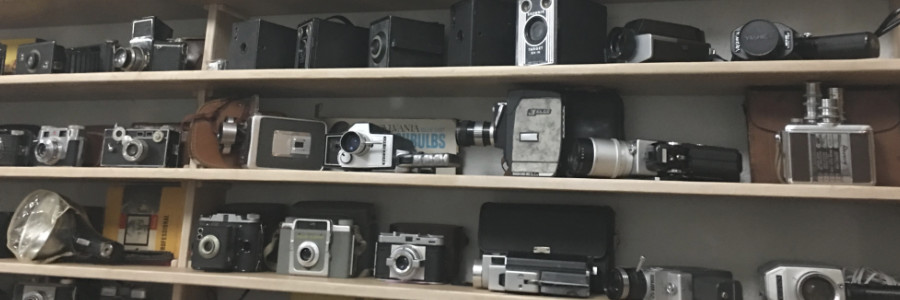
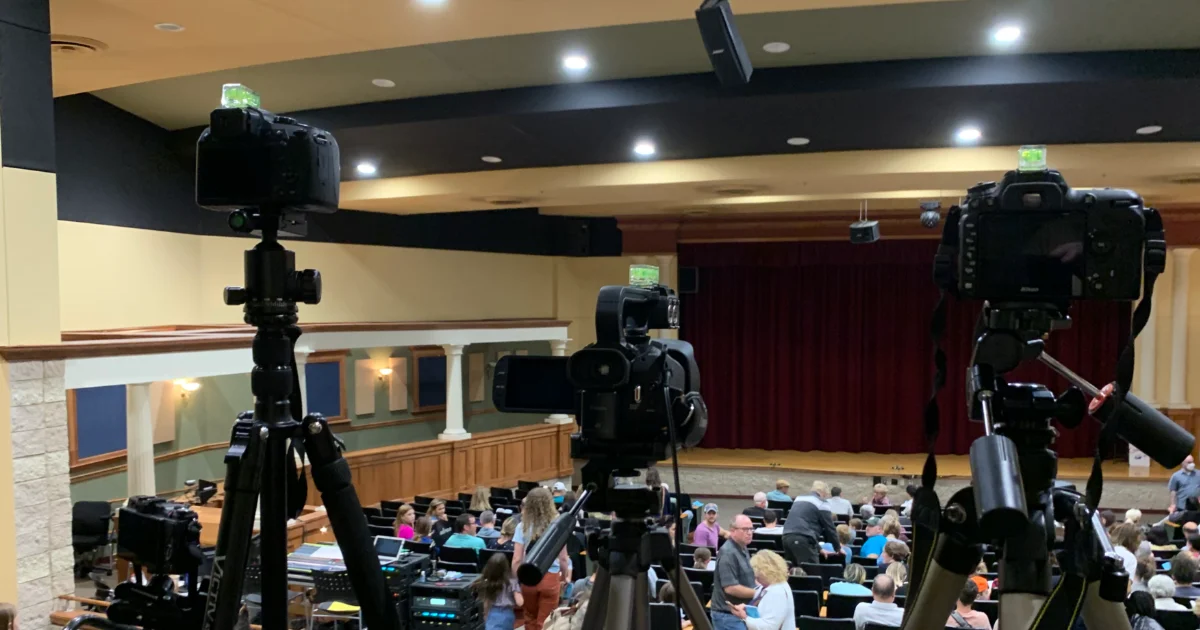
Multiple Cameras - Originally, I had five cameras capturing the play. I wanted five cameras so that I could better capture the action on stage. I used one as the main camera, and the others to capture scenes that I might have missed.Â
Why multiple cameras? well to paraphrase a famous sports quote - “You don't want to let anything sneak through the crack, you don't want to forget anything, you don't want to miss anything, and you want to be perfect on that day. You don't get many chances to get that one shot."
Recording Audio via the system audio - I had an audio cable bag with all kinds of cable connectors. I captured the audio from actors who wore microphones. I can add the audio to the final clip using Final Cut Pro. The sound of the auditorium won't distract the show from the key parts of the show.Â
Plenty of space on the cards - In this year's show I made sure that I had plenty of space on the cameras' SD cards. The main camera has a 256GB card, but at the last show, I had to run to the store between shows to buy more cards. Ideally, 256GB should be the minimum size card to use for a two-hour show.Â
Plugged in the Video Camera - The video camera was plugged in so I didn't have to worry about its battery life. I had a spare battery, but I didn't need it. The other cameras I had didn't work when plugged in. In order to be safe, I changed the spare batteries for those cameras during intermission.Â
GoPro Hero 9 Worked better this time - The camera didn't work at the last show because of overheating, so I bought a new battery and connected it to the power brick. I used a black one so it wouldn't be obvious. I also had a 256 GB memory card that holds 7 hours of 4K videos.
Here are some things I would do differently
ÂLearn more about the Canon A40 manual controls. I think I would have gotten better colors had I set the white balance on the Canon A40. I noticed other cameras were doing a better job with color correction. I plan to learn more about how to use the manual controls in order to get a better picture.Â
Camera Levels - I was having trouble seeing if my camera shot was leveled. I don't know if there is a glow-in-the-dark level. There must be a better way to ensure my shots are level.Â
Keep the iPhone separate - I took shots using my iPhone using a tripod magic arm. Overall, this worked well. However, every time I adjusted the tripod, there was some minor shake on the iPhone. This could be easily avoided if the iPhone was mounted on its own tripod. There are some drawbacks to the magic arm, but it is a great device.Â
Watch more of the Show. During the dress rehearsal, I learned a lot about video challenges. I should have watched a couple of practices using a program so I would have known where to focus the camera. In order to prepare the right camera and angles, I should talk to the stage manager in advance.Â
Bring the right lens. I had a DSLR and I brought a 70-300 lens, which I thought would be perfect, but it was too much. I should have packed an extra lens just in case. Based on the location, the 70mm lens is the better lens to use. My thought was that it doesn't hurt to bring a couple extra items. In case you need an extra bag, you can always have it in your car.Â
Final Thoughts
Planing a shot is easier when you have to deal with the post-production work as well. You'll be better prepared for the challenges you may face later, such as dealing with color correction.Â
It's a lot easier when you are the Producer and Director of your own project. Planning and post-production work will result in an amazing video for the drama group.
PermalinkCanon XA40
New Blog Topic This Month!
A few weeks ago, I purchased a new Canon AE-40 video camera. This is the first camcorder that I purchased since I got the Sony TRV-720 - more than 20 years ago.
Oddly enough I used the TRV-720 this past weekend as part of a tool to help actors backstage know what is going on stage.
Do you Still need a Dedicated Video Camera?
Yes, there's a lot than the Canon can do that even the latest iPhones can't do:
- Create decent zoom 4K videos.
- Connected multiple audio devices as separate audio channels.
- Virtual unlimited storage - just add more SD cards.
- and more.
New Blog Category!
I decided that for the month of April, I'll add a new category to the blog lineup. I'll show all the cool functions of the Canon AE-40,
New Blog posts will be available on Wednesdays -replacing the Apple Motion topics
PermalinkManual Exposure Mode
Considered to the be Expert Only Mode
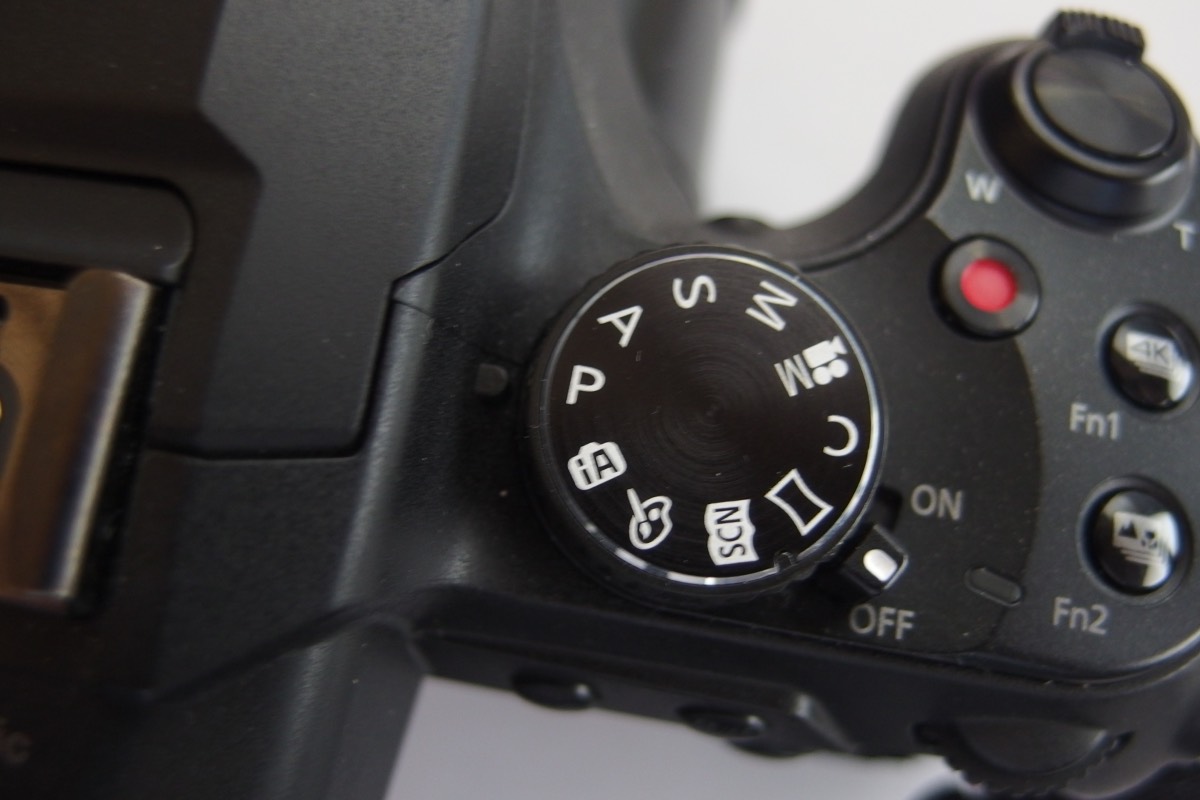
Most Cameras have four common-mode settings: Program Auto, Aperture Priority, Shutter Priority, and Manual Exposure Modes. Otherwise known as PASM.
Over the next few weeks, we'll do a deep dive into each one of these modes. The goal is to better understand when it's best to select that particular mode.
This week we look at the Manual Priority mode, otherwise known as the M on the camera mode dial.
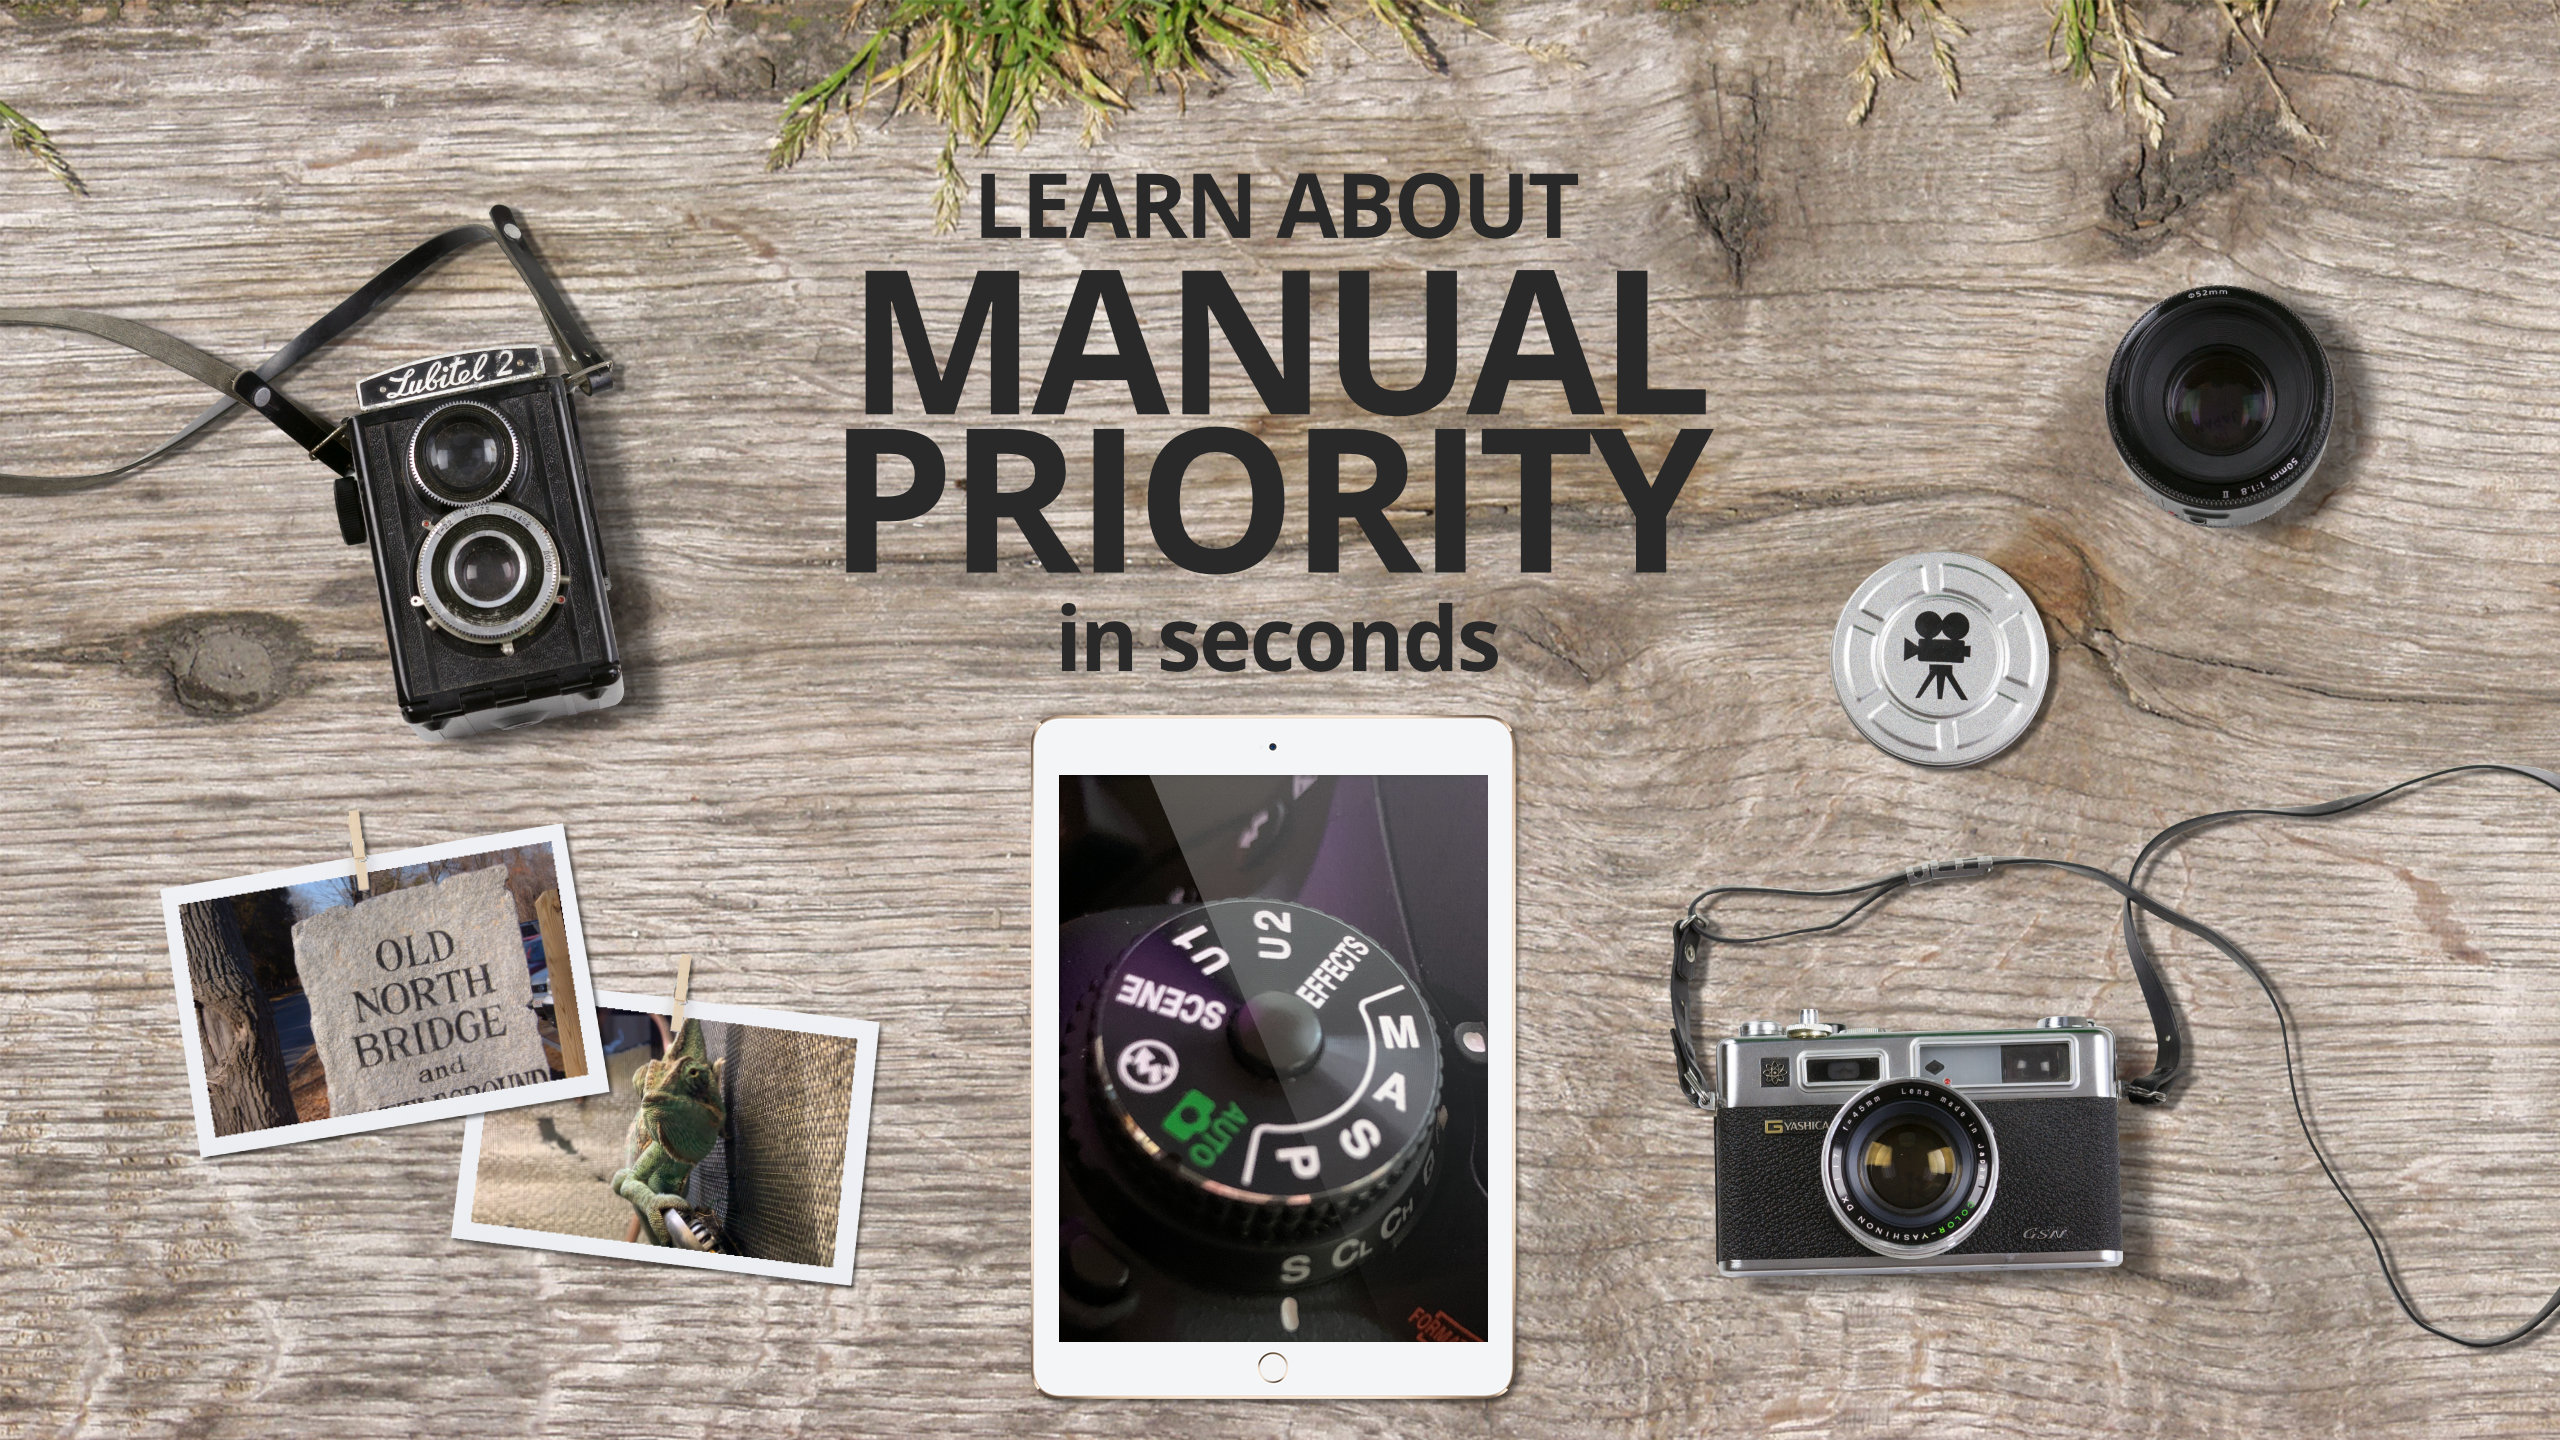
Manual Priority Mode
M is for Manual and M is also for Max Control. So when you want maximum control of your camera, using the 'M' mode is the way to go.
Manual Exposure Mode is when the photographer manually sets the aperture, ISO, and shutter speed all independently of each other in order to adjust exposure. This gives them full creative control over the output of the image.
Advantages of using the Manual Priority Mode
This mode gives you the most power over their camera. It's great when you want total control of the Aperture, Shutter Speed, and Exposure.
When to Use the Manual Priority Mode
Once you mastered using Aperture, ISO, and Shutter Speed, you'll want to switch it to Manual mode to get more control over your shots.
This is a great mode to use when testing cameras at the store. You'll be able to see the limits of the camera without looking at the manual.
This is a great mode to use when taking photos of the fireworks show at Disney World. Make sure to play around with the settings - know what dials do what when you are in Manual mode. (Each Camera is different.)
Use this mode when you're looking for a particular effect that Auto isn't letting you do. For example, if you want a better motion blur of highway car headlights from a highway overpass.
PermalinkShutter Priority Mode
Learn the Advantage of the Shutter Speed
Most Cameras have four common-mode settings: Program Auto, Aperture Priority, Shutter Priority, Manual Exposure Modes. Otherwise known as PASM.
Over the next few weeks, we'll do a deep dive into each one of these modes. The goal is to better understand why someone would want to select that particular mode.
This week we look at the Shutter Priority mode, otherwise known as the S on the camera mode dial.
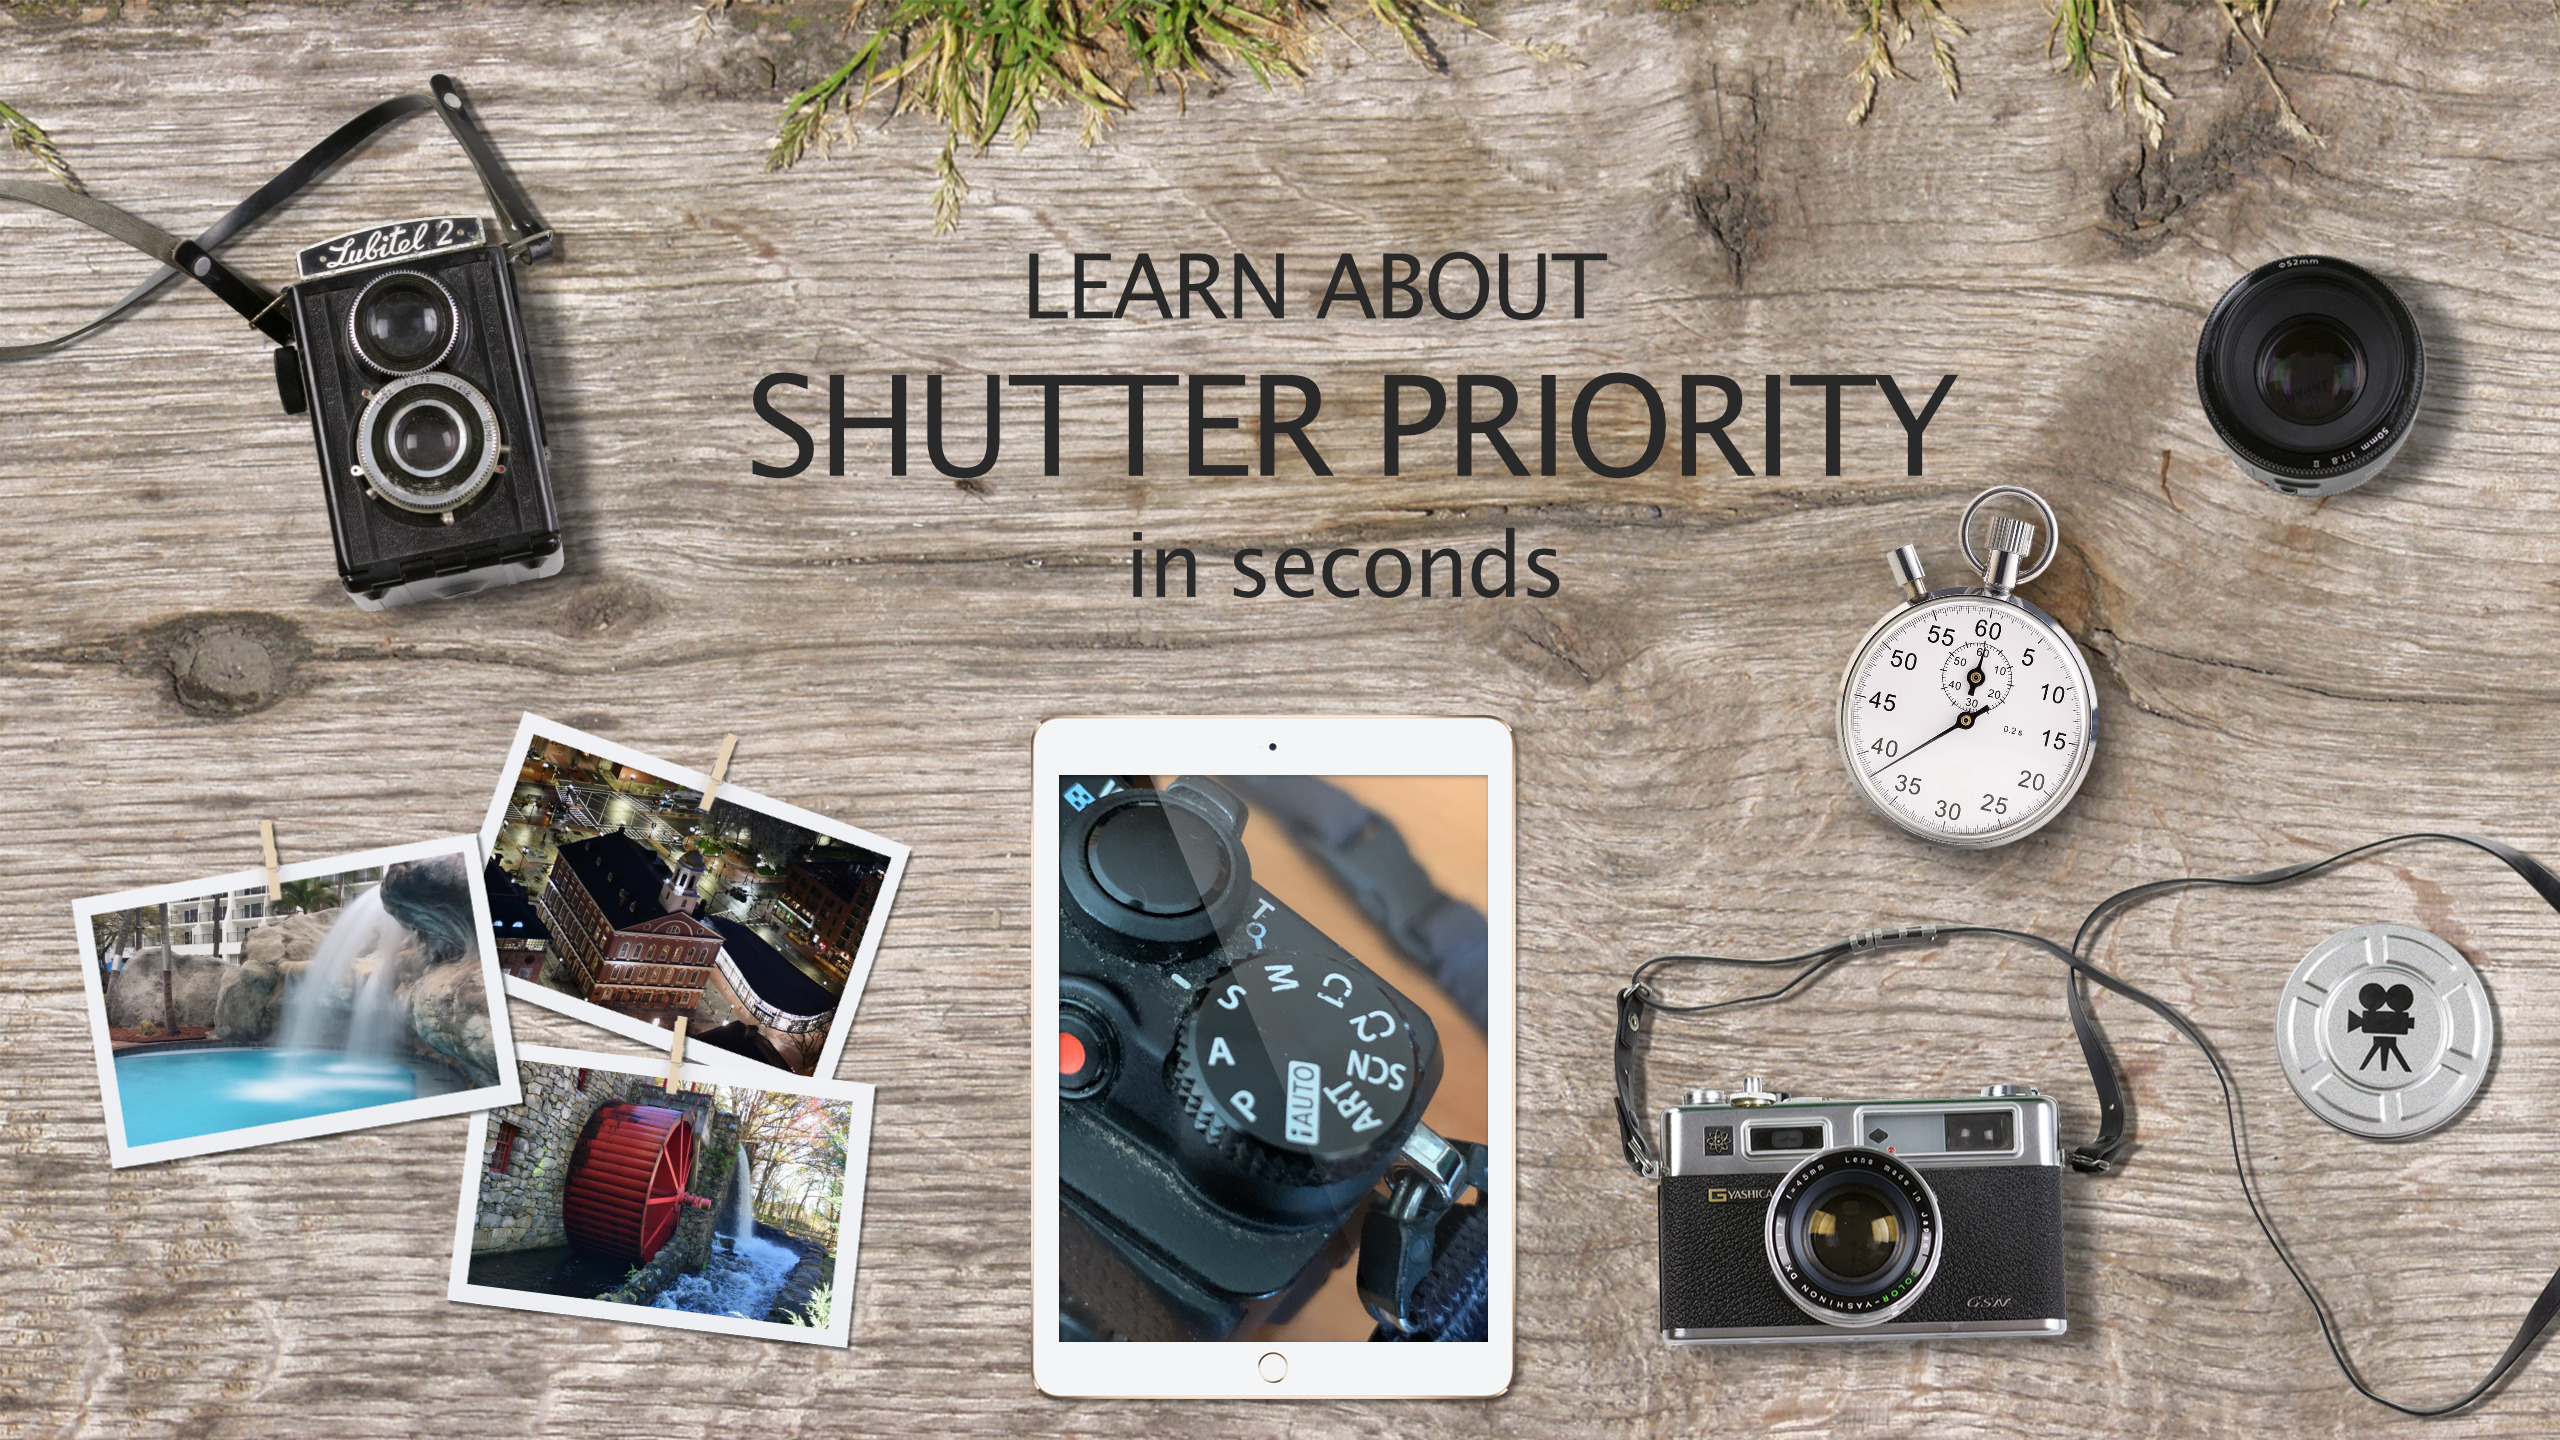
Shutter Priority Mode
S is for Shutter and S is also for Speed. So when you have a high-speed shot, you should think of moving the mode to S.
"S" is an automatic mode to set the shutter speed. Use this mode to freeze a moving subject (fast shutter speed) or convey the impression of movement (slow shutter speed).
Advantages of using the Shutter Priority Mode
Use this mode when you have an action scene and you want to have more control. Using "Auto" mode isn't going to help because the camera isn't going to know your intentions for the particular shot.
If you have multiple cameras, you should know the shutter speed upper/lower limits of the camera. You can find this by simply moving the mode to "S" and then making the speed adjustments to see what the limits are.
If you're going to take pictures of runners at a Marathon, you want to make sure that you pack the best camera for the shot. You may be surprised at which camera has a fast shutter speed.
Here's a useful graphic to illustrate what happens at the various speeds:

When to Use the Shutter Priority Mode
Fact Action Photos - If you are shooting moving cars or a soccer game, you may be better off using a high shutter speed. A speed of 1/2000 is considered to be good.
Night Time Photos - While your better off using the Aperture Priority to have the best shot, but there maybe times when having a slow shutter speed may add some cool effect.
Waterfall Photos - If you want to add a blur effect to a waterfall, you'll want to see the 'S' setting. Simply select a slow shutter speed on your camera to get the motion blur effect.
PermalinkAperture Priority
Think of it as Super Portrait mode
Most Cameras have four common-mode settings: Program Auto, Aperture Priority, Shutter Priority, Manual Exposure Modes. Otherwise known as PASM.
Over the next few weeks, we'll do a deep dive into each one of these modes. The goal is to better understand why someone would want to select that particular mode.
This week we look at the Aperture Priority mode, otherwise known as the A on the camera mode dial.
Aperture Priority Mode
When your camera in in mode A, you choose the aperture and let the camera automatically adjust the shutter speed for optimal exposure. Rotate the mode dial to A to enable the Aperture-Priority AE mode.
Think of Aperture Priority mode as the same functionality as the iPhone's Portrait Mode - but way better. DSLR cameras have more control over the Aperture than iPhones.
Advantages of using the Aperture Priority Mode
Most camera experts mention that this is a great mode to force the background to be out of focus.
This is a great mode to use when you want to open up the lens in low light condition - just remember to keep the camera steady or use a tripod.
The camera aperture settings, otherwise known as "f-stop," determines the amount of background blur. This is a handy chart to help:
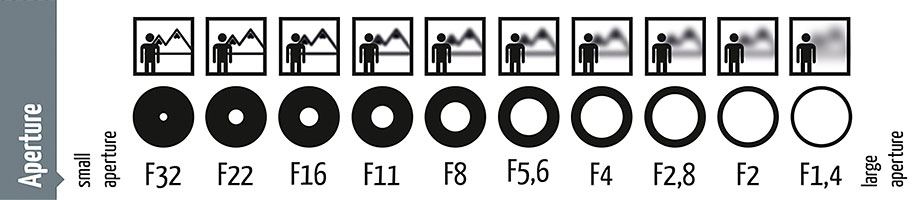
Quick Guide to F-Stops
According to the above guide, it looks like Apple defaults to 5.6. That might be a good selection to start.
When to Use the Aperture Priority Mode
Object Photography - When you want to focus on something that may have a busy background. Such as a person in a field.
Reduce Glare in Night Pictures - If a street light is overpowering a night shot, you can use Aperture Priority to reduce the shine from the street light.
Duplicate iPhone Portrait Functionality - When you are trying to take a portrait picture like you would with the iPhone. Remember: In the DSLR world, you do have more power than a point-and-shoot smartphone.
PermalinkProgrammed Auto
Step Up Camera Mode from Auto
Most Cameras have four common-mode settings: Program Auto, Aperture Priority, Shutter Priority, Manual Exposure Modes. Otherwise known as PASM.
Over the next few weeks, we'll do a deep dive into each one of these modes. The goal is to better understand why someone would want to select that particular mode.
This week we look at the Program Auto mode, otherwise known as the P on the camera mode dial.
The "Point-and-Shoot" Program Auto Mode
In Program Auto mode, the Aperture](https://www.nikonusa.com/en/learn-and-explore/a/tips-and-techniques/understanding-maximum-aperture.html) and [shutter speed are adjusted for optimal results. Users can make the adjustment of the combination of aperture value and shutter speed while keeping the correct exposure.
Terminology Check:
- Nikon calls this Programmed Auto.
- Sony call it Program Auto
- Canon, Fujifilm calls it Program AE.
- Olympus calls it Program shooting.
Advantages of using the Program Auto Mode
The Program Mode is a great next step in-camera control from the Auto functionality. You would use the Program Auto Mode when you want a bit more control over adjusting the aperture and shutter speed but don't want to adjust them individually.
The Program Mode is useful when you want to add more depth of field, to a shot. Using the Auto mode, you may not have the flexibility.
This mode is perfect when you want to take a low-light photo without the camera forcing a flash. Using the Auto mode, the flash is an automatic action when it detects low light.
When to Use the Program Mode
Taking daytime pictures of snow - Sometimes the white is too bright. In Program mode, you can adjust the exposure, which you can't do in Auto mode.
Tweek Auto Mode - When you want to make a quick change to the auto mode. Start with the auto mode, then flip to "P" to make some minor adjustments.
Time Constraint - Best when you need adjustment but don't have much time to adjust all the settings.
PermalinkBlog Schedule
| Saturday | Internet Tools |
| Sunday | Open Topic |
| Monday | Media Monday |
| Tuesday | QA |
| Wednesday | Veed |
| Thursday | Business |
| Friday | Macintosh |