
Mastering Snagit's Fill Tool
A Game Changer for QA Professionals
Today, I want to dive deep into one of its lesser-known but incredibly useful features - the Fill tool.
What is the Fill Tool in Snagit?
The Fill tool in Snagit is a simple yet powerful feature that allows you to replace a specific color in an image with another color of your choice. This can be incredibly useful for highlighting issues or anomalies in screenshots of software UIs, especially when dealing with design-related problems.
Why Use the Fill Tool for QA?
In QA, our job is not only to identify bugs but also to communicate them effectively to developers and designers. A picture is worth a thousand words, and using the Fill tool to highlight issues can make your bug reports significantly more effective and easier to understand.
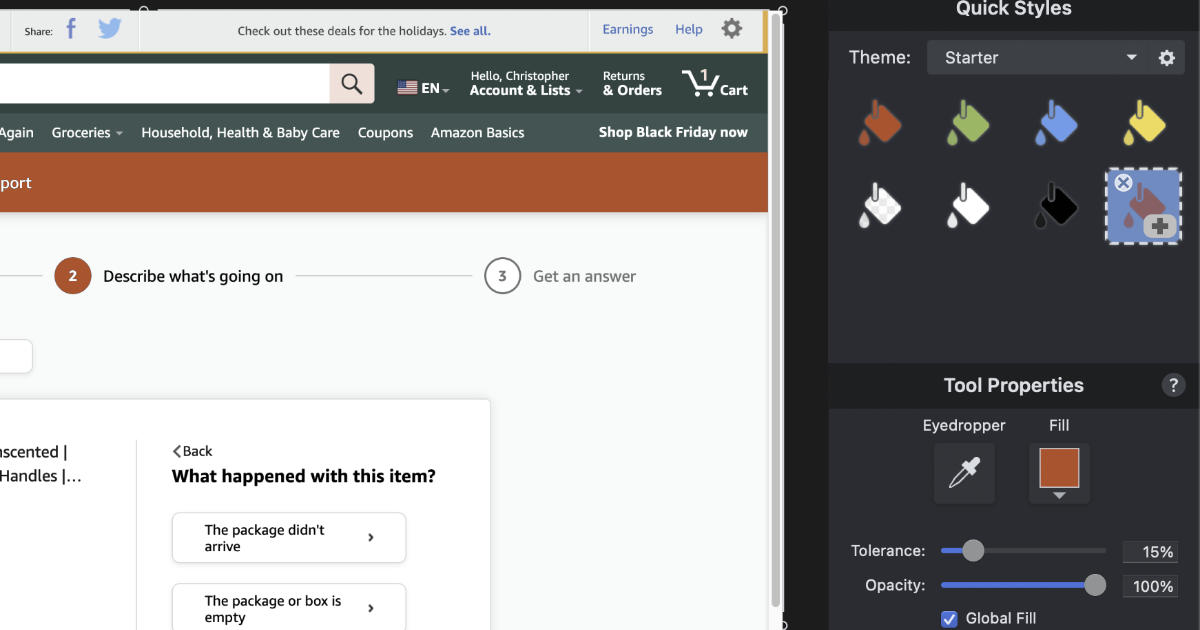
Case Study: Highlighting a Navigation Bar Issue
Scenario: Imagine you're testing a web application and you find that a navigation bar, which shouldn't appear on a certain page, is visible.
Before Using the Fill Tool: You take a screenshot of the page. The unwanted navigation bar is there, but it doesn't stand out in the screenshot, making it less obvious to someone who wasn't directly involved in the testing process.
After Using the Fill Tool: You use Snagit's Fill tool to change the color of the problematic navigation bar. Now, it's vividly highlighted, instantly drawing attention to the issue.
Step-by-Step Guide to Using the Fill Tool
- Capture the Screenshot: First, use Snagit to take a screenshot of the issue.
- Open the Image Editor: Open the screenshot in Snagit's image editor.
- Select the Fill Tool: Choose the Fill tool from the tool menu.
- Choose Your Color: Select the color you want to use to highlight the issue.
- Apply the Fill: Click on the color in the image you want to replace. Snagit will fill all contiguous pixels of that color with your chosen highlight color.
- Adjust Tolerance: If the color doesn't fill as expected, adjust the tolerance setting. A higher tolerance will fill colors that are similar but not identical to the one you clicked on.
Tips for Effective Use
- Color Choice: Use a color that contrasts strongly with the screenshot's color palette for maximum impact.
- Annotations: Combine the Fill tool with other Snagit features like arrows or text boxes for more detailed explanations.
- Before and After Images: If possible, show both the original and modified images in your report for context.
Conclusion
The Fill tool in Snagit is a simple but highly effective way to communicate visual bugs and design flaws in software testing. It's a testament to how small tools, when used creatively, can have a significant impact on our work as QA professionals.
Call to Action
Have you used Snagit's Fill tool in your QA work? Share your experiences and tips in the comments below!