
Snagit Presets
Useful Tips and Tricks
Welcome to another exciting journey through the world of screen capturing and image editing with Snagit! Having used this versatile tool for over 5 years, I've discovered numerous tips and tricks to optimize the capturing process, making it faster, smoother, and more tailored to individual needs. In this blog, we're going to delve deep into setting up personal capture presets, a feature that can significantly enhance your efficiency and productivity. Let's get started!
Why Use Capture Presets?
Snagit is renowned for its extensive array of capturing options, but sometimes, repeatedly customizing settings for each capture can be time-consuming. This is where personal capture presets come into play. By creating presets, you can save your preferred capture settings and apply them with a single click, eliminating the need to adjust settings manually every time.
Setting Up Personal Capture Presets:
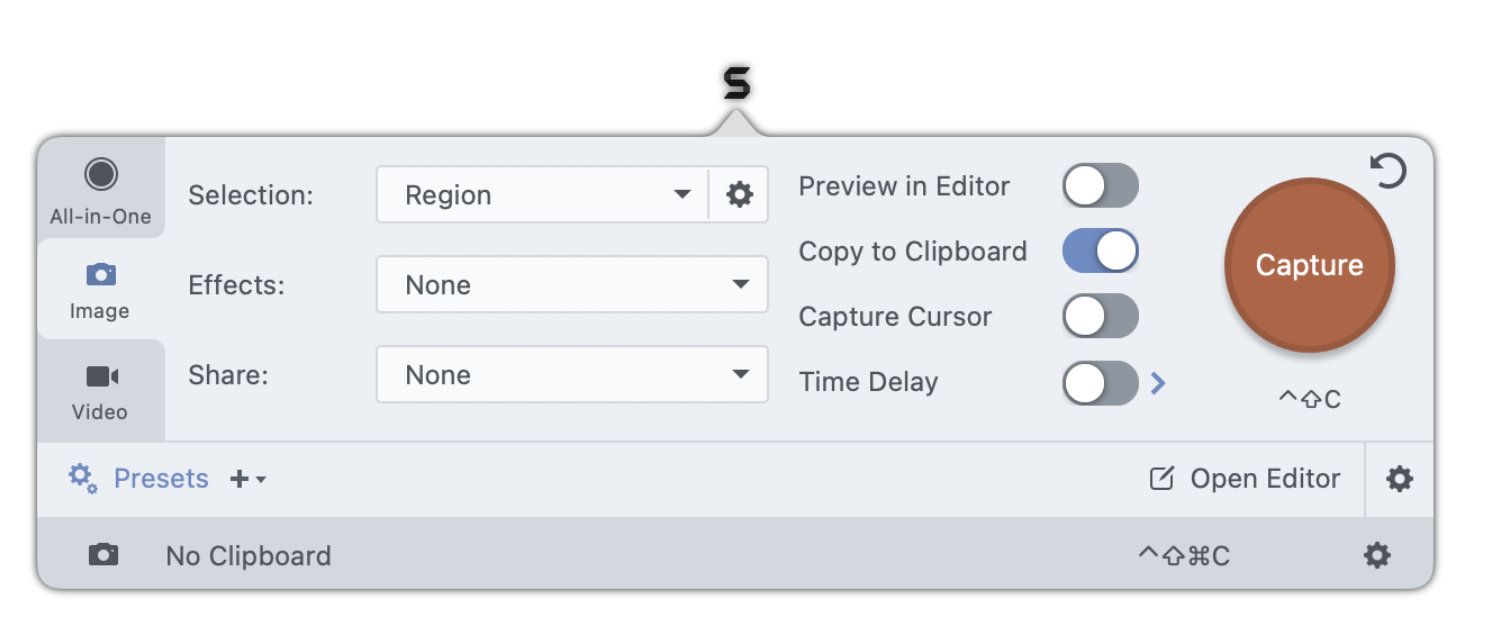
- Open the Capture Window: Start by opening the Snagit Capture Window. You can do this by clicking on the Snagit icon in your taskbar or using a shortcut key (if you have set one).
- Configure Your Capture Settings: Choose the type of capture you want to perform (e.g., Image, Video, Panoramic, etc.). Adjust the settings according to your preferences. For instance, if you want to capture a region of your screen without any delay, choose the "Region" capture type and set the delay to 0 seconds.
- Adjust Advanced Settings: Click on the 'Capture Settings' (gear icon) to access advanced settings. Here, you can customize various options such as effects, selection style, and more. If you want to turn off the "Copy to Clipboard" functionality, ensure that the checkbox next to this option is unchecked.
- Save Your Preset: Once you have configured the settings to your liking, click on the 'Presets' dropdown menu at the bottom of the Capture Window and select 'Save Preset.' Give your preset a descriptive name that makes it easy to identify later.
- Accessing and Using Your Preset: Your newly created preset will now appear in the 'Presets' section of the dropdown menu. To use it, simply select it from the list, and click the capture button. Snagit will apply all the settings you've saved, allowing you to capture content quickly and effortlessly.
Tips and Tricks
- Organize Your Presets: If you find yourself creating multiple presets for different purposes, take a moment to organize them. Rename them for easy identification, and delete any that you no longer need.
- Shortcut Keys: Assign shortcut keys to your presets for even faster access. Go to 'File' > 'Capture Preferences' > 'Shortcuts' to set up keyboard shortcuts.
- Update Presets as Needed: Don't forget to update your presets if your capturing needs change. Simply adjust the settings as required and save the preset again.
- Share Presets with Others: If you work in a team, you can export your presets and share them with your colleagues, ensuring consistency across all captures.
Conclusion
Creating personal capture presets in Snagit is a powerful way to streamline your workflow and save valuable time. With just a little bit of initial setup, you can enjoy faster, more efficient screen capturing tailored to your specific needs. Experiment with different settings, organize your presets, and discover how this feature can transform your capturing experience. Happy capturing!