Initial Time Code
Reset the Time Code on Your Camera
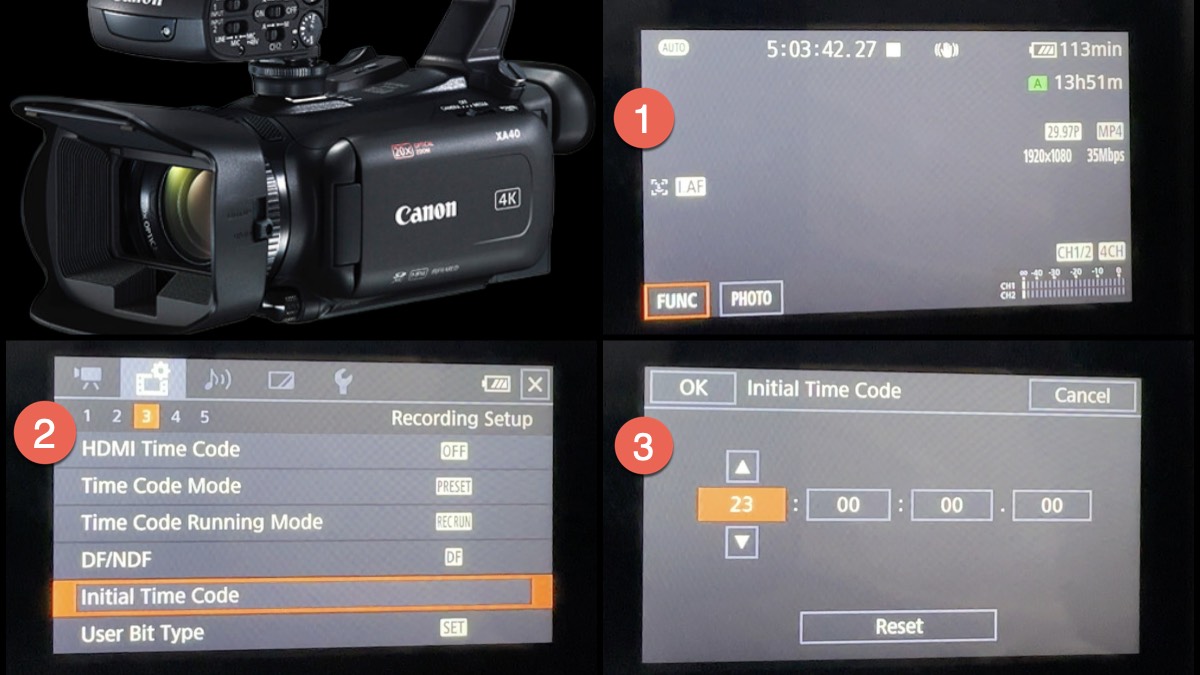
Resetting the time code on the Canon XA40 video camera is a simple process that can be done in a few steps. The time code is a vital feature that helps you keep track of your footage and synchronize it with other cameras or audio equipment. In this blog post, we'll guide you through the steps to reset the time code on the Canon XA40 video camera.
Step 1: Turn on the Camera
The first step is to turn on the camera by pressing the power button. Once the camera is on, you will see the display screen showing the current time code.
Step 2: Access the Menu
Press the Menu button on the camera to access the settings menu. Use the joystick or touch screen to navigate to the "Recording" tab. Go to page 3 and look for "Initial Time Code."
Step 3: Select the "Initial Time Code" Option
Once you have selected the "Time Code" option, you will see a sub-menu. Select the "Reset" option and then click "Ok" to get back to the main menu.
All Done!
In conclusion, resetting the time code on the Canon XA40 video camera is a quick and easy process that can be done in a few steps. It's important to keep track of your time code to ensure accurate synchronization with other cameras or audio equipment. Remember to set the time code to the correct time after resetting it, and you're ready to start filming!
I find reseting the time code helps me during recording. I can make a note of an event that occurs at a particular time. That way in post-production I can pay more attention to that moment of time.