
Filmora 12
Three Key Features of Filmora 12
Filmora 12 is the latest version of Wondershare's popular video editing software. It has several new features that make it a great choice for both novices and experienced editors alike. The first thing to note about Filmora 12 is its intuitive user interface, which makes it easy to learn how to use the program quickly and efficiently. Additionally, Filmora 12 offers a wide range of tools for creating stunning videos with minimal effort. From basic cutting and trimming tools to advanced color correction options, there are plenty of ways users can customize their projects in this powerful software package.
The second key feature that sets Filmora apart from other video editing programs is its vast library of effects and transitions available for users??? projects. There are hundreds of different types available so you can find something suitable no matter what kind or style your project requires; be it an action-packed movie trailer or a simple slideshow presentation! Additionally, all these effects come with customizable parameters so you have full control over just how much they affect your work - making them perfect for adding subtle touches as well as dramatic flourishes depending on what you need!
There are 589 Transitions and 492 Titles - making it easy to add some professional look to your video right out of the box.
Finally, one unique aspect about Filmora 12 compared to other programs out there today is its ability to share content directly within the application itself ??? allowing users not only to create amazing videos but also easily publish them online without having to leave their workspace at all! This makes sharing creations quick & easy while still giving creators complete control over who sees their work by setting up private links or even password protection if desired; plus many more features like this help round out an already impressive suite capable enough to meet any editor???s needs!
Three Key Things
There are three key features in Filmora Wondershare that you can't do in Final Cut Pro - and why it's worth having even if you own Final Cut Pro.
Ability to Record WebCam
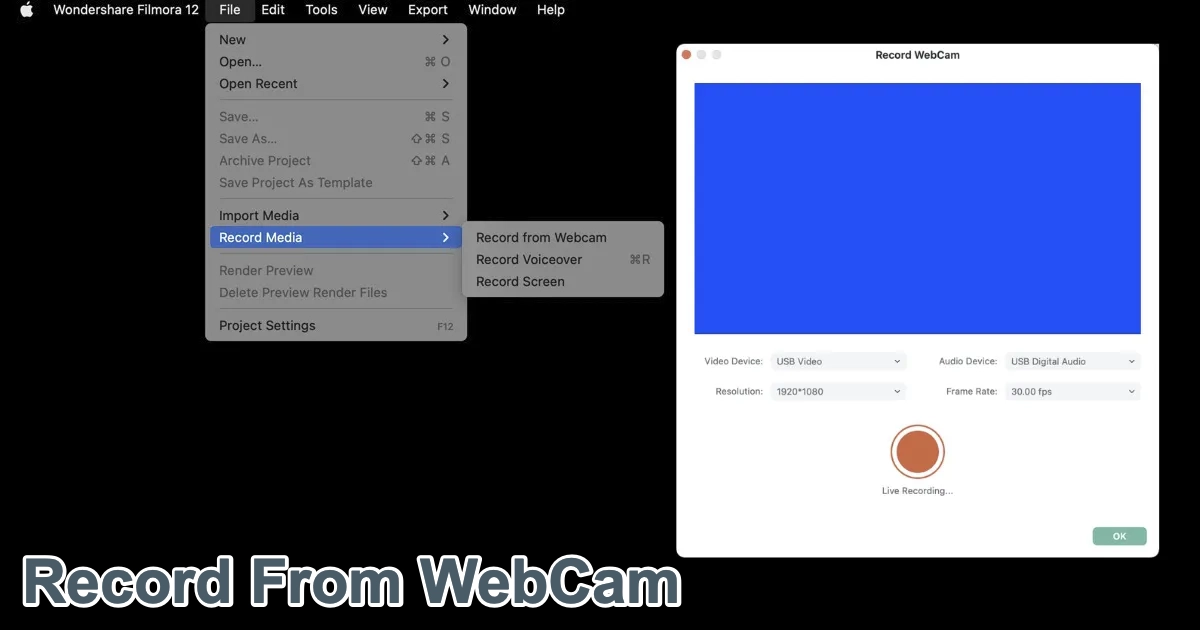
Wondershare offers users the option of recording their webcams. This feature is extremely useful for those who are interested in recording important moments or creating videos for social media platforms such as YouTube or Twitch. As one of the most popular webcam recording solutions available today, Wondershare's webcam recording capabilities are easy-to-use and offer a variety of features.
You need to decide which type of camera you want to use when using Wondershare's webcam recorder - either your laptop's built-in camera or an external USB camera like a digital camcorder. Select "Record Webcam" from the menu bar at the top left corner of the screen once you have selected your device. After that, you can select the resolution (e.g., 320x240), frame rate (up to 30 frames per second), audio source, microphone input level, etc. Having set up all these parameters, click the "Start Recording" button to begin recording videos from your computer's webcamera.
After finishing recordings, you can easily edit captured clips by adding text, images, watermarks, music, etc before saving them to your hard drive in various formats, such as MP4, AVI FLV MOV WMV 3GP MTS MPG VOB DV ASF TS HD Video.
Music Visualizer
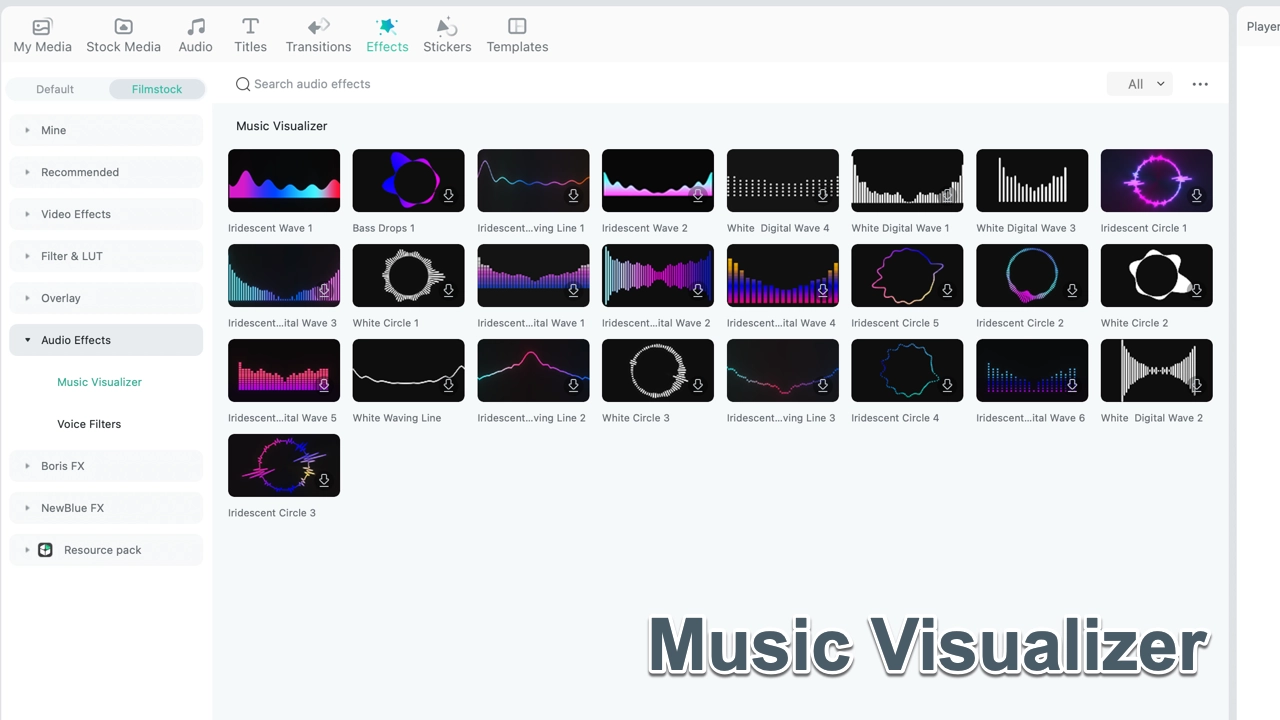
Music Visualizer in Wondershare is an amazing tool for creating stunning visuals for music videos. It allows users to create beautiful, eye-catching visuals that will bring their music to life. With the help of this powerful software, users can easily add special effects and animations to their tracks as well as create unique visualizations that are sure to capture the attention of viewers.
The Music Visualizer in Wondershare provides a variety of features and tools that make it easy for anyone with basic video editing skills or knowledge about audio production techniques to produce high-quality visuals quickly and efficiently. Users have access to numerous options such as color palettes, sound waveforms, particle systems, and motion graphics templates among many others which they can use when creating custom visualizations from scratch or by using pre-made templates available within the program itself. In addition, there are also various tutorials provided on how best one might utilize these features so even those without any prior experience may be able to take full advantage of what Music Visualizer has to offer them .
Overall, Music Visualizers from wondershare provides an excellent platform for experienced professionals looking into producing visually stimulating content and beginners who wish to learn more about audio production techniques while having fun. Its user-friendly interface makes it very accessible allowing anyone regardless of background level get the most out its potential capabilities .
Speech to Text
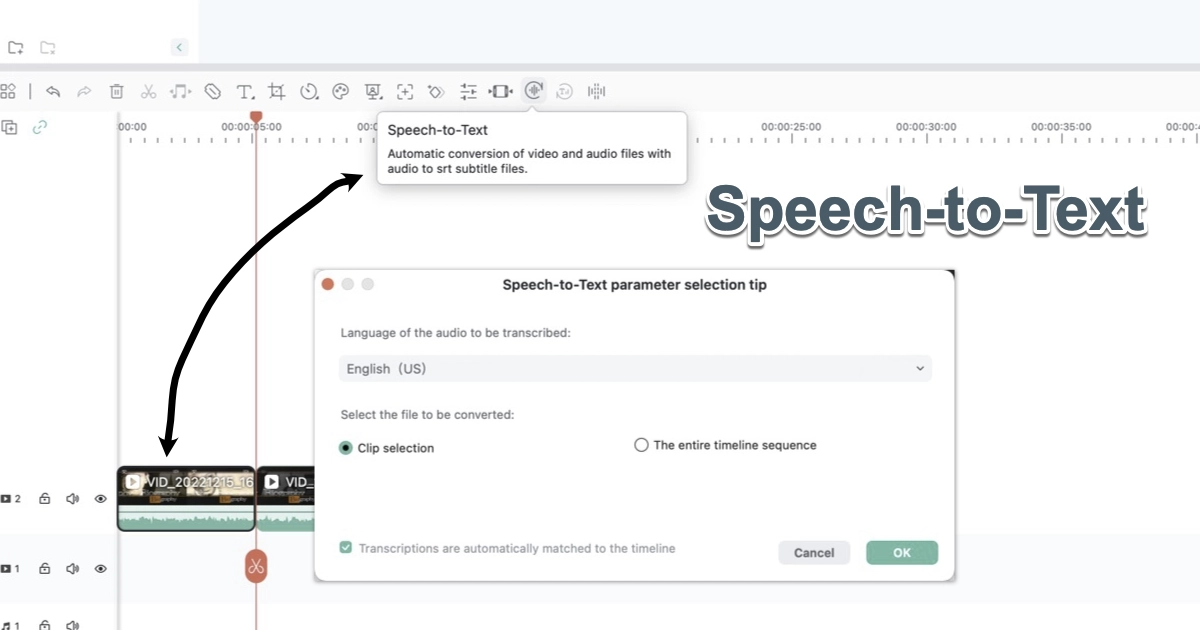
Speech to Text in Wondershare is a powerful tool that can help people quickly and easily convert their spoken words into written text. It is an invaluable aid for anyone who needs to transcribe audio recordings, such as journalists, students, or professionals. With Speech to Text, one can save time and effort by automatically converting voice recordings into accurate transcripts with just a few clicks of the mouse.
The program allows users to upload any audio file they have recorded on their computer or mobile device directly into the software interface where it will be converted within minutes. The software also supports multiple languages so users from all over the world can use this tool without worrying about language barriers getting in their way. Furthermore, Speech To Text has advanced features like automatic punctuation correction which helps ensure accuracy when transcribing long conversations or lectures that contain complex sentences and phrases.
Overall, Speech To Text in Wondershare is an incredibly useful resource for anyone looking for an efficient way of turning speech into text without spending hours manually typing out each word themselves! This feature makes transcription much easier while also saving precious time which could be spent doing other tasks instead!
PermalinkChristmas Ideas
Some generals gift ideas for Macintosh Users
Are you looking for the perfect last-minute gift for your favorite computer geek? If they love Apple computers, then we've got some great ideas to help make their day extra special!
First up is an Apple Magic Keyboard. This sleek and stylish keyboard offers a comfortable typing experience with its low-profile design and optimized key travel. It also has built-in rechargeable batteries so it can be used wirelessly, making it ideal for those who like to take their work on the go.
Next, why not get them an Apple Pencil? This handy device allows users to draw or write directly onto compatible iPads or iPhones with ease and accuracy ??? perfect if your giftee loves sketching or taking notes digitally. The pencil also comes in multiple colors so you can choose one that matches his/her style perfectly!
Magnetic Power Bank for the iPhone - The magnetic wireless power bank is a small device that connects to the phone and can provide you with instant power when you are away from a reliable source of electricity. These are the most convenient way to charge your phone when you are away from a power outlet. They are available in plenty of styles you can choose from.
Create Your Own Cable Bag - This is a collection of USB cables sorted by type and put together in a nice storage bag so that they can easily find the right cable when they need it. Suggested cables are USB-A to USB-C, USB-A to USB-B, USB-A to Micro, and audio cables.
If your computer friend likes to take pictures using a DSLR camera consider buying some extra SD cards. I would recommend getting at least 128GB or greater. You can never have enough cards when you go on vacation or planned photo shoot.
Apple Gift Card - Perhaps your friend is looking to upgrade their computer in the near future to get an Apple Card so they are one step closer to that purchase. Tip: Get the card at BJs or Costco. You can get about $5 off any gift card value. That is - more bang for your dollar.
Storage Drawer Carts - Help your friend be more organized with a multiple-drawer storage cart. These can be used to separate office supplies and various cables and gear. Very useful to stay organized and be more productive. The Container Store has some good solutions.
PermalinkEquirectangular projection
View and Modify 360 Photos in Affinity Photo
If you have some 360 photos and would like to use parts of the images, you can do that in Affinity Photo. You can zoom in and out and "fly around" to find the perfect place to export as a picture. In addition, you can use Affinity's powerful touch-up features to clean up your 360-degree photo.
In Affinity Photo, the tool you use to navigate a 360-degree image is called the Equirectangular projection. This tool allows you to explore an image as if it were a globe; spinning it around until you find the perfect spot for your needs. Once you've found what you're looking for, simply exporting it as a regular 2D image will give great results thanks to Affinity's excellent editing capabilities.
Five Things I Learned
The Equirectangular projection tool is only available in Affinity Photo and not Affinity Designer.
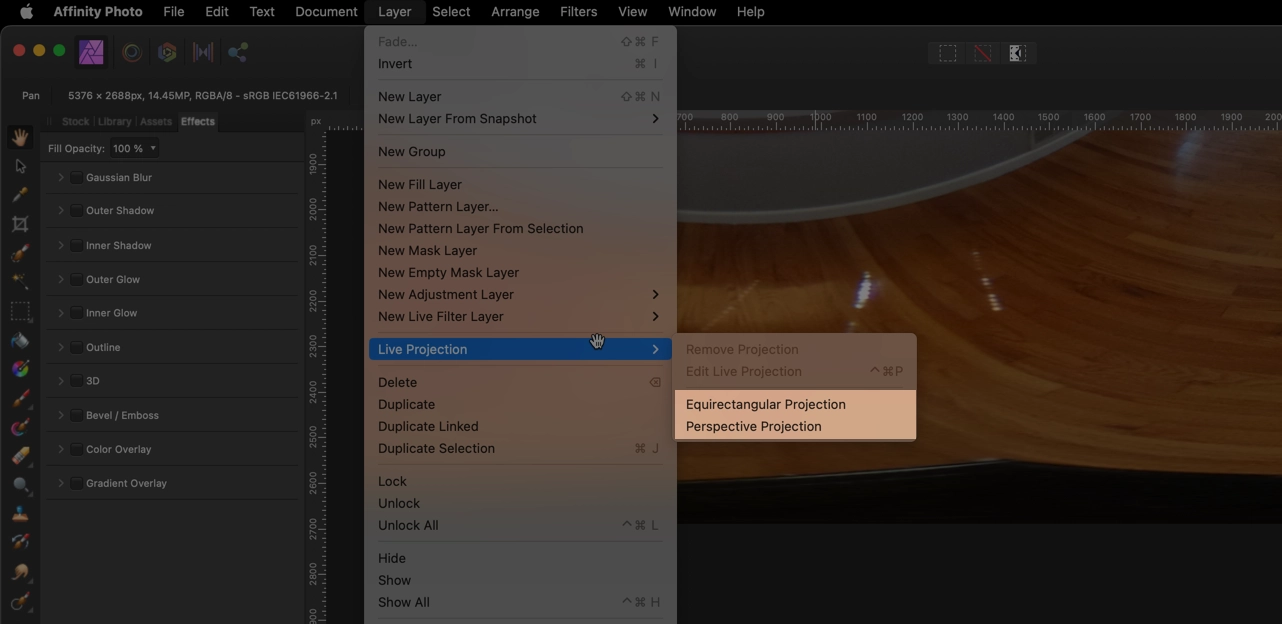
You can simply drag and drop a spherical image onto the Affinity Photo icon. Once open, go to Layers -> Live Projection -> Equirectangular projection. Now you can click and drag around the image.
To zoom in and out in Live Projection, use the "Field of View" in the menu just above the photo. When you first enable the Equirectangular projection tool the Field of View is set to 75% zoom of the image.
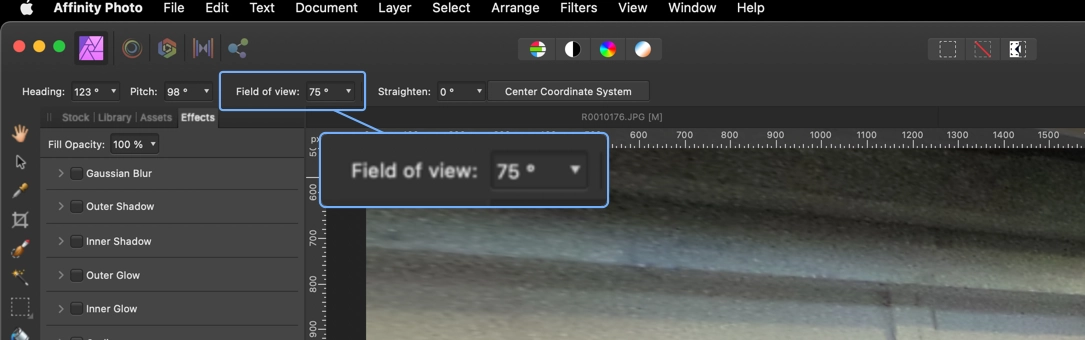
Live Projection menu options.
You can import the image into an Affinity Photo file, to use the Equirectangular projection tool you need to Rasterize the image. Simply right-click on the image and select Rasterize. Then the Equirectangular projection tool will be available in the Layers menu.
If you switch tools while in the "Equirectangular projection tool" mode, you can get the "Live View Pointer" back by typing the following shortcut: Command - Control - P
PermalinkQuick BBEdit Notes Tip
Finally close out all those unused notes
If you use BBEdit Notebook, you may have a lot of open files. Having files open isn't bad as it doesn't up us any memory. However, I use the open file indicator to focus on notes that I am actually using.
To quickly close out of all your notes, just use this simple shortcut:
Control - Command - W
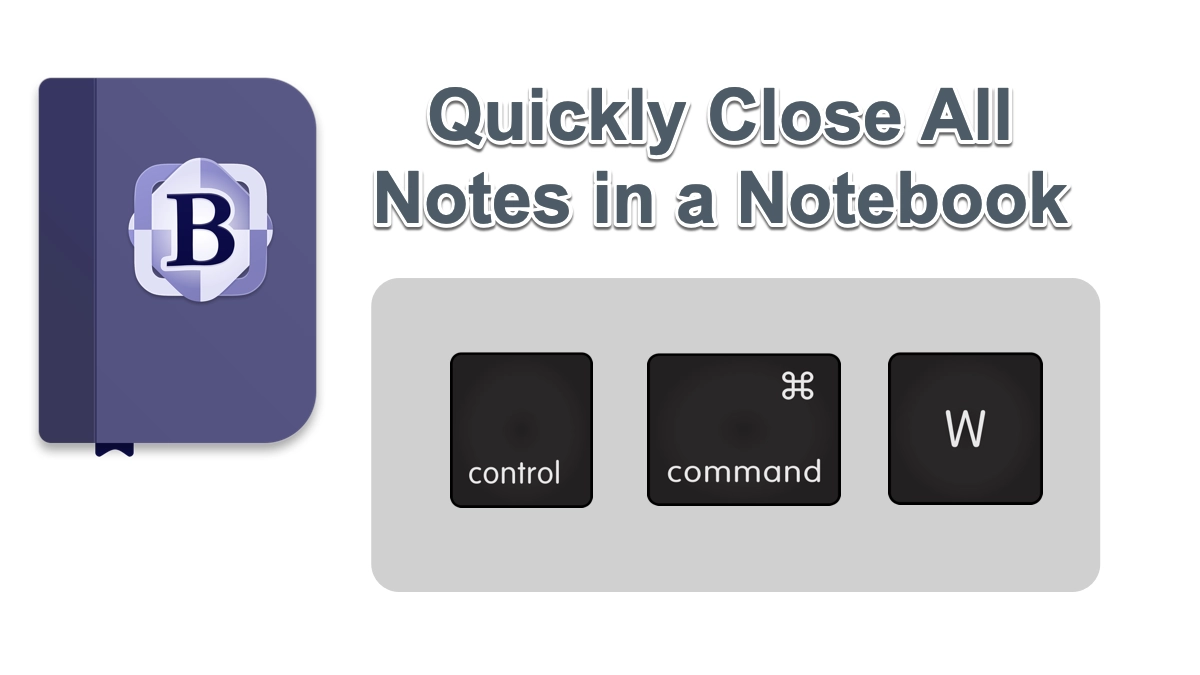
When you apply this simple command, all the notes are closed, even ones that are in Collections that you probably haven't looked at in a while.
PermalinkUniversal Control
Using one keyboard and mouse to control two computers
With Apple Universal Control, it is now possible to control two computers from a single keyboard and mouse, thus making computer control easier.
Using this feature is similar to using multiple monitors at the same time. To get to the other computer, simply move the mouse to the edge of the screen, and your mouse will appear on the other computer.
In a way, it's like magic. It's incredibly useful and very cool.
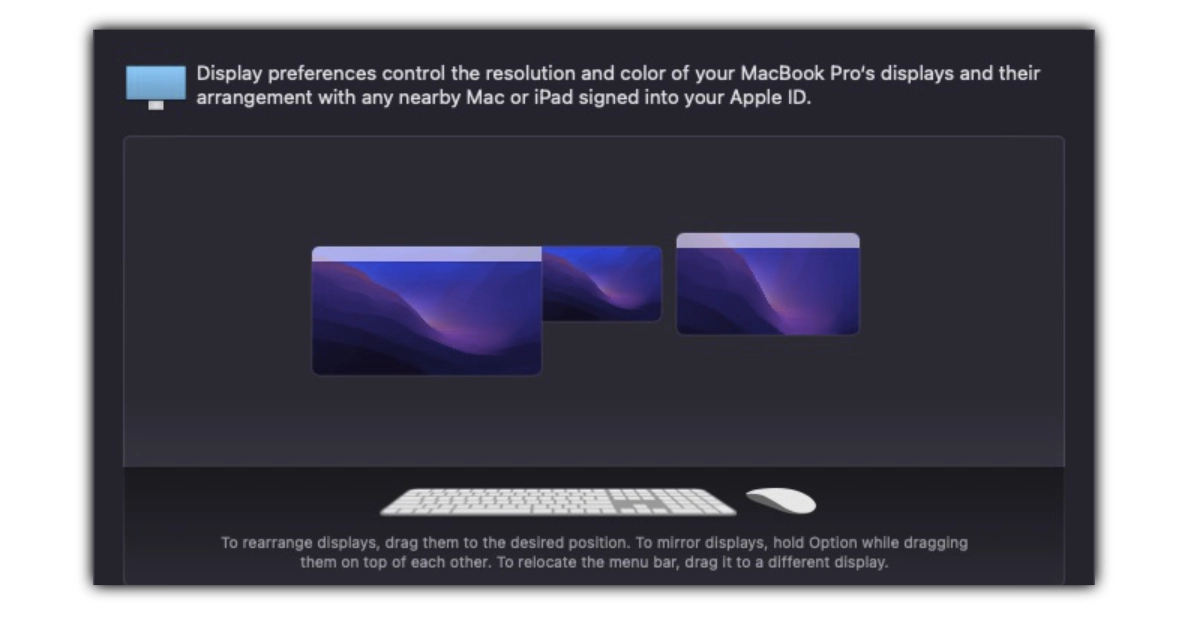
macOS Monterey Display System Preference panel showing the Universal Control access
How it helps me
This is an awesome way to switch between a personal computer and a work computer. My work has strict restrictions on what software I am allowed to install on the company-provided laptop. However, with Universal Control, I am able to switch between computers quickly and use the applications that I wish.
The VPN allows me to view websites outside my firewall on my work computer while I can view them on my personal computer. This allows me to view sites from different locations and from different users.
I have a work computer that is one macOS version behind my personal computer, despite the fact that my personal computer always has the latest macOS version.
It allows me to have the most up-to-date version of Snagit on my personal computer, as well as to copy screenshots over to my work computer so that I can show issues that I have discovered over there.
Full details are available on Apple Support page.
Five things I Learned
It is still necessary for you to have a keyboard for both computers in order to log in to them.
This is a very useful feature when you have a cat who likes to walk around the desk and sit anywhere on the desk at will without being asked. The Universal Control saves space on the desktop. (You can hide the other keyboard and mouse.)
When it comes to keyboard shortcuts in applications like Keyboard Maestro, it is important to know that wherever the mouse is, the keyboard controls that application as well.
There are many things you can accomplish when using two computers with just one keyboard and mouse. You will be able to get more things done without having to switch between keyboards and mice.
When I switch between computers, it's sometimes difficult to make the switch between them. I have to bounce the mouse several times to let the computer know that I want to move to the other computer.
PermalinkAffinity Suite Collection Refresh
Paid Version Upgrade to the Affinity Collection
Affinity updated its graphic platform this week with Affinity Photo, Affinity Designer, and Affinity Publisher. These applications have some cool features and are worth checking out if you haven't already.
In order to check out some of the changes, I downloaded each desktop application and installed them.??
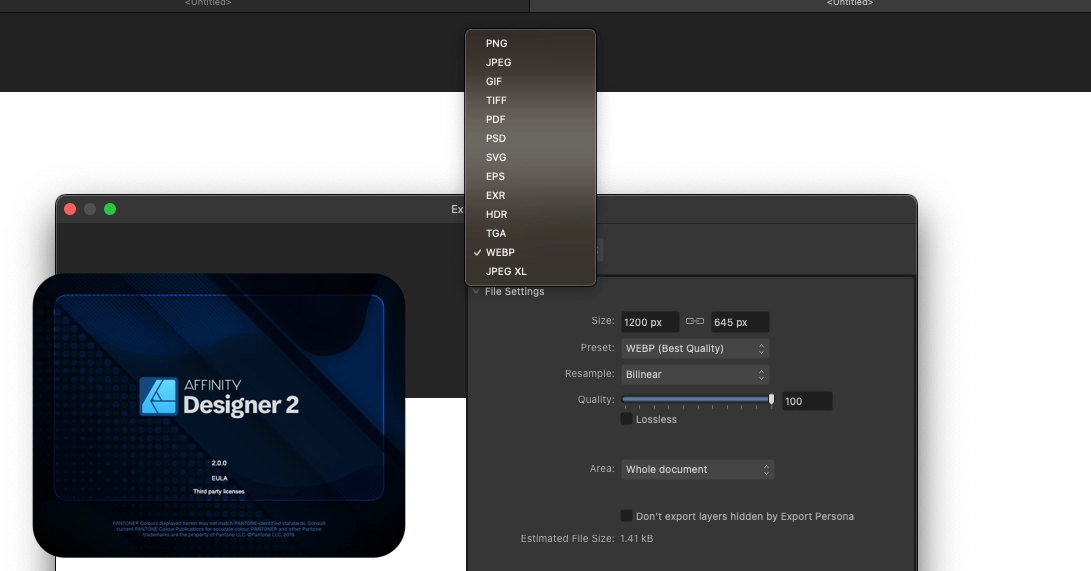
One of the nice features of Affinity Photo and Designer is the ability to export using Webp. This means that I do not have to open another application to convert the image type I am exporting.??
It's important to note a few other changes that have been made to the "New" functionality. The dialog box is a bit more complex than it was in the past, which I am sure is intentional so that designers can focus on other things.??
Still Testing
I am still testing all the changes made to Affinity Designer and Affinity Photo. Next week I'll post my review of the changes and if its worth upgrading.
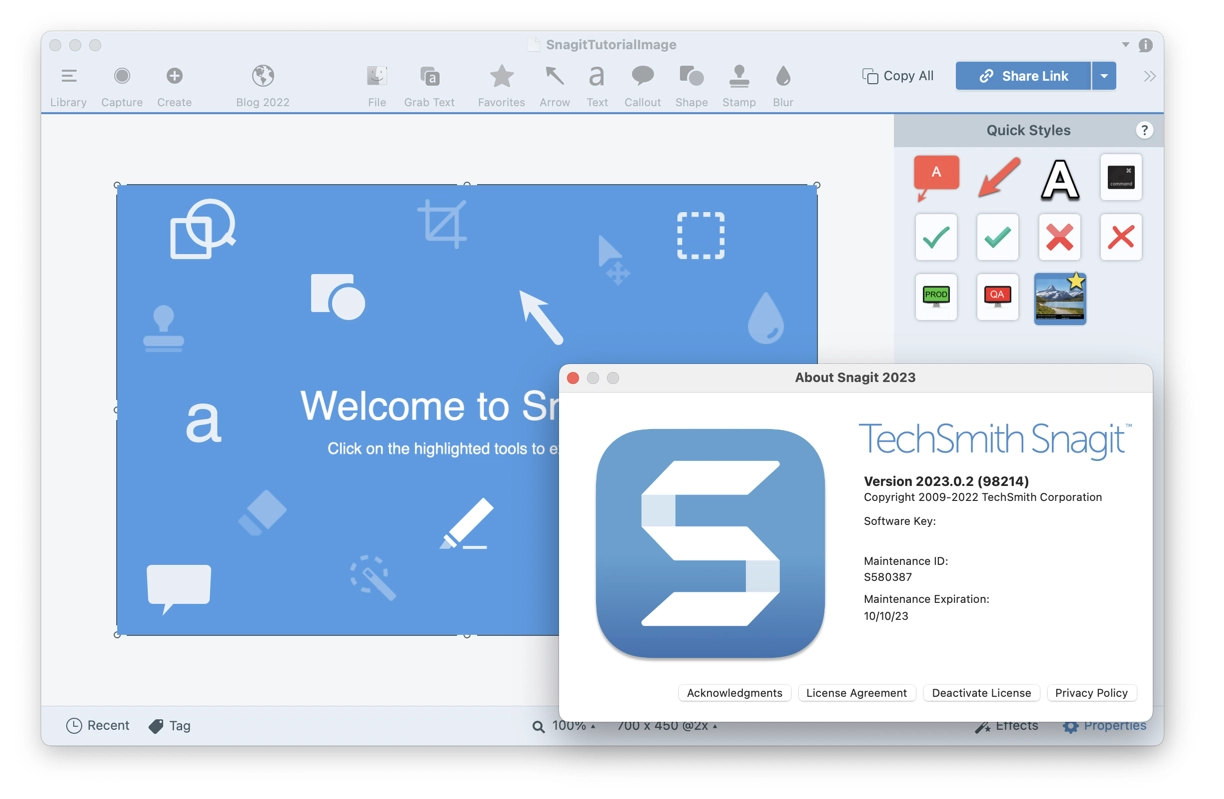
PermalinkSnagit 2023
New Features of the Popular Screen Capture Tool
Last week TechSmith introduced the latest paid upgrade to Snagit. This upgrade includes the following features:
- Picture in Picture with Screen Draw - Users can now add pointers, steps and boxes to their view presentations. This makes it easy to point to certain features while talking about them.
- Quickly Share Content - Snagit has a new ???Share Link??? which makes it easy to share recent snapshots. Now you can touch up a screenshot and instantly share it on Slack, Email or Social Media. The Share Link is using the TechSmith screencast service. Screenshots are saved for 12 months.
- Better Collaborate - Users that have access to shared content can now leave comments on the video and images - including emojis.
- Add Effects to Favorite - You can now add your favorite Effects as favorites. This makes it easy to apply common edges, Borders, Capture Info, Shadow, and more.
- Webpage File Format Support - Users can now save images using the popular web format. (Not new in 2023 came late in the 2022 release)
Worth the Upgrade?
I don???t use much of the video capabilities, so the Picture in Picture and Collaborate functionality doesn???t have much use for me. I think if I do some training videos, in the future, it might be a very handy feature to have but in the short run, it doesn???t really add much improvement.
I was surprised that TechSmith didn???t do any changes/enhancements to any of the annotate tools. For example, it would be nice if there were more arrow style or text effects.
I think it???s worth the upgrade so TechSmith can continue to create more awesome features in future releases. If you have version 2022 and use some of the core functionality - I don???t think this is a ???must-have??? upgrade.
Take a Shot and Try It
Why not download the application and try it out. When you install it the application name is different so you won???t lose your previous paid version.
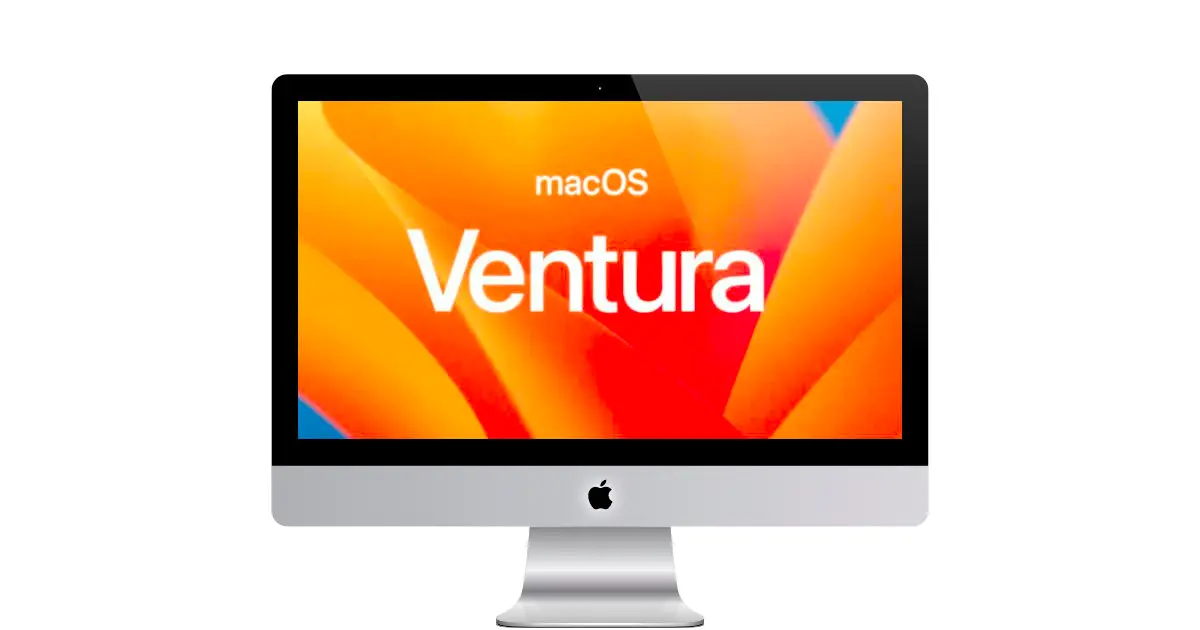
PermalinkmacOS Ventura
First Impressions
The latest Macintosh OS, Ventura, was installed on Monday. The installation went smoothly and fairly quickly. After the installation, my first impression was - Now What? I didn't notice any major changes to the Finder.
The first noticeable change was to the About Macintosh box. It has certainly changed a lot:
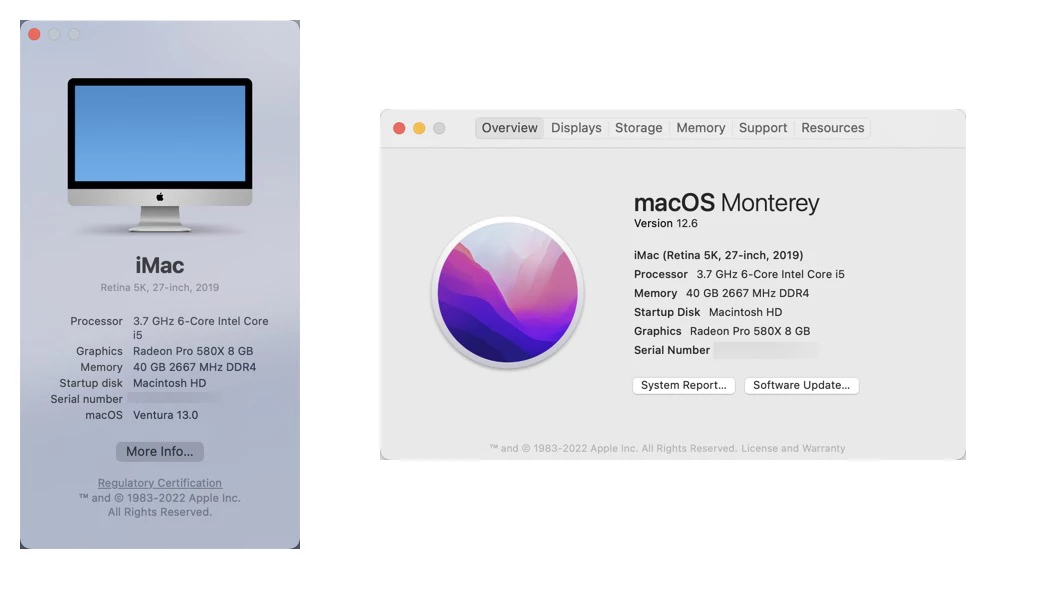
About this Computer dialog box is much smaller. The old box looks like marketing, the new box looks like it was done by engineering.
Five First Impressions
Easy Install - The installation was very easy, the only thing I had to do post-installation was to reinitiate some application permissions. I had to reinitiate the screen capture permissions on Snagit.
System Settings - The Systems Settings dialog box is nice and clean. This change reminds me of when Bare Bones change the BBEdit preferences box. The settings box has gotten so complex, that most people just search for the feature they are looking for.
Spotlight Search improvements - Searching for images has improved. Its nice to search for text within images. I would like the option to prioritize certain categories. I am likely to search for things on my computer, I don't want Safari History to be the first item on display - I would like to lower that category.
Stage Manager - I played around with one of Ventura's newest feature - Stage Manager. Stage Manager puts other open apps on the left side of the screen where it's easy to access. I can see this would be something useful when you're switching around applications - especially if you only have one display connected to the computer. This is a functionality that I'll have to get used to.
Upgraded Snagit to 2023 - On Thursday, TechSmith announced the new version of Snagit. There weren't any issues using Snagit 2022 on Ventura, but since I qualified for the upgrade I decided to upgrade to get the latest and greatest features.
PermalinkmacOS Ventura
Getting ready for the upgrade
Apple will be releasing macOS 13 Ventura next week. This next-generation macOS operating system contains a lot of new features. Here are three key features that I'll be looking forward to:
Enhanced Image Search in Spotlight - Find images in Photos, Messages, Notes, the Finder, and the web right from Spotlight. You can even use Live Text to search for an image based on text inside it. This feature may cause LaunchBar to issue an update.
Stage Manager - automatically organizes your apps and windows in a single view on any Mac, so you can stay focused while easily moving between tasks.
Continuity Camera - Use the iPhone as your computer webcam. Center Stage now you can stay centered in the camera frame during calls even when you move around.
New Improved Home App - The Home app has an all???new design that makes it easier to navigate, organize, view, and control all your accessories. Improvements to the underlying architecture enhance your smart home???s performance and make it more efficient and reliable.
Backup and Plan
It is this time of the year when most third-party applications are going to release a major update in order to take advantage of all the new features that macOS Ventura has to offer.
I've recently updated my TechSmith's Maintenance Agreement for another year, which cost $12.85. I think it's a great deal compared to a $34.99 upgrade to Snag-it right now.
As of today, TechSmith hasn't announced what new features that will be in
You might want to check the applications you have and upgrade any maintenance agreements that might save you money in the future.
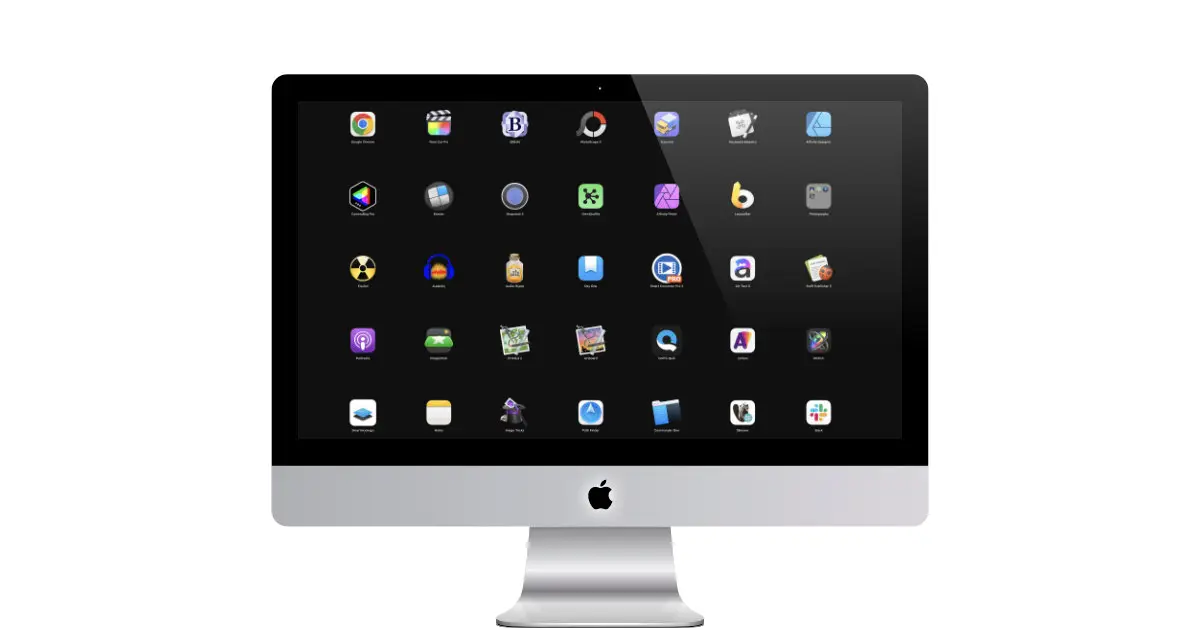
LaunchPad
Using my computer's LaunchPad, I have set up the first page to show the most popular applications I use. This makes it easy for me to select applications that are most relevant to me.
There is only a limited number of apps displayed on the first page of LaunchPad, so I have to create a list of the "Top 35" apps that I care about the most.
This is an excellent way for me to be able to manage my apps and not have to deal with a lot of different apps, especially when it comes to free and low cost apps that I hardly ever use.
Next Week Blog
There will be a blog post next Friday about what it was like to upgrade to the macOS 13 Ventura operating system.
PermalinkUSB Drives Lifespan
Practical Use for Long Term Storage?
When it comes to digital storage, you can???t get much more portable than a USB thumb drive. These little guys are super useful for anyone who wants to store and transfer documents, photos, videos and other files anywhere they go. They???re also incredibly affordable. You can buy a thumb drive for as little as $5 or so. Furthermore, the vast majority of USB flash drives are built to last for at least a few years of regular use ??? if not much longer. Most manufacturers advertise the lifespan of their devices as being somewhere between 100K and 1 Million reads or writes (typically indicated as ???read/write cycles???). But what exactly do those numbers mean? Do they indicate how long your thumb drive will last under normal usage? How long do most people actually keep their flash drives before they fail? In this article, we???ll answer all those questions and more!
What Do Read/Write Cycles Actually Mean?
When a manufacturer states a particular number of read/write cycles for a USB thumb drive, they???re referring to the lifespan of the device. Here???s how things break down: The lifespan of your thumb drive will be directly tied to the number of times you read from and write to the device. So, one read/write cycle would be one time you read data from your drive, and one time you write data to the drive. Keep in mind that data is constantly being written and read from your flash drive. That includes whenever you???re transferring data, or just plugging it into your computer or other device to access the data stored on it. Each time you read or write to a USB thumb drive, you???re using up some of its lifespan.
How Long Do Thumb Drives Last?
As we???ve discussed, each USB thumb drive is guaranteed to last for a certain number of read/write cycles. But how long do flash drives actually last for each of those cycles? It???s actually quite difficult to find accurate data on the lifespan of USB thumb drives. That???s because there are so many variables that affect the lifespan of a device. There are many different types of thumb drives, with different internal components. There are also many different ways to use them, and the way you use your drive can have a dramatic effect on how quickly it fails. Also, many different factors can affect how long it takes for a flash drive???s data to degrade, like the quality of the materials used in the device (e.g., plastic vs. aluminum casing), the size of the drive, whether or not it???s used in an environment with high humidity or temperature, and more!
Why Do USB Thumb Drives Fail?
So, if each flash drive is guaranteed to last a certain number of read/write cycles, why do they fail so quickly? For the most part, thumb drives fail due to regular wear and tear. After you???ve used a drive enough times to reach its read/write cycle limit, it???s not likely to fail immediately. Instead, the device will generally start to degrade over time. Eventually, it will simply stop working. There are also a few different ways that a USB thumb drive can fail more quickly. But most of these issues can be avoided with proper care and maintenance.
How to Make Your Thumb Drive Last longer
If you want to make your flash drive last for as long as possible, there are a few things you can do. Here are some tips: First and foremost, buy a USB thumb drive with a high read/write cycle rating. Some of the best USB thumb drives come from reputable brands like SanDisk, Kingston and more. You can even find thumb drives with a lifetime warranty. If you???re using your thumb drive regularly, be sure to give it a break every now and then. If you plug and unplug your drive constantly, you can actually speed up the rate at which your drive degrades. If you???re storing data on your thumb drive for any length of time, make sure to clean it regularly. You can also store your data in more than one place ??? this is called ???duplicate??? or ???backup??? data! This can help prevent against data loss.
Bottom Line
Finally, if you???re using a USB thumb drive regularly, it???s a good idea to replace it every few years or so. If you keep using the same thumb drive for long enough, it???s almost guaranteed to break down. So, it???s better to just replace your flash drive before it fails completely! While USB thumb drives are extremely useful, they???re not indestructible. It???s important to take good care of your flash drive to make it last as long as possible. Doing so can help prevent data loss, prevent you from losing important files, and extend the life of the device!
PermalinkAbout
As someone who has worked on Macs since 1989, I will use my experience to share tips and tricks with you on Fridays. As a Mac user since 1989, I have seen the evolution of Mac software and hardware, and I know how Mac computers work. I also know how to troubleshoot and fix Mac problems that can arise.
Check out all the blog posts.
Schedule
| Saturday | Internet Tools |
| Sunday | Open Topic |
| Monday | Media Monday |
| Tuesday | QA |
| Wednesday | New England |
| Thursday | Gluten Free |
| Friday | Macintosh |
Other Posts
- MacBook Keyboard Replacement
- Cable Marker
- OmniGraffle 7
- Macintosh HFS Disk Format
- LiveQuartz Photo Edit
- 360 Photo Viewer
- Background Removal via Finder
- CofeShow Video Slideshow Maker
- Art Text 4: Photo Colorize
- Apple External Keyboard Stopped Working
- Disk Inventory X
- Serif vs Sans Serif
- Pixelmator Remove Background
- Location Base Smart Albums in iPhoto
- Stage Manager and Desktop